This section is pretty broad and actually covers more than it says. This is a catch all for prepper related gun and weapon things as well as self defense training. If I don’t have a better place to put it and it is dangerous it will probably be found in this section.
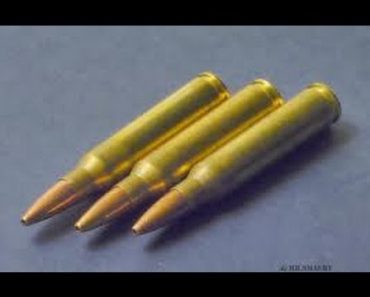
How to Deprime Shell Casings is something that really probably does not deserve its own post. If you cannot figure out how to do it your probably shouldn’t reload your own ammunition. However, I do have a couple things to say:
You Can Deprime in Bulk
I ended up with lots of brass before I started reloading and I wanted to deprime them in anticipation of reloading but I did not have a press. What I did was find a socket that fit the case, and inserted a long finishing nail into the case and into the flash hole. A wack with a hammer drove the primer out. I bent a lot of nails until I decided to ground a larger nail tip down. This is not something I recommend, but it worked for me, and is pretty much the process used by the Lee hand loaders.
Boxer vs Berdan Priming Systems
The only problem I had was with reloading surplus WWI and WWI rifle rounds, sometimes I have Boxer (single flash hole) primed rounds, and other times I had Berdan (double flash hole) primed rounds. Due to the case neck, I never really looked into the rounds to check and I screwed up many Berdan cases. That was no big deal as I couldn’t reload them anyway.
I have, on rare occasion screwed things up (Okay so maybe not so rare) and had to deprime a live primer. Most recently I reloaded a couple hundred .223 and found out I resized them wrong. I prefer to pull the bullet and powder, and just fire the primer so it’s inert, but for pistol rounds I have gently and smoothly pressed the live primer out. Either way I don’t reuse the primer as I want to make sure my rounds are going to fire, and I a worried about damage to the primer anvil.
I Often Use a Lee Handpress
Most of the time I deprime my cases separate from reloading (before cleaning). I like to use a Lee Handpress and a Lee universal decapping die. It is a simple process to with those tools. I can change cases and only have to change shell holders.
This process is one of the few reloading steps I feel comfortable doing while having a distraction in the room. (specifically watching TV, but on occasion this could mean having the wife in the reloading room talking about her day….)
Spent primers are small, and tend to get EVERYWHERE if you’re not careful. Most presses have a small collection cup under the ram that collects the primers. If you keep this clean, you can just dump out the primers every once in a while. A hand press doesn’t do this, and tends to keep the primers in the ram. Either way, your wife will be angry if you leave them in the carpet for her to vacuum up. I have heard you can recycle them, if your patient enough to collect up a LOT of them, but I never have.
Reloading is not hard, especially if you pay attention and get some good advice from a mentor. It’s not something that leads itself to learning on your own, as mistakes can be costly, but this is not rocket science if all you want to do is make some inexpensive target rounds.
So as I said in my Physically Check Your Firearm Chamber video above, firearm doctrine is created by our understanding of what works and why it works. Some things may seem to be superfluous or unnecessary when our understanding is limited, but as we understand the framework of the system we begin to realize WHY we do what we do.
This post shows one such firearm safety procedure and why you should always check your firearm chamber, physically as well as visually when unloading.
Firearm safety rules and procedures are fundamental to our safe use of firearms. Later we will delve into the 4 fundamental rules of gun safety and why they are the fundamental rules. For now let’s just talk about one thing. Why do we need to physically check to make sure our firearm is empty? Isn’t enough just to look into the chamber to see there is not a bullet inside?
I get a lot of personal joy helping someone become more comfortable shooting. However, the main reason I like firearm training is the knowledge I get from keeping current in the field. To teach defensive firearm use I need to learn about how the mind works under stress, and how to apply that knowledge to physical tasks.
Why You Should Physically Check Your Firearm Chamber
You don’t rely on just your eyes to ensure our firearm is unloaded is because you cannot always trust them. To be more accurate, we cannot always trust our brain to accurately interpret what our eyes are telling it. Our brain is constantly being hit by stimuli, our clothes, background noises, smells, air currents, and other things would drive us crazy if the brain was not able to catalog and then ignore what it finds to be unimportant. It also creates little shortcuts to deal with minor repeatable tasks. If a stranger says “hello, how are you?” your brain automatically responds with something like “Pretty good, you?” (Or if you’re a Dave Ramsey fan “Better than I deserve”).
Of course someone is saying, “That’s stupid, I would never go into autopilot with something important like seeing if my gun was unloaded?”. I bet if they thought about it, they could not remember a recent time that they actually thought through the steps it takes when they start their car, they just do it. Cars are serious business; more people are killed by cars than by handguns.
Furthermore, I bet that if they really think, they can remember a time when, after changing jobs, they found themselves missing a turn to their new workplace because they found themselves on autopilot driving to work.
When your brain goes about deciding to ignore the unimportant as background, it is creating ruts to preserve its processing power work together in this case. If you find yourself “going through the motions” of gun handling you may be in for a surprise.
Basically, if you expect to see an empty chamber, you will probably see an empty chamber. You can learn more about this in the book Thinking, Fast and Slow.
By physically using a finger to Check Your Firearm chamber you fix both of these root causes. By taking the extra step, your brain attaches extra importance to the act of ensuring the chamber is clear. When your finger actually touches a round, the double dose of reality jars the brain into admitting its mistake.
Train like you Fight!
I know this may sound a little farfetched to some, but put this in your head for perspective. You fight like you train. For decade’s law enforcement trainers told their students to let the rounds fall to the ground when reloading their revolvers. Rather than reload quickly law enforcement students would instead take the time to dumping spent rounds into their hands. Cops dumped the rounds in their hands so they wouldn’t have to pick them up later. Officers routinely said they would only do that on the range. They argued that they were smart enough to know the difference between range ease and street tactics.
After the Newhall shooting, the officers killed in the line of duty were found with casings in their pockets and unloaded firearms in their hands showed both trainers and students that training outweighed notional ideas of what you might or might not do. The officers involved were good cops and they fought back the best they could. However, they did not have a full understanding of their tactics and training issues involved and they ended up murdered.
We might not carry revolvers as much anymore, but firearm fundamentals and mental preparedness apply to any firearm action type. You can easily check your firearm chamber by feel in a semi auto as a revolver.
Take what I am saying to you, and apply it to your situation. I would hate to hear about a negligent discharge caused by an “unloaded gun”.
Firearm Safety is essential. It is not hard to be safe around firearms; it just takes the knowledge of basic safety rules and a little common sense. There are many variations of safety rules taught by differing organizations but they all encompass the same thoughts and goals.
The following are what is commonly called the four fundamental safety rules.
Four Fundamental Firearm Safety Rules
Treat every weapon as if it were loaded.
This rule is sometimes over-zealously and incorrectly taught as load every firearm. This is not what it means. This rule means that no matter what condition you believe the firearm is always act as if it is loaded. It is generally not possible to tell just by looking if a weapon is loaded.
Never point a weapon at anything you do not intend to shoot.
Firearms are tools. And like any tool it has a purpose. A firearm’s purpose is to punch holes in things. You would never use a saw on something you did not want to cut, or hit something with a sledge hammer that you did not wish to break. It is the same with a firearm.
Keep your weapon on safe until you are ready to fire.
If your firearm is equipped with an external safety device, never disengage it until you are ready to cause your firearm to discharge a bullet. There have been many instances where people have disengaged safety devices while their firearm was in the holster and then proceeded to shoot themselves. Do not turn off a safety device until the firearm is actually pointed at the target.
Keep your finger straight and off the trigger until you intend to fire.
Actually placing your finger on the trigger should be the very last action before firing the weapon. As soon as you are done shooting the finger should be immediately taken off the trigger and lain along the frame of the firearm. This helps ensure a firearm is not discharged accidentally. Humans have a flinch response that causes them to clinch their hands when startled. If your finger was on the trigger while you were walking with a firearm and you tripped, you would instinctively pull the trigger. With your finger outside the trigger guard and alongside the frame of the weapon this will not happen.
It is also important that there are other rules common to firearm usage, or even specific shooting disciplines. You may even create other rules as you see fit. Anything that makes you safer with a firearm is acceptable. Nothing will reduce accidents 100% however, these four rules will greatly increase you safe and enjoyable use of firearms.
First of all, let me just say, I am no expert at casting lead bullets and this article is only a basic guide to get started and to show you that this is do-able for the lay person. Please visit forums like cast boolits and read manuals like Lee’s Modern Reloading, and the Lyman Cast Bullet Handbook before you get too involved in this hobby.
Realize that man has been casting lead for thousands of years. Our forefathers one several wars casting their bullets over a fire using nothing but lead, a spoon, and a mold. Understand that this is something almost everyone can do.
Factor in the dangers inherent to molten metal, the toxicity of lead, and the engineering problems of casting for modern firearms with their higher tolerances and pressures. Understand that there are steps you should take to ensure a safe experience and a good finished product.
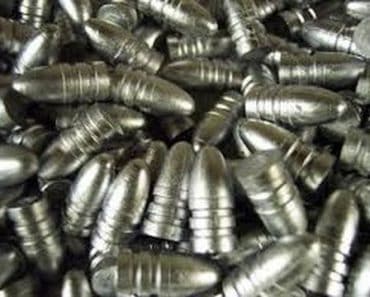
First thing after doing your research is to find some lead. It is getting harder to find. In my experience when I find some its free (or cheap) and there is usually at least 100 pounds.
The way I get my lead is either through asking on sites like craigslist, or driving around to tire shops. Some smaller tire shops will give you a bucket full (bring your own bucket) or sell it to you for $20. I know many people that just buy their lead at a reloading store or for about a buck a pound on eBay.
Wheel weights are about 95% lead, .5% tin, and about 5% antimony. The tin and antimony are added to the lead in wheel weights to help the lead flow and cast a good weight. I find this ratio of lead to be soft enough to make good pistol bullets without alloying any additional metals to the mix. The problem with lead wheel weights is that they are not always lead.
A lot of modern weights are made of zinc. Zinc makes casting a nightmare as it makes the lead not flow as easily which makes your bullet mold not fill out properly.
You can do an internet search on this problem, and castboolits has lots of posts on this but:
You can ID zinc weights by hardness, sound, label, or melting point.
If you drop zinc on the ground it makes a ringing noise and lead makes a thud.
Most zinc weights are actually labeled as “Zn”.
I have also noticed that the zinc weights look cleaner than lead, but that may not happen all the time.
Zinc has a higher melting point than lead. If any make it past the sorting process you have a second chance to pull them out before they melt.
Zinc melts at 787º F, Lead melts at 621ºF so it helps to keep your pot just hot enough to melt the lead but not enough to melt the zinc.
The way I do it is in steps.
Some years I go on a binge and drive around to every mom and pop tire shop I can find until I get 5 or 6 buckets of wheel weights. Each bucket is about 75 pounds. I then take a Saturday and dig out my turkey fryer and a cast iron pot. I only use that pot for lead. Additionally, I always keep some solid lead in it to make sure its ONLY used for this purpose. Next I sort and melt all the wheel weights.
Wear gloves as you would not believe all the extra junk that gets thrown in here. You will find tobacco spit, razor blades, and all types little bits and pieces of all sorts of nastiness…
Do this melt outside (melt all lead outside). Don’t breathe the smoke and vapor as lead is toxic to your body. Once the pot is full of nice molten lead, I will break off a piece of candle to flux off the oxides that form as scum on the top of the pot. I let that burn off. Next I ladle the molten metal into my ingot molds.
You don’t have to have special molds. I use an old muffin pan. Just ensure that you never use it for anything else besides lead.
I have more than one ingot mold so I can ladle one as the other cools.
When I cast lead I keep a metal bucket nearby. This is to collect all the steel wheel clips and other junk that comes off the lead. The scrap dealer gets this bucket.
By law it is not hazmat until it’s at the end of its life. Consequently, as long as its being recycled it is not hazardous waste. If you get caught throwing this junk away you can get hit with HUGE fines. To learn more check out the Comprehensive Environmental Response, Compensation, and Liability Act also known as the superfund law.
Once I have a couple hundred ingots I have enough to cast bullets for the year.
Personally I use Lee molds. I recommend Lee equipment (as long as its metal) as its cheaper and of good quality. Some of their stuff (like the Shotshell loaders) take some handiness to get to work perfectly. However, I have nothing but good things to say about their molds.
Since their bullet molds are aluminum, you don’t have to coat them in oil after use to keep them from rusting. This means they are really easy to work with.
However, since they are aluminum they aren’t durable enough to use professionally. This means dont use them to cast thousands of rounds a month. I cast several thousand rounds a year and have done so for several years though and have not had any problems.
The Process is Simple.
Melt your ingots. I use an electric bottom pour pot, but you can use almost anything as a heat source if you have a ladle.
Preheat your mold. I keep mine on the edge of the pot so it gets warm with the lead. If the mold is not hot enough, the lead will solidify as it enters the mold and will not fully form the bullet.
Lube your mold at the pins and moving surfaces, Don’t lube the mating surfaces. Ensure you use lube not alox.
This next part takes practice, and is best done than read about.
Fill the mold with melted lead. I find my first couple attempts each time never seem to fill completely. However, as the molds heat up I quickly get back into the game. I find that if I tilt the mold SLIGHTLY and start at the far end of a 6 mold block and pour the lead at the chamfer at the top of the sprue plate rather than directly into the hole it tends to fill better. As I fill each bullet mold I make sure to leave a little puddle of lead at the top of the sprue. This is because the lead will shrink as it cools. The puddle gives the bullet some additional lead to pull from as this happens.
As the lead cools and solidifies, but before it becomes totally solid I take a hardwood stick (wood never metal) and give a good sharp wack to the sprue plate. This cuts off the sprue of metal and gives a flat base to the bullet.
If I am casting blackpowder bullets that need to be really soft. I then open the mold and dump them out onto a slightly damp towel folded up nice and thick.
If your casting bullets for centerfire pistols and especially rifles (that will also require gas checks) the bullets need to be harder. In that case, I drop them into a 5 gallon bucket of water and the sudden cooling helps harden them.
Here is a word of warning.
If we ever meet you can see the scar on my hand and the little shiny bits on my boots. Never, ever, EVER allow anything wet or moist near your lead pot. If you do it WILL explode. Steam is created in the pot faster than it can be released. A single raindrop will cause a huge bubble of molten lead to coat what ever is closest to the pot. (I know this as I gilded my hand once… luckily only the thickest glob of lead burned me sever enough to scar.)
If you drop a bad bullet into the bucket, or damp towel then pull it out and save it to melt the next time. You can and should re-melt your sprue plates in your pot as they are hot and will melt quickly.
Like I said before, I use Lee’s molds, and mine don’t require sizing, so I am not going to get into that in this article, but depending on the mold you may need to lubricate and size your bullet with a special die for your reloading press. I will do an article on that later if needed.
Casting bullets is not hard, its kinda fun, but you need to be cautious and pay attention to detail. If you are reloading to save money, then this is a nice skill to pick up, but if your reloading in preparation for a time you cannot buy commercial ammunition, then this is an essential skill to put in your tool box.
Some Shooters like to reload, so do many preparing for TEOTWAWKI or WROL, it’s also a skill for those like to DIY or roll their own. Many of the types of people that visit my sight reload themselves or are interested in it. Therefore, I am going to start publishing articles on reloading and reviews on some of the equipment I have.
That being said, I am a relative novice with reloading. I do hold instructor credentials in this field, but I stick to published loads and am pretty conservative when it comes to reloading as I don’t like unplanned explosions….
Before we do any serious reloading I want to cover one thing very well, you are going to have waste, you’re going to have mistakes, and your going to have to be able to take ammunition apart – mostly to recover components, but also to prevent anyone from attempting to shoot your goofs. This post will show the two main ways of how to take apart your mistakes – otherwise know as How to Pull Bullets
There are two main ways of pulling bullets from their case, and each has individual’s drawbacks and benefits so you would be wise you invest in equipment to do both.
The cheapest and simplest way to deconstruct ammunition is to use an inertial puller.
Inertial Puller
Click to View on Amazon
This is basically a plastic hammer with a hollow head. One end unscrews and the cartridge is placed bullet down inside a special collet and the end screws back on tightening the collet on the head of the cartridge.
When the puller is smacked briskly down on a block of wood the cartridge stops moving, but the law of inertia makes the heavier bullet to want to continue to move. With enough raps of the hammer the bullet will eventually slide out of the cartridge case and be collected in the hammer head along with any powder that was inside the case.
The collet is made out of three small pieces of metal and a small rubber band, and some reloaders find it to be pain in the neck to use, some resourceful reloader began using shell holders instead of the collets and the trend caught on UNTIL a couple shells detonated in the puller.
ANYWAY, this should not turn you away from inertia pullers, just using them incorrectly.
This type of puller costs around $15-$20 and works best with pistol calibers with heavier bullets. Bullets like .223 or with a heavy crimp may not come out at all, or at least without a lot of effort. For cartridges of that type you may need a collet puller.
Collet Puller
Click to View on Amazon
A collet puller screws into your press just like a die, and is used in much the same way.
The round is placed in the ram’s shell holder and then raised into the collet die. The collet is then tightened around the bullet and the ram is lowered. This separates the case from the bullet.
You get much more mechanical leverage this way. It works on rounds that cannot be broken down with the inertial puller. The powder also stays in the casing, unlike in the inertial puller. This lets you recover it more easily. If your doing a lot of deconstruction, this method is faster than the inertial puller. You must be careful or you can tighten the collet too tightly on the round. This leaves either “pull marks” or is may change the size or shape of the bullet.
A collet puller starts around $15.00. Unfortunately, you will have to buy a collet for each diameter of round want to pull. A collet costs around $10.00.
Personally I like my inertial puller the best when I am only doing one or two rounds. It is fast and not a hassle to set up. However, when I have a lot of rounds to dismantle, I use the collet puller.