Tag: beeswax

  • How to Make Beeswax Cotton Food Wraps

    How to Make Beeswax Cotton Food Wraps


    52 Unique Techniques for Stocking Food for Prepper
    Buy at Amazon

    I take a lot of leftovers to work.  Normally I use plastic containers or plastic bags to carry them.  However, the convenience this gives me comes with the cost of buying the containers.  Additionally, I have concerns over BPA and other chemicals in the plastic.

    While neither of these concerns alone are great enough (to me) to necessitate a change.  I am interested in learning what to do in the event I would not be able to easily buy plastic sandwich bags or cling wrap.

    It did not take me very long on the internet to find beeswax cotton food wraps.  There are several commercial sites that sell the wraps.  I also found numerous websites that also showed how they made the wraps.

    One is My Healthy Green Family  and alternative method (which I discuss on the video) can be found at DIY Natural.

    Since I did not want to dig out the ironing board or my iron (I have an iron for projects and the wife has a clothes iron.  Having two saves on divorce lawyer expenses) I choose to use the oven method.
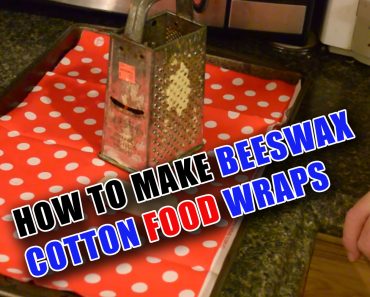
    Equipment

    • 100% cotton cloth (about the thickness of sheets) – I imagine muslin would work but I used a quilting square cut up.
    • Beeswax -I used some from my own beehive, but you can easily find either beeswax ingots or the easier to use beeswax beads in craft stores in the candle making supplies
    • Cookie Sheet – Once you get hot wax on the sheet it will forever be useless for baking cookies on – once again I have project cooking utensils and food cooking utensils because I do NOT like being hit about the head and neck with a rolling pin…
    • Grater (if using solid beeswax ingots)

    Procedure

    • Preheat oven to 170-190 – Beeswax is highly flammable and melts between 143 and 151 deg. F so don’t try to overheat it to speed up the process (unless you want to call the insurance adjuster)
    • Cut your cloth to the desired size – this is up to you – you can hem the edges or use pinking shears to make a nice edge, but I just wacked at it with an old pair of scissors and was done.
    • If using ingots, grate them using your cheese grater. If using beads you can skip this step
      Set your cloth in the cookie sheet and lightly dust with the bits of wax – you want an even coat. In the video you see both how much I used, and how stiff the finished product was. In my opinion the amount I used was perfect for wrapping food (sandwiches, vegetables, and the like) – if you plan on using it to replace cling wrap, then you may want to use more wax.
    • Less wax will let more moisture pass though, more wax make a stiffer cloth.
      Put the cookie sheet with the cotton and wax into the oven. 5 minutes will do just fine. Longer may cause problems, so if it is not all melted at 5 minutes keep a very watchful eye.  (In the video not all of my “wax” melted – some of it was junk left over from the hives – you should not have this problem using store-bought wax)
    • After you take the cloth out of the oven – immediately remove from the cookie sheet and hang to cool. It should appear darker – any light spots did not receive as much wax so be on the lookout for this.
    • Once cool you can use immediately.

    If your wrap gets dirty, you can easily clean it with cold water – don’t use soap or hot water as this will impact your wax.

    I hope this helps…

  • Beeswax for Dirty Hands

    Beeswax for Dirty Hands

    Beeswax for Dirty Hands
    Buy at Amazon

    When I garden or work with my hands I tend to end up with dry hands – I have all sorts of beeswax based salves, but preventing is better than treating, at least in my opinion.  So I wanted to show you how to use beeswax for dirty hands to keep them clean.

    I have found that if I have some warm beeswax (body temperature) and rub it on my hands I get just enough wax rubbed in to protect my hands, but not so much that I get it caked on (as when I am working with melted wax.)

    Because I am using wax and not a salve or cream, the coating is dry and relatively durable, and still comes off with soap and water when I am done working.

    I hope this tip on using Beeswax for Dirty Hands helps – if it doesn’t (or your hands are cracked and dry from other things) try my beeswax balm recipe.

    This tip does take some work to rub it on, as you have to knead the wax and rub it into between your hands to heat it up.  You can’t just swipe the wax across you palm.  However, from personal experience, this is worth it when you are going to be working in the dirt for a while.

  • How to Make Homemade Diaper Rash Cream

    How to Make Homemade Diaper Rash Cream


    Homemade Diaper Rash Cream
    Buy at Amazon

    Today’s post is more baby medicine. Not only is this Homemade Diaper Rash Cream a great ointment for diaper rash it can be also used as a full body cream as well as healing ointment.

    All ingredients promote healing and healthy skin.

    • coconut oil – antiviral, antifungal, anti-yeast
    • olive oil – antibacterial, antioxidant
    • shea butter – anti-inflammatory, moisturizer
    • cocoa butter – antiseptic, moisturizer
    • beeswax – anti-inflammatory

    Here is the procedure, and like the other ointments we have made it is not much more than melt and stir.

    Ingredients

    • Coconut oil (all one ounce except the beeswax)
    • Olive oil
    • Shea butter
    • Cocoa butter
    • 1/2 ounce beeswax

    Procedure

    • In double boiler, add all ingredients and heat until melted.
    • After all ingredients have melted take off heat and move to a container that is safe for mixing.
    • Mix well
    • Let the mixture cool.
    • Using a wisk, your stand mixer or handheld blender (not a regular blender), mix on high speed until completely cool and in “whip” form. (f your mixture is runny or not turning into solid form, add more beexwax or cocoa butter – both are solid at room temperature).

    Use within one year of making this cream!
    This cream is cloth diaper safe!

    Our boy has not had any diaper rash problems, most of this is due to his mommy being fanatical about changing his diapers, but I like to think this cream also helps.

  • How to Make the Perfect Homemade Lip Balm

    How to Make the Perfect Homemade Lip Balm


    How to Make the Perfect Homemade Lip Balm
    Buy at Amazon

    I started beekeeping for two reasons. I wanted honey to make mead, and I wanted beeswax. Beeswax has hundreds of uses, and one of those uses is cosmetics.

    Now, homemade lip balm isn’t the main use for my beeswax, but when I do make some, it is in high demand because handmade beeswax lip balm where care has been taken in its manufacture has no comparison to commercial balms.

    It does not take much time or equipment to make your own balms, and if you have your own bees, then the next big expense is the containers. You can easily purchase twist tubes, but small jars work just as well.

    This worked so well, and was such a hit that I made a bunch of other cosmetics.  When Genny was nursing she really liked my nipple balm (but she hates me talking about nipple balm)

    Materials

    • Double boiler (we improvise by balancing a small pot on a mason jar ring sitting in a larger pot of water.)
    • Disposable stirring sticks
    • measuring spoons

    Ingredients

    • beeswax
    • carrier oil (coconut, Shea butter, almond oil) we use a mix of almond oil and shea butter
    • Flavoring oil (peppermint works great)

    Procedure

    • Melt 3 teaspoons of beeswax
    • add 5 teaspoons of carrier oil and let melt
    • add 5-7 drops of flavoring (start low and work up to what you like)
    • Mix
    • Pour into containers and let cool (it will take some time to harden)

    This is a recipe you can experiment with, more wax makes a harder balm, more oil makes it glossier.

    If your a guy that wants to keep bees, this is a great way to bring your wife on board. My wife loves giving this balm to her friends because they love it, and she likes being able to tell them she made it from beeswax from HER bees…

  • How to Make Beeswax Votive Candles

    How to Make Beeswax Votive Candles


    How to Make Beeswax Votive Candles
    Buy at Amazon

    When I got into beekeeping I wanted the wax as much as I wanted the honey. Beeswax can be used for hundreds if not thousands of things. It is great bullet lube, helps hold bow strings together, has medical and cosmetic uses, and makes a great additive to woodworking varnish. But one of the biggest uses is candle making. Beeswax candles have some great advantages to paraffin based candles.

    They are renewable and natural – bees make more wax each year. They burn cleaner and longer than paraffin, unlike paraffin candles they won’t deposit soot in your home. Beeswax burns brighter than paraffin, and is more similar to sunlight. Beeswax candles don’t drip wax.

    I guess the only downside of beeswax is the cost. Because paraffin wax is a by-product of oil refining, there is a lot more of it so costs are lower.

    However, even cost can be mitigated if you keep your own bees and make your own candles.

    Be Safe While Making Candles

    Before we get into How to Make Beeswax Votive Candles, I want to give you two safety caveats.
    Beeswax gets HOT. I have melted several plastic measuring cups and molds working with it. It is also very flammable. If you are not careful and use a stove without a double boiler you will most likely have a fire. Never leave heating beeswax unmonitored.

    It’s not really hard to do; all you need to start is just get a mold, some wicks, and some beeswax.

    Melt Wax

    To melt my wax, I used wax that I had previously strained. Raw wax will have bee bits and other unattractive items. If you don’t have any hives, or a friend with hives to barter with, you can buy beeswax from a craft store or order it online.

    To melt it, you either need a double boiler (in a pinch you can use two pots – just make sure they are Pyrex or stainless steel. Anything else will probably stain your wax.) I used a Pyrex measuring cup and a couple minutes in the microwave.

    The microwave method can get the wax super heated, so I run it long enough to get some wax melted, and then use what litte patience I have to let the melted wax melt whatever is left. If you run your microwave until all the max is melted it will be VERY hot, and can melt plastic….

    Mold Candles

    For a mold I bought a multiple votive mold from a bee supply store, but you can use just about anything. I have heard paper Dixie cups work outstanding, but I heard that after I dropped money on the metal mold.  For wicks I bought a bag of pre-tabbed wicks that were cut to length and have a little metal mounting tab attached. You can buy a roll of wick if you want, but its more trouble to make it stick in the bottom of your mold. If you were using paper cups, generally you would need to punch a hole in the center and run the wick up through the cup and tie the end of the wick to a stick to hold it in place.

    Add Wick

    With a pre-tabbed wick, all I did was put a little dab of melted wax in the mold and stick the tab to it. Once that hardened, I poured a little more wax to cover the tab and let that harden. I then slowly poured the rest of the wax to fill the mold. You will need to pour it in slowly, as you don’t want any air bubbles.

    Beeswax needs to cool slowly or it will crack. The larger the candle the longer it will take to cool. As it dries the top will shrink and may leave a little depression around the wick. The wick hole might also enlarge. Either can be fixed by pouring a little hot wax to fill it in.

    Once the candle completely hardens, I turn the mold over and gently tap the bottom to knock out the candles. Just like with my interpersonal communication, gently doesn’t always work, in that case, I grab my stick and beat the fire out of the bottom of the mold until the stubborn candles drop free. If I was cheaper and used paper cups I would just peel the paper off.

    If there are imperfections in the candles, and I am giving them away, I just use a little heat from my hands, a heat gun, or a quick dip in hot water to soften the wax and run the imperfection away.

    After that, I just store them is a cool spot until my wife gives them away to her friends…