Tag: cob

  • Corn Cob Jelly Recipe

    Corn Cob Jelly Recipe


    Recipe: Corn Cob Jelly
    Buy at Amazon

    This week’s project is one that I have seen on many internet sites and multiple canning and old school food preservation books. It took me a while to get around to trying it, but when I did I found that corn cob jelly tastes a lot like honey it made me wish I did this much sooner.

    I typically only cook corn on the cob when grilling out with my family, and when I do so, I tend to cook a lot of corn. This recipe lets me turn the normally wasted water from boiling corn into a tasty food product in itself.

    However, I feel like I should let you know that traditionally red field corn was used. Personally I have only used sweet corn.

    Ingredients:

    • 12 large ears of corn
    • 2 quarts water
    • 2 tablespoons lemon juice
    • 1 package powdered pectin
    • Sugar (amount will vary, but 4-5 cups should be enough)

    Equipment:

    • Knife
    • Measuring Cup
    • Non-Reactive (Steel) Pot
    • Spoon
    • Canning Funnel
    • Canning Jars, Lids, Rings
    • Water Bath Canner
    • Canning Jar Lifter
    • Towel

    Procedure:

    • Cook corn, cut kernels from cobs and store for another use.

      Corn Cob Jelly
      Corn Cob Jelly
    • Measure 2 quarts water into a large pot; add corn cobs.
    • Bring water to a boil and keep uncovered at a rolling boil for 30 minutes to concentrate the liquid
    • I try to boil it down until I get 3.5 to 4 cups of liquid.
    • Stir in 2 tablespoons of lemon juice
    • Add pectin and bring to a boil.
    • Add sugar cup per cup to match the measure of your corn liquid. Stir to dissolve sugar.
    • Bring pot to a rolling boil. Boil for one minute while stirring constantly.
    • Remove from heat. 10. Ladle hot corn cob jelly into hot jars.
    • Adjust lids and bands.
    • Process in a boiling water bath for 10 minutes.
    • Add enough water in the canner to cover lids with one inch of water
    • Start time when water is boiling
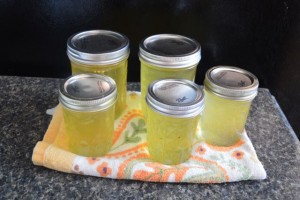
    Yield: 5 half-pints


  • How to Test Soil Test For Clay Content

    How to Test Soil Test For Clay Content


    How to Test Soil Test For Clay Content
    Buy at Amazon

    This post came from several places; Christina Ott and I talked about this on the podcast and I read about it in the Hand Sculpted House.

    I think Cob construction has some great benefits to preppers and homesteaders, but before you decide that cob is the material you will build with you really ought to test your soil to see if it is appropriate for your land.

    Cob should be a mixture of sand, clay, and fiber – It is my understanding that the best mix is 30-50% clay. Sand gives it form and the fiber gives it tensile strength, but it is the clay sticks it all together.  This post shows an easy soil test for cob.

    Cob Building Clay Test

    • First scrape away the top organic layer.
    • Next take a cup or two of soil from various potential house sites and from various depths. (Soil samples can vary a lot even a few feet from each other.)
    • Take out any stones or pebbles.
    • Put each sample in a quart jar, you should have about 1/3 of the jar full of broken up soil.
    • Label each jar
    • Next fill the jar 2/3 full with water and either some salt or a couple drops of dish soap.
    • Shake well. Very well – make your arms tired, switch off with someone, and then switch back and tire yourself out again.
    • Then let it settle. If your soil has sand, silt and clay in it, you’ll get three distinct layers.
    • The sand is the heaviest and will sink to the bottom as you watch.
    • The silt will settle next, and the clay will stay suspended in the water for a couple days then settle on top of the silt.

    Finally, the best soil with have little silt and a lot of clay.  As you can always add sand to get the proper consistency.

  • Easiest Way to Make Corn on the Cob for a Crowd

    Easiest Way to Make Corn on the Cob for a Crowd


    52 Unique Techniques for Stocking Food for Prepper
    Buy at Amazon

    I like grilling out, but I have a problem timing everything to be ready at the same time, and I tend to run out of eyes on the stove and space on the grill when trying to entertain. This means I am always looking for better ways of doing things (plus I just love experimenting…)

    I saw this tip the other day on pinterest for cooking corn on the cob in large amount easily and had to try it – it worked amazingly well so I felt I should share it.

    If you dump raw corn (shucked and cleaned preferably) into a clean chest type freezer (not Styrofoam) you can cook large amounts of corn without doing a lot of work. Simply add boiling water to the corn filled cooler, close the lid and wait at least 30 minutes.
    The corn will cook perfectly – will not overcook – and the cooler will keep the corn warm for hours.

    Very simple, very easy, and when we tried it at our home it worked perfectly…

    This way of cooking corn on the cob is crazy simple, and it turns out the water can be reused for making jelly.

    I don’t think I will ever cook corn on the cob on the stove again, unless it is just for me.  It is just to easy to do it this way when cooking for groups.