Most cheese was historically made with animal rennet, nowadays, a lot of cheese is made with a mold based rennet.
It is possible to make a vegetarian rennet for those that are either vegetarian, vegan, or who do not have the resources to make animal based rennet.
Today we will make a DIY Vegetable Rennet out of Thistles.
The biggest problem with vegetable rennet is that it becomes bitter in aged cheeses.
This means it should not be used with raw milk, or cheeses like cheddar that need aging to build their sharp taste.
List of plants used to make a vegetable rennet:
Thistle
Fig
Yarrow
Ground ivy
Lady’s Bedstraw,
Nettle
Pineapple
Artichoke
Since Artichokes and Thistles are in the same family, we will show how to make rennet using them, but as a rule of thumb if you crush and extract the sap from the greenery any of the plants above you can use it to thicken milk.
Material:
Thistle flower head when it has turned brown, but harvest it before the plant produces the thistle down, in which case it is too late.
Or
The Purple head of the artichoke before it makes the head
Equipment:
Dehydrator
Pot
Procedure:
Dry the flower heads and pick off the purple stamens.
Boil water and drop thistles into the water and let steep into a thick dark tea.
Strain off the liquid. This is now thistle flower rennet.
The rennet can now be added to warmed milk to curdle it and begin the cheese making process.
Note:
Most cheese recipes using commercial rennet are in the teaspoon/tablespoon amounts, I started using a traditional recipe amount, but ended up using ½ cup of my homemade rennet to get a good result.
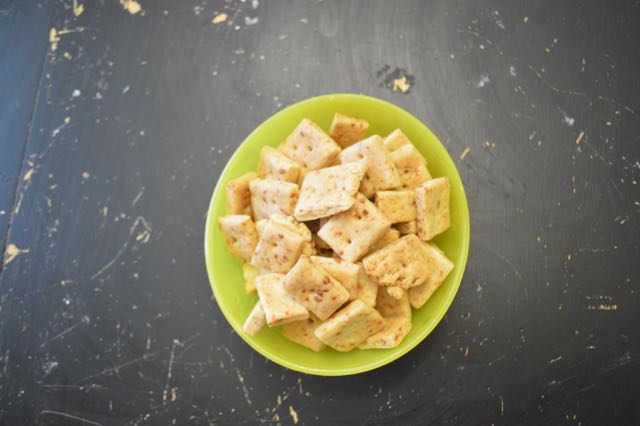
When I cam upon a recipe for homemade cheese crackers, as soon as I got past the excitement, I realized that this simple recipe was something that I should have been able to figure out on my own.
At my house we go through boxes upon boxes of cheese crackers, my three year old loves them, and while he will share if forced, he doles them out to his daddy one at a time.
This is a good recipe for young cooks, as it is easy, but due to the novelty, it will get them lots of complements from those that they share with.
Now that I bought a stand mixer I plan on making this pretty often. They don’t cook as crispy as the store bought chips, but I think is you cooked them twice the would get harder.
Ingredients:
1 cup all-purpose flour
4 tablespoons unsalted butter, cut into small pieces
8 ounces sharp cheddar cheese, grated
3/4 teaspoon salt
2 tablespoons cold water
1/2 teaspoon ground mustard (optional)
Tools:
Food Processor
Measuring cups and spoons
Plastic wrap
Pizza cutter
Toothpick
Baking sheet
Parchment paper.
Procedure:
In a food processor, pulse all the ingredients (except the water) until it looks like course crumbs.
Once you get the crumbly texture, add in water 1 tablespoon at a time while continuing to pulse the food processor.
Remove the mixture from the food processor
Wrap the mix in plastic wrap and refrigerate for at least 20 minutes.
Preheat oven to 350 degrees.
Roll out dough until it is very thin, and then cut into squares using a pizza cuitter.
Use a toothpick to poke a hole in the middle of each cracker.
Place crackers on lined baking sheet, since the crackers don’t expand much you can put them close together.
Though we do believe that proper martial arts training is the best way to learn an arsenal of effective self-defense moves, there are some basic moves that you can easily learn without having to spend years of training.
On this post, the team at BookMartialArts.com is sharing 5 self-defense moves that anyone can learn and use to defend themselves during a violent physical attack.
Please note that we highly recommend for you to seek the assistance of an experienced martial artist and/or a professional to demonstrate how you can safely and properly execute these self-defense moves to avoid unwanted harm or injury to yourself or others.
The Wrist Lock
BJJ No Gi Wrist Lock Variations Tutorial. Video credit: Stuart Tomlinson YouTube channel
This straight-forward yet effective technique comes from Brazilian Jiu-Jitsu (BJJ) and it is a move that anyone regardless of size, age or fitness ability can do. The wrist lock variations comes in handy when an attacker gets hold on your wrist. To execute the simplest form of this move, rather than pulling back, you will need to squat down. Once in this stance, proceed by leaning forward and bending your elbow towards the attacker’s forearm until you free yourself of his grip.
The Eye Gouge
Image credit: Tipsforsurvivalist.com
The thought of gouging someone’s eyes is enough to make most people shudder. However, it is definitely an effective method to free yourself when an attacker gets a hold of you.
There are different ways to execute an eye gouge, however, the simplest way is to aim both of your index and middle fingers towards the attacker’s eyes and poke them hard. You can also opt to use your thumbs for maximum impact.
With the thumb eye gouge, you would need to place your hands on the side of the attacker’s face and press your thumbs as hard as you can into the eyes.
The Stomp Kick
How to Do a Toe Stomp. Video credit: Howcast YouTube channel
Our legs are generally stronger than our arms so kicks may be one of the best ways to easily get away from an attacker. A toe stomp kick is a move that is easiest and most effective to do so.
Start by bringing your knee up and drive your heel down as hard towards your attacker’s instep as fast and as hard as you can. If you kick hard enough, you may just break some bones and severely injure his foot enabling you not only to escape from him but also prevents him from running after you. Ladies, this technique is particularly useful when you are using stilletos or high heels as the heels of your shoe can act as a ‘weapon’ and likely to help in severely injuring the assailant.
The Palm Strike
Image credit: Howcast.com
Instead of the usual punch done with a clenched fist, this technique uses the ‘meaty’ portion of the bottom of your hand – located by your wrist.
This move will do enough harm and confuse your attacker, giving you enough time to flee from him. Plus, hitting with the heel of your palm is less painful (for you) than throwing a punch!
Though the palm strike is particularly effective when aimed straight up towards the attacker’s neck, it can be as effective when used to target the opponent’s head or shoulder.
The Groin Kick
Groin Kick Techniques for Krav Maga. Video credit: Expert Village YouTube Channel
This move is one that is taken out from Krav Maga’s playbook. Also known as the “Art of Staying Alive”, Krav Maga moves are designed with effectiveness and efficiency in mind.
The groin kick, however ‘crass’ it may seem, gets the job done quickly. To carry it out properly, you would need to aim for and kick your attacker’s groin as fast and as hard as you can.
Start by facing your attacker with the leg you’ll be kicking with behind you. Then, proceed to kick out and upwards between the attackers legs with your shin for maximum impact.
I hope these Self-Defense Moves that Anyone Can Learn help you stay safe.
If you want more I linked to a comprehensive article on different types of Martial Arts Training.
By: Lystia Putranto
Lystia is a contributing writer for BookMartialArts.com, the world’s leading martial arts theme travel website. She’s fascinated by all types of martial arts and can’t get enough of martial arts moves both on screen & off.
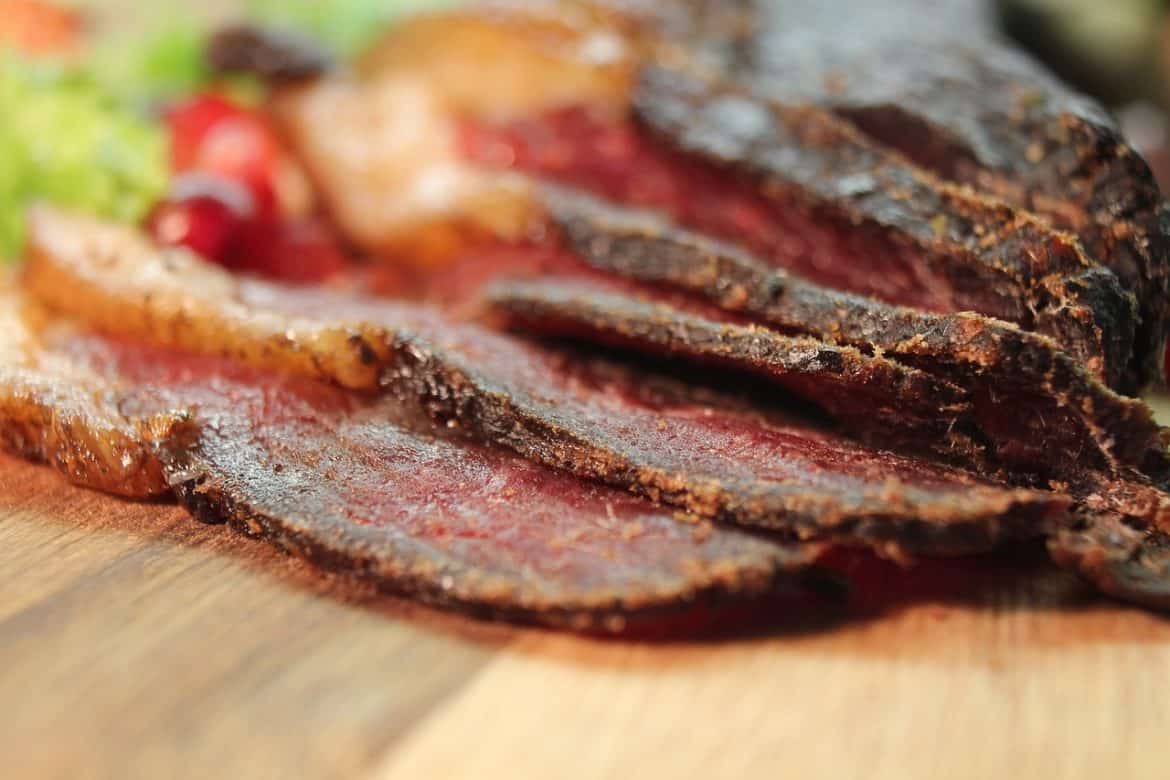
This post is about how to make your own curing chamber.
Our ancestors cured meat to survive, so it can’t be that complicated, right? Well, as humanity has advanced so has the science of food preservation. Curing meats is part of the cooking field called charcuterie.
Curing Process Basics
A combination of spices and drying methods preserve meats. Modern technology allows chefs to finely tune the environment used for curing meats.
Bacteria is unable to survive once the water content in a meat reaches a low lever. This is also helped by having a high salt content.
However, the ability to monitor the conditions of a curing chamber does not necessarily boost taste or quality. Although it can help the novice charcuterie chef to develop a safe and efficient methodology.
Control the Conditions:
Even without modern technology, curing meat requires a certain control of environmental factors. The conditions that must be controlled during the meat curing process are temperature, humidity and air flow. Although you may be able to use a storage room, basement or other area for curing meat, the ideal area will be isolated from volatile external elements. For example, curing meat in a garage can expose meat to exhaust fumes as well as various temperature and humidity changes.
For most people, building a meat curing chamber is the best option. The chamber protects meat from fluctuating conditions and can be closely regulated. Surprisingly, a meat curing chamber is relatively easy to construct. It is between the beginner and intermediate DIY level. Luckily it is also extremely inexpensive.
Materials:
An old frost-free refrigerator
Search your local classified listings or Craiglist for an old refrigerator. Free is the best price and $25 should be the maximum. Remove the shelves as needed. Perhaps leaving the top shelf as a hanging mount. There should be enough room in the bottom of the refrigerator for additional equipment.
A Freezer Temperature Controller
Those old refrigerators produce temperatures much too cold for curing. A Freezer Temperature Controller regulates the temperature of a refrigerator. It works by turning power on and off to achieve the pre-set conditions.
A Humidity Controller and an Ultrasonic Humidifier
A Humidity Controller measures and regulates the power needed to reach the ideal humidity levels in your curing chamber, As that occurs, the Humidifier adds moisture to the air. Only add distilled water to your Humidifier. Also, choose one that will power up automatically in response to the Humidity Controller.
A Fan
Humidity Controllers are built with a power outlet, and by connecting a power strip to this outlet, you can simultaneously power the Humidifier and a Fan. The Fan will circulate the air and disperse the moisture in the air.
A Dual Temperature and Humidity Sensor
This tool makes it easy to monitor the conditions of your curing chamber and can catch any discrepancies between measurements from your Freezer Temperature Controller or Humidity Controller. Additionally, a Calibration Kit is an inexpensive, optional tool that will ensure accurate measurements.
Additional Notes: Recipes and Rodents
Curing chambers are located in areas without a lot of activity. However, this positioning, paired with food, can be rather inviting to rodents.
If you are concerned about rodents, you may want to drill holes in the side of the chamber to run all electrical cords. Small mesh openings provide airflow.
In conclusion, your curing chamber is going to look awfully funny without any meat! You can find recipes. on sites like this one as well as Honest-Food.Net. Honest Food has simple, straightforward approach to living and eating as our ancestors have.