A common trick among backpackers is to wrap some duct tape around their water bottle or lighter so that they always have a couple feet readily available for quick repairs. This is an easy duct tape tip that ensures you always have some tape on hand.
I find that having some duct tape with me in the things that I carry everyday helps me stay prepared. When hiking, I can use it on “hotspots” to prevent blisters, and its invaluable for survival when making things like plastic water stills and bags. However, since I spend most of my time in an office, I tend to use my duct tape in more normal ways.
This tip is useful more than just outdoors-men. I have a cut off ink pen body wrapper with duct tape on a monkey fist hanging from my keys. In the end, it really does not matter if you wrap duct tape on your keys, lighter, water bottle, or frame of your pack. What matters is that duct tape is dead useful, but a roll is bulky and heavy.
This simple tip ensures you have some if needed as well as saves weight and space.
This duct tape tip is one of my favorites as it keeps tape close at had for any emergency purpose as well as makes my water bottle easily distinguishable from the ones carried by everyone else.
You can also use this tip on hiking sticks and trekking poles – I even know a handy guide to purchasing trekking poles.
This common Duct Tape Keychain tip is well known among backpackers. If wrap some duct tape around a water bottle or lighter you will always have a couple feet readily available for quick repairs.
I Went One Step Farther
In the video below I show some wrapped around a small disposable lighter, but taking the concept one step farther I took an old ink pin that was no longer serviceable and cut the ends off with a pipe cutter.
This left me a hollow tube as long as the roll of tape was wide.
I then wrapped about 4 feet of tape around the tube – in essence creating a mini-roll of black duct tape.
I then untied my monkey fist from my key-chain and threaded the tube along the length of paracord.
When I retied it, I now have a captive roll of tape that is always with me.
It takes no extra space, and adds very little weight.
I like it, and I hope it is useful to you. Until I went back to work at the prison and had to significantly alter my EDC for the correction environment I carried this ring daily for years. Having the tape on your person leads you to have need for it more than you would think.
Several years ago I tried out Dave Canterbury’s sling bow. It was fun and I saw that it had potential, Unfortunately, arrows are expensive. The short arrows I bought just did not develop enough energy to be useful.
I decided to look into making my own arrows. Arrow-making has obviously been around a long time. So it is a pretty developed science. Feathers arraigned in a 3 feather system are the most common. However, some use 2 or 4 feathered fletching systems. Additionally plastic vanes are available commercially.
In today’s article we are going to go “mad max” and create Duct Tape Arrow Fletching.
The Prepper MacGyver’s Most Common Resource is Duct Tape.
The great thing about duct tape is that is common, cheap, is not too stiff so that it can bend as it comes in contact with the bow, but when doubled up is stiff enough to direct the arrow in flight.
To make fletching simply cut three bits of tape about six inches long.
Pick up one piece and bend it lengthwise to form a “U” with the sticky side outwards. The base of this “U” is stuck lengthwise along the shaft – in other words (and the video will help) the middle of the tape is stuck to 1/3 of the diameter of the shaft with the two ends flopping free.
Now pick up the second piece and bend it like the first one. This one will be stuck in position a third of the way around the shaft from the first one, while the first bit of tape is still bent in the “U” position to keep it out of the way. You do not want the two pieces of tape to stick together until you get everything situated. (I find that clipping the loose ends of the first piece of tape together keeps them out of the way.
Once you feel that the two pieces of tape are sitting in the right position, you can allow the two adjacent wings of tape to stick to each other, forming the first complete vane.
Mold the tape against the shaft to get it to stick well. The two bits of tape will sometimes stick without being exactly in the right position thus skewing the vane or making it lumpy.
Apply the third piece of tape is applied in a similar manner.
Tips for Duct Tape Fletching
A challenge with this tape fletching is to get three flat and evenly spaced vanes.
Another problem is to end up with the vanes where you want them in relation to your nock so that you get the conventional “cock and hen feather” configuration with the cock feather at right angles to the plane of the nock.
Once you have the tape into place, you can trim the vanes with sharp scissors.
Keep the vanes tapering down to nothing at the leading end so that they ride nicely past the bow and your bow hand.
Keep the vanes as narrow as possible and make the taper as long as possible.
You can also apply a tight wrap of soft insulation tape over the very front end of these plastic vanes to stop them catching and pulling away.
Obviously this won’t give you a good a result as using proper fletching and a jig like the one below, but it is serviceable and just the thing to use if your using a homemade PVC bow (more on that later).
I recently purchased a contour +2 action camera to use in my video production. I bought it because it was small, durable, had an external mic jack, streamed wireless to my phone, was water proof, and had a built in GPS. So it only figures that I would do a post on a Contour Camera Review
When I got it, I found that it was oversold just a little bit – it has an HDMI out port – which they say allows it to be used as a webcam to apple computers – but the laptop I have is HDMI out only, so it will not work to tape my classes.
The video is a little jump as it has a low frame rate, and the lens makes everything look a little walleyed.
However, it comes with a waterproof case for scuba and snorkeling activities, and a bunch of different mounts – if I was using this solely as a gun cam, I would be very happy, as it is smaller and has more features than the go-pro.
Because I wanted a good quality camera with an external mic jack and I wanted to stay under $1000.00 I allowed myself to be taken by all the hoopla around this camera. I guess sionce I have a waterproof case I can finannyl start working on shooting the Glock underwater…
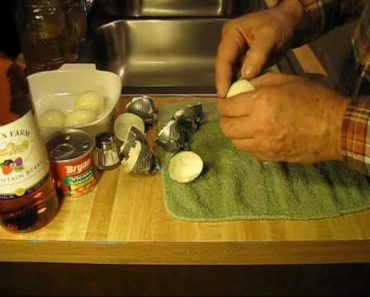
I want to share ShopDogSam’s video on How to Peel A Hard Boiled Egg With Duck Tape
Wala Shazam – This borders on alchemy. I just found this guy on YouTube, and think he is funny as well as smart.
Get two strips of standard (non fancy camouflage kind) duct tape and affix the tape around each end of the egg, leaving a small gap in the center of the egg and ensuring the two pieces don’t touch.
The next step on How to Peel A Hard Boiled Egg With Duck Tape is to crack the egg shell all the way around the egg. Work the cracks all the way around the egg.
Once the egg shell is broken loose and the shell is craked, simply pull on the tape and the egg shells will come out leaving a clean boiled egg.
Now it seems like this way is not the most efficient method of peeling eggs as you have to buy the duct-tape, but I don’t think its as bad as the poor hippie country boy jokes about in the video.
However, efficiency aside, this makes the peeling process easier and cleaner, so there is a trade off that many people will gladly do.
Personally, I like feeding my chickens the old egg shells so I don’t use this method, but I love his humor (I think it is intentional humor) So I wanted to share his video.
You may enjoy looking at shopdogsam‘s other videos on YouTube.