These DIY chalkboard mason jar lids are great for storage. While it was designed for spices, it can work in the garage for nuts and bolts, or the reloading bench for small parts like shell holders.
Simply take a baby food jar (or any other size you want), and paint the lid with chalkboard paint. You can then write whatever is in the jar on the lid.
If used with spices, you can then easily store in a drawer beside the stove, rather than above the stove.
However, the heat from the stove will cause a reduced lifespan of the spices.
Like the other mason jar lid tips, your mileage may vary on how useful this is. I used this idea for spices for about 6 months and then went back to my old ways. It works, no doubt about it. Unfortunately my handwriting is horrible.
Besides on the counter I did not need a lot of labeling, as I could see through the jars. However, if you used smaller jars and put them in a drawer so you could only see the top, then this would be an awesome tip for organization.
From my experience here are some knowledge points for cooking rice this way.
Do not fill the pressure cooker more than halfway full.
Do not short change the standing time at the end of the process.
Ingredients:
]1 cup rice
2 cups water, broth, or stock
1 tablespoon butter (optional, I sometimes use oil – or even omit it altogether)
Procedure:
Add all of the ingredients to the pressure cooker.
Securely fasten lid.
Cook over medium-high heat until it is at high pressure. (it will vent)
Reduce heat a little and continue cooking for 7 minutes.
Remove from heat (I let it set until it cools, but you can place in sink and release pressure by running cold water over the lid if you are in a hurry)
Let rice stand covered for 5 minutes. Check pressure before removing lid. If any pressure has built up, run under cold water again to release it.
Having a toddler and a healthy living advocate in the house we go through bananas like a circus tent full of monkeys – not that eating bananas is bad. They are a great source of potassium and really help with the soreness after working too hard at the land.
However, eating one food to extremes can get old and I am always looking for neat new recipes. As a beekeeper (beehaver is more accurate) I admit I am especially interested in recipes using honey so when I found this baked honey banana recipe I could not wait to try it.
This recipe is so simple written instructions are not necessary, the video is short and is easily followed. However if you love sweet gooey desserts this recipe is addictive. It is so easy and tastes so good you may find yourself cooking it often.
Personally, I like taking it to potluck dinners because it is “exotic” I get much more credit than the effort expended is worth.
This easy recipe tastes good, looks good, and is simple, so Baked Honey Bananas wins in every recipe metric. You owe it to yourself to try this fun recipe. Its good.
Here is an Asian inspired Egg Drop Soup that is very simple to make and uses one of the perfect homestead proteins sources – eggs.
This is a very economical recipe that contains few ingredients in the base, but allows you to add more ingredients based upon your desires.
Egg drop soup is just eggs added to a boiling chicken broth. The eggs cook almost immediately when added to the hot broth and create thin strands in the flavorful liquid.
Many times egg drop soup is just seasoned with salt, pepper and a little green onions.
Here in America we often add corn starch to make it thicker.
Since both eggs and chicken stock are very nutritious, making this soup is a great source of nutrients. The simple nature and easy digestibility makes it easy to digest so it is a great soup to eat when feeling run down or when dealing with some kind of sickness.
Ingredients
3 cups chicken stock
1/8 tsp ground ginger
2 tbsp fresh chives, chopped
¼ tsp salt
3 eggs
Preparation
Pour the chicken stock into a large saucepan over a medium-high heat.
Add the ginger, chives and salt to the liquid and allow it to come to a boil.
In a small bowl, whisk the eggs
As the broth continues to boil, use a fork and drizzle the eggs into the pot. The eggs should cook immediately.
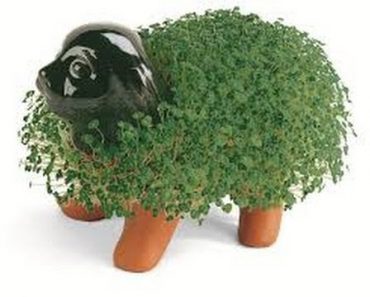
Chia seed is much better used as a food than as a pet.
It is actually an ancient superfood from the sage family (Salvia Hispanica), and was once a staple of the Incan, Mayan and Aztec cultures, along with the Native Americans of the southwest.
It was actually used as an energy supplement for Mayan couriers who ran messages between cities and always had a small bag of chia seeds with them to get a surge of energy.
It has a lot of essential nutrients, is energy dense, and is very easy to eat.
It is said by some Mayan descendants in Mexico that as little as one table spoon of chia can sustain a person for 24 hours.
Chia seeds are said to have:
Twice the protein of any other seed or grain
5 times the calcium of milk
Twice as much potassium as bananas
3 times the reported antioxidant strength of blueberries
3 times more iron than spinach
Substantial amounts of essential fatty acids like omega 3 and omega 6
Chia seed is a complete source of protein, providing all the essential amino acids in an easily digestible form.
They are also provide a good source of soluble fiber.
Another advantage of chia is that it has a high antioxidant content, which contributes to the seeds ability to store much longer than other fatty grains flax, for example, may turn rancid.
Chia seeds can easily be stored dry for 4-5 years without deterioration in flavor, odor or nutritional value.
You can substitute chia in any recipe that calls for flax.
Chia has a mild taste, so you can combine it with other foods without dramatically changing your diet. It will, however, bulk food up so that you consume less calories but feel like you have eaten as much as normal.
What is neat about chia is that it is very hydrophilic, and will absorb water and create a mucilaginous gel. They can hold 9-12 times their weight in water and they absorb it very rapidly – in under 10 minutes.
To eat it:
The most common way to eat chia is to first soak the seeds. They can very quickly absorb a large amount of liquid – between 9-12 times their volume, in under 10 minutes.
The Basic Gel
Add 1/3 cup of seeds (2oz) to 2 cups of water.
Stir the mixture well, to avoid clumping, then leave it in your fridge, in a sealed jar.
This will yield around 17oz of chia gel.
You can begin to eat the gel almost immediately if you like.
Just 10 minutes is enough time for the gel to be formed.
More nutrients will be digestible if you let it set a few hours, so many people make up a batch and leave it in the fridge.
It will stay good for about three weeks.
You can add the gel to smoothies, mix it with salad dressings, puddings or granola, or simply take it by the spoonful.
Since Chia will absorb anything – it doesn’t have to soak in water. try apple juice as an example. The sweetness of the apple juice is offset by the chia and it tastes yummy ;).
You can also sprinkle the dry seeds onto salads or add them to granola mixes.