How to Build with Tires

Homesteading - Building with Tires Part
Click the Picture to Purchase

I have been interested in sustainable building for decades.  I remember sitting in the birthing area of the USS Saipan in the mid 1990’s reading about Earthships and missile silo homes.

For some reason I am very taken by the concept of rammed earth tires as a building material.  However, the idea of pounding 3 or 4 four wheelbarrows of dirt into a tire over the course of 45 minutes multiplied by the 1000-15000 tires per house keeps the idea in the back of mind instead in front of me under a swinging sledgehammer.

Tire Building Does Not Have to Be Earthships

However, the technology has evolved and I recently found two sites that gave me some ideas that bring the concept back into focus.  The first is a place called Blue Rock Station.  They sell a self-published little booklet about how to use tires as a foundation for other building designs.  This allows you to build with tires without solely building with tires.  Their concept allows the use of less cement, and is perfect for incorporating into cob, cordwood, or straw bale construction.

The second is a place called Touch The Earth Ranch who have found and published a college paper on the use of tire construction where one sidewall was removed.  This allows a tire to be filled in 10 minutes instead of 40-45.  While the tests show it is less strong, it is still plenty strong enough for most purposes.

My plan at the land is to incorporate both ideas to all building with tires that is faster and more flexible than typical earthships.  Basically I want to build several small sheds with waist high tire walls.  With framing made of earthbag, cordwood, strawbale, and any other methods I want to try.

I figure there public place someone can go to experience the multiple types of alternative construction.  So I should be the first.

The plan is to turn each building into a specific workshop; electrical, metalworking, woodworking, storage, and firearms related.  Then connect them all with one roof so we have several dog-trots to allow for open air classrooms and working space.

I have no experience building with tires, but that’s not going to stop me as I experiment and learn.


Shooting: The M6 Scout is One of the Best Homestead Rifles

Why The M6 Scout is One of the Best Homestead Rifles


Shooting: The M6 Scout is One of the Best Homestead Rifles
Buy at Amazon

The M6 scout was one of the first rifles I bought when I got out of the Marines.  I kept it in a case in he back of my car for decades.  The gun was originally designed as a survival tool attached to the ejection seat of American fighter planes.

Originally this was designed to be .22 Hornet and .410 but the commercial models are typically .22 LR and .410.  The civilian guns are also a shade longer as the Air Force models are considered Short Barrel Rifles per the National Firearms Act.

Why The M6 Scout is One of the Best Homestead Rifles

I think the M6 Scout is one of the best homestead rifles you can have because it is light, short, and handy.  It is large enough to take care of most varmints and powerful enough to hunt small game.  It is of a simple design and is both safe and rugged.

You do not have to use a scope on the rifle.  It has a rear sight that flips to either calibrate to the .22 or the .410.  However, it is tapped for a scope mount.  If you get a M6 I would suggest a scope, and know where to find the best rimfire scope.

If you are going to have a beat around truck or tractor gun then this is a model to consider.  I keep the .410 side loaded because it is perfect for killing poisonous snakes I find in the brush as I clear off the homestead.

Since it is a break open with a hammer and a selector switch, I can keep the ,410 loaded and the selector on the unloaded top .22 barrel and feel very confident in the safety of the gun.  I have to both select the .410 barrel and cock the hammer to fire.

Survival Punk Paleo Food Bar


Kitchen DIY: Survival Punk Paleo Food Bar
Click the Picture to Purchase

One of the friends I have made while creating this site is James Burnette of Survival Punk.

While we share a strong DIY ethic, we do have a lot of differences.

Most notably in the areas of fitness and nutrition…  However, while out working on the land James offered me some of a Paleo Food Bar he developed.

Jame’s Paleo food bar is a mixture of 4 ingredients – Lemon, dates, coconut oil, and shredded coconut.

While I much would have preferred a burger, I can see where a paleo ration bar has a use in preparedness or survival.  While, I don’t like coconut, it tasted pretty good.

Watch the embedded video to hear James talk about his bar and why he created it the way he did.

My wife has experimented a little with paleo diets as she has worked to get healthy. I still am not convinced any diet is better than just eating a balanced diet and working hard physically.

However, since I still eat mayo, cheese, sweet tea and beef as my four food groups you should not consider me an expert.

*Update:

I dropped sweet tea as a food group.  I now drink water.  That helped my diabetes.  I am also working on my cholesterol so mostly I eat Cheerios and grumble.

dry milk

Kitchen DIY: Dry Milk to Whole Milk

Kitchen DIY: Dry Milk to Whole Milk
Buy at Amazon

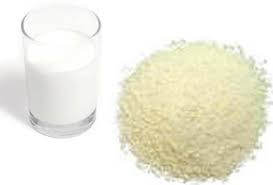
Dry Milk to Whole MilkIn order to reduce rancidity to help with long term storage, almost all powdered milk is no-fat, in order to use powdered milk as whole milk in recipes, you will need to modify it slightly

Because powdered milk has no fat, it is a poor substitute for cooking and baking recipes that require whole milk.

The milk fat gives recipes (baked items, especially) a consistency that cannot be found without fat.

Preppers can benefit by knowing how to substitute the powdered for fresh in recipes.  If you want to turn dry milk to whole milk follow the guide below.

To Turn Dry Milk to Whole Milk Simply:

  1. Combine 1 cup water with 1/3 cup powdered milk.
  2. Stir the ingredients together well to dissolve all the powdered milk. Use a blender or mixer for best results.
  3. Add 1 tbsp. oil after the powdered-milk mixture is well blended.
  4. Mix or blend the mixture thoroughly.

It is not that hard – 1 tbsp. of oil for every cup of milk…

This is a bit of kitchen knowledge that, while not common, is something every person with home food storage should know.  This tip will help turn pounds of dry milk powder into something usable for recipes

How to Prevent Your Macbook Cord From Breaking

How to Prevent Your Macbook Cord From Breaking


How to Prevent Your Macbook Cord From Breaking
Buy at Amazon

Apple products have an almost cult-like following – and in most cases the quality control is deserving of admiration.

However there is one area that apple gets wrong.  The power cords fail on a regular basis, cost nearly $100 each, and apple holds a patent on them and zealously guards it so when the cord breaks you have to spend $100 to keep the $2000 macbook from turning into a brick.

The best way to keep from having to buy new cords is by preventing your macbook cord from breaking.

I prevent cord breakage by supporting wear points on the ends

I have tried tape, but it does not last long, so this time I started using sugru to build up the area around the magnetic connector.  This prevents macbook cord breakage by keeping the cord from flexing at its most vulnerable spot.

Watch the video above to see exactly how the sugru was used.  In this post I used a homemade sugru style silicone to make these modifications, but real sugru would work just as good (if not better).  I used the homemade kind because it was cheaper and I did not have to order it.