I have wanted a pocket chainsaw since I was a boy, It would be simple enough to buy one, but it seems I never got a round tuit, that is until Sumpri offered me a chance to review their folding pocket chainsaw and fire starter kit.
I had great plans to take this chainsaw out and throw a line over a high tree limb and use the saw with some paracord – unfortunately, when I got out to the land it started raining, and I got my truck stuck in the mud.
While a pocket chainsaw is great for a lot of things, I couldn’t use it to get unstuck (well I guess I could have cut limbs to make a timber winch or to throw under the tires). I decided to wait on the video and focus on what was important now – which was recovering my truck from the mud.
The saw was well made, and it was sharp. I found that it pulled easily (better with long strokes) and cut smoothly. The firestarter is a typical ferocerium rod – it creates hot sparks and is of normal quality. I do wish the case was a little stronger, but it was above average for these types of gear.
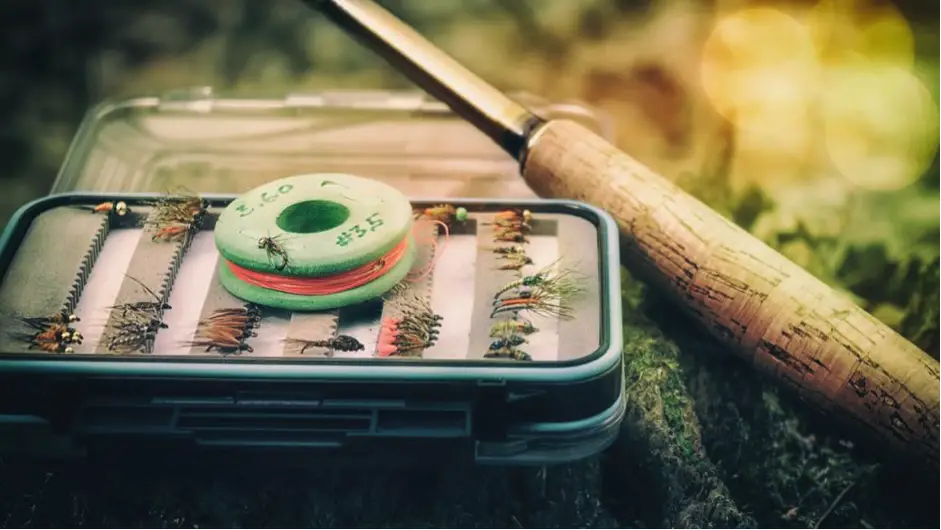
With the tenkara being the latest trend in fly fishing, I have found many anglers longing to get to know every single detail about it.
I am lucky to have learnt about it earlier and perfected my skill, thanks to my father.
Before I proceed, I will let you know what a tenkara is. Tenkara is a trend in fly fishing, used in fresh water fishing, quite common in Japan. It involves fishing using a telescopic reel which has no reel.
The tenkara method boasts a more simplistic approach, where only a rod, a fishing line and fly, are used.
Believe me it is very easy. The biggest challenge you will encounter is that you will have to really spend a lot of money to get started, but the good news is that I have quite an appealing secret that I am willing to share with many anglers freely.
Just read on, and you will get to learn and love my secret.
How to Make a Cheaper Tenkara
Careful anglers, here is my secret. I realized that to shop for the right equipment for tenkara, I needed quite some dollars, which I truly didn’t have. My budget for fishing was way too low to give me the luxury of acquiring a tenkara. I desperately needed to find a way out, and that was when I decided to purchase a telescoping rod which could perform as a tenkara. Research came up with simpler and cheaper methods which would give me maximum results at quite a cheap price. I modified a telescoping rod which became a perfect substitute for the tenkara rod which costs about $30.
Step by step procedure on how to make a tenkara fishing rod
Make a wine cork grip
Materials
Wine corks
Something to make a winding check, brass grommet is preferable
A piece of thread used to make a winding at the front part of the grip
Procedure
Determine the length of your grip by measuring the diameter of the rod at the top and bottom area where your grip will be. This will help you to determine the size of the hole you should make in the corks.
You can now bore holes in the corks. To find out if you got the diameter right, fit the first bored cork on the rod before making holes on the rest.
Remove the beveled ends of the corks. You can choose to sand the ends off.
Stick the corks and the blanks together
You can choose whether to make a winding check or not, having it decorated is also optional.
Extra steps on decorating winding’s grip with a paracord. You can follow this video:
Add a line keeper
Materials
Stainless steel wire
Polyester embroidery thread. Should be of high quality
Epoxy
Pair of pliers
Procedure
Shape your line keepers. You can use pliers to bend the wire to the shape of your liking. Just ensure that the ends will be tapered.
Fix the keepers to the rod, temporarily though.
Wrap your keepers onto the rod. At this point, you use the high-quality embroidery thread.
With epoxy, cover the keepers and the rod so that they can remain permanent. This process requires a lot of practice.
At this point, you are done. You will have done quite some meaningful work at a fair price.
Butt Cap Keeper Loop or Rod Plug for Looping the Connector.
In making the keeper, simply enlarge the pre-existing hole in the butt cap and then add a hole at the center of the rod plug.
You should make sure that you drill the holes as large as required for accommodating the paracord loops having a smaller diameter.
After installing the loops, go ahead and attach the butt cap loop to the rod plug loop by simply using a loop to loop connection.
Making the Handy Carrying Case.
Procedure
Use the Tenkara Rod to measure and mark the PVC before cutting it to the required length.
Find a way of pressing the end cap onto the PVC by simply gluing it or pushing it hard into the PVC
Gently slid the tenkara rod into the PVC before adding the top. It is advisable to mark the top so that it can be opened from the same end whenever you want to do so.
End product, the tenkara fishing rod is now ready
Having done all this, you will have your tenkara fishing rod at a very cheap price.
It could be termed as free since you might end up not buying any of the materials.
You will also have made it suit your specifications, which means that it will eventually be quite attractive.
GO FISHING!!!
I hope that this article has been both enjoyable and educative. You can now make your own $10 tenkara fishing rod rather than buying the expensive one which costs approximately $30.
You will have had fun from the activity of assembling the requirements to create one quite useful fishing equipment. Enjoy your fly fishing spree.
Make any comments which you may find to be important and let me know of anything that I could have left out.
Seek clarification on anything that could be an issue to you. I will be glad to assist where I can.
When it comes to survival, the key is having the right mix of gear and skill available to solve a wide array of potential problems that might come up.
As most of us already know, a bug out bag (BOB) is a particular set of gear that is intended to keep you alive for up to 72 hours. Basically it helps you reach your predetermined bug out location (BOL).
For a great refresher on the different type of emergency kits, check out David’s summary.
Before we dive into the battery strategy, I want to share the main assumptions behind a great BOB.
The type of gear that you put in your BOB should be thought around meeting your needs of shelter, water, and food (for energy).
It is important to think about it in that order of priority. On average you can live up to 3 hours in adverse weather, 3 days without water, and 3 weeks without food.
Keep Working on the BOB
Over the years, I’ve spent a lot of time revising my bug out bag in order to get it down in weight so that its mean and lean. My current total BOB weight, including the clothes that I will be wearing, is at 37.3 pounds.
I have found that shelter, including clothes, easily consumes about 33% of the total weight.
Next comes water purification and initial water for the first stretch of the trip, weighing about 20% of the total. Food in terms of energy needs can be had surprisingly light at less than 2 pounds.
The rest of the space, which is about 25%, is reserved for tools, fire making, lighting, health, and miscellaneous other items. It is in these areas where the need for batteries are bound to come up.
Common Batteries Used In BOBs
Devices that are often found in BOBs include flashlights, lanterns, walkie talkies, weather and emergency radios, or other items based on your own specific needs.
The main issue here is that electronics tend to be bulky and heavy. On top of that, they require batteries to run, which are also bulky and heavy.
With a BOB, your goal should be weight reduction to the point of meeting the requirements of keeping you alive for 3 days without injury. If you have never carried a backpack that weighs more than 35 pounds, I suggest you try it out before you load your BOB to the brim.
Over the course of 3 days, you will need a flashlight at a bare minimum to operate and navigate in the dark. Depending on other necessities, you might choose more devices to add to your bag. It is recommended that you at least have a handheld flashlight, a headlamp, and a key-chain light.
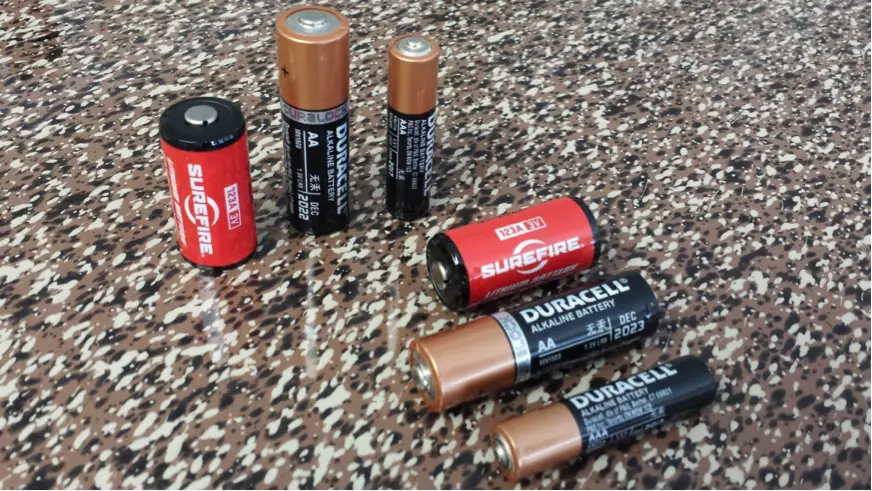
The most common battery types that you will encounter with these devices include: AAA, AA, 123A, and 18650. We will go over the main details for each of these next.
AAA
The AAA battery is a common size that you can find almost anywhere. For a typical Alkaline version, the voltage is 1.5 Volts, and the energy it contains will last you about 10 hours at 0.1 Amps of current consumption for the average Duracell. The weight is 0.35 ounces per battery.
AA
The AA battery is similarly common like the AAA. The voltage is the same at 1.5 Volts, however the size is bigger, giving it more energy. In contrast, the AA battery can last about 26 hours at 0.1 Amps of current consumption. This is over 2.5 times more than the AAA. The weight of the AA is 0.85 ounces, which is about 2.5 times more than the AAA, naturally.
123A
The 123A is a specialty Lithium type of battery that you find in higher power flashlights. The voltage is 3.0 Volts, which is similar to two AAA/AA stacked together in series. A Duracell 123A can last around 16 hours at 0.1 Amps of current pull. This puts it somewhere in between the AAA and AA. It weighs in at 0.5 ounces.
18650
The 18650 is a rechargeable Lithium battery at 4.2 Volts. These batteries vary in performance by manufacturer quite a bit, but on average you can expect it to last about 20 hours at 0.1 Amps of current pull. The weight is higher at 1.6 ounces. Note that many flashlights these days will come with an option of using either a 18650 or a pod that takes 3 AAA batteries instead.
Best Battery Strategy
We just looked at four common battery types that you will see most often for these types of electronics. They vary in voltage, current capacity, volume, and weight.
When it comes to thinking about a strategy, one thing to note is that you most likely won’t be using all of your gear at the same time. The core item that may overlap use with other devices is going to be the flashlight if you are using something in the dark.
Otherwise, chances are you won’t be using your walkie talkie while also listening to your emergency radio. If you are using your lantern, you won’t be using your flashlight, and so on.
With this in mind, we can start thinking about the advantages of choosing one specific battery type to go for on our electronics instead of just buying electronics and separate batteries for each device.
The best way for this to work is to select your most important piece of gear first, which is typically the walkie talkies, and then down selecting your other gear to match the same battery type.
For example, there are some very great performing flashlights out there in all of the battery types that we have covered. David posted two awesome flashlights that he was considering for his BOB. It was between the Klarus XT11S (18650 battery) and the Felix LD41 (AA batteries).
Buy a Light Based on Battery First
What I learned is that it might be more strategic to choose a flashlight based on its battery type first, and then based on its other features.
I did a ton of research and put together the top performers in flashlights. From the top 10 AA flashlights, one of the best for your BOB is the J5 Tactical V1 Pro, which runs on a single AA battery.
I bought one, tested it, and found that it can run on high for 4 hours and on low for 20 hours from one battery. That’s pretty amazing. It’s not the brightest flashlight out there, but for the price, weight, light output, and performance, it is hard to beat.
As for the top AAA flashlights, the Streamlight Stylus Pro is a great option and runs on 2 AAA batteries. The run time is about 6 hours.
Obviously, you are going to have the best opportunity to replenish your batteries if you go with either AAA or AA. They are commonly found almost everywhere. That way, if your batteries get run down before you get to your BOL, you have a much better chance of finding replacements.
Gear Experiments
Let’s do a simple experiment to see what kind of savings we can get by eliminating multiple battery types. We will pretend that we are being sloppy and not paying attention to battery type or caring about weight reduction.
A typical set of walkie talkies can take 3 AA batteries for each headset. So we will need 6 AA batteries to use them. That equals about 5 ounces of battery weight. Should we pack a spare set of batteries and double the weight? Let’s do it. There, that’s 10 ounces for 12 AA batteries.
Now let’s grab a 18650 flashlight which adds another 1.6 ounces of battery weight. We also want a headlamp that runs on 3 AAA batteries, which is another 1 ounce. Of course we want spares for these, so here we have about 5 ounces for all of these batteries.
Combine these three battery types together for these devices including spare batteries and we have a whopping 15 ounces of battery weight! That is nearly a pound just for batteries. In BOB land, that kind of weight is insane to add to your pack. If we were using an emergency radio as well, it would be even worse.
Now, what if we instead chose all of our gear to work off of AA batteries? Let’s use the same walkie talkies that require 6 AA batteries to operate. We can also select a single AA flashlight and a single AA headlamp.
The spare set that we have for the walkie talkies, which is 6 AA batteries could also be used as spares to power our flashlight and headlamp. Adding it all up (I count 14 AA batteries total), this scheme gives us a total of 12 ounces of battery weight. That is a savings of 3 ounces (0.2 pounds) by just being smart with our battery plan. It also gives us a much better pool of backup batteries. If you have multiple family members, the savings on spare batteries can really start stacking up.
Conclusion
It’s clear that battery and device selection is one of the best ways to remove wasted weight out of your bug out bag. Ounces count big time. As we discussed, if you blindly choose your electronics and they happen to have different battery types, then you will have some wasted weight in your pack.
The Best Battery Strategy here is to select your most important electronic device first, and ideally select one that runs on AA or AAA batteries, which will give you the best chance to be consistent across your other electronics.
It’s much easier to select flashlights and headlamps in either the AA or AAA battery variety. If you do this well, you have the opportunity to save at least 3 ounces or more as seen from our gear experiment.
If you have already built your BOB, then give your battery plan another look. It just might be a great way to shave off some much needed weight, while offering you a much better pool of backup batteries.
About the Author
Tom Sheppard spends a lot of his free time prepping. He also enjoys camping out in North Texas. With his technical background, Tom does a lot of tinkering with gear. He often shares his knowledge with survival articles at Trek Warrior.
Simple as they may look, binoculars are very useful for any outdoor adventure. They are especially a must-have for hunters and bird-watchers who need to be able to see clearer and farther in the wild. Picking the perfect binoculars is not as easy as finding the shirt that fits, though. Several things have to be carefully considered to ensure that your chosen binoculars fit your needs.
If you’re on the hunt for a new pair of binoculars for your outdoor recreational activities, here are six tips to help you decide on the best binoculars to buy:
1. Select Binoculars Made Specifically for Your Usual Activities
While all binoculars may look the same, some have features that others do not. There are those that are made specifically for bird watching, hunting in the forest, spectator sports, astronomy, marine activities, or general outdoor activities. As you check your options, your main consideration must be the kind of activities you will be using the binoculars for.
2. Choose the Right Magnification
Binoculars come in different magnification ranges. The greater the magnification is, the more powerful the binoculars are—though this does not mean they are always better.
The magnification affects the field of view and stability when you are using binoculars. Low magnification of 8 or lower offers better stability and wider field of view (meaning, you can see more objects on the frame). On the other hand, with a magnification of 10 or higher, you will get a closer view, a narrow field of view, and jarring motion on the image. In most cases, it is more practical to go with low-magnification binoculars because they are easier to hold steady. But if a higher magnification type suits your needs better, you will have to use a tripod to keep yours steady while using them.
3. Examine Image Quality
You will be investing in an extremely important tool for your outdoor adventures, so you better check the image quality of the binoculars to make sure you get value for your money. Pay attention to the crispness and clarity of the image that you see as you peek through the optics.
4. Consider Your Eye Relief
A lot of binoculars have eyecups that can aid people with eyeglasses and ensure their comfort while using them. If you are wearing specs, look for binoculars that offer eye relief of 11mm or higher. Get binoculars with durable and multi-adjusted eyecups so that you can see through clearly, without any parts blocking your sight.
5. Assess the Binoculars’ Weight
Binoculars can be quite heavy, and the really heavy ones can wear your neck or shoulder down. The best binoculars are those you can easily carry along during those long walks, hikes, and camping adventures. Most people find it bearable to carry a 35-ounce binocular. But then again, try on your binocular choices to check they are easy and comfortable to lug around with.
6. Review Other Features and Warranties
The field of view and focus should be on your list of considerations as well. Check every single detail that makes up your prospective binoculars. Check its durability, waterproofing, and even the warranty. A lot of companies offer a great package of warranty. It is great that you know how to take care of your binoculars, but sometimes, you might need their services, too.
Conclusion
Binoculars are an important investment for any outdoor enthusiast. They make for a better hunting and bird-watching experience (or whatever activities you like) while you are on the field. Take the time to thoroughly check the choices available before you decide on the best binoculars for your needs.
The Glock 26 pistol comes with ten round magazines that will expand to as much as 12 rounds with floor plates.
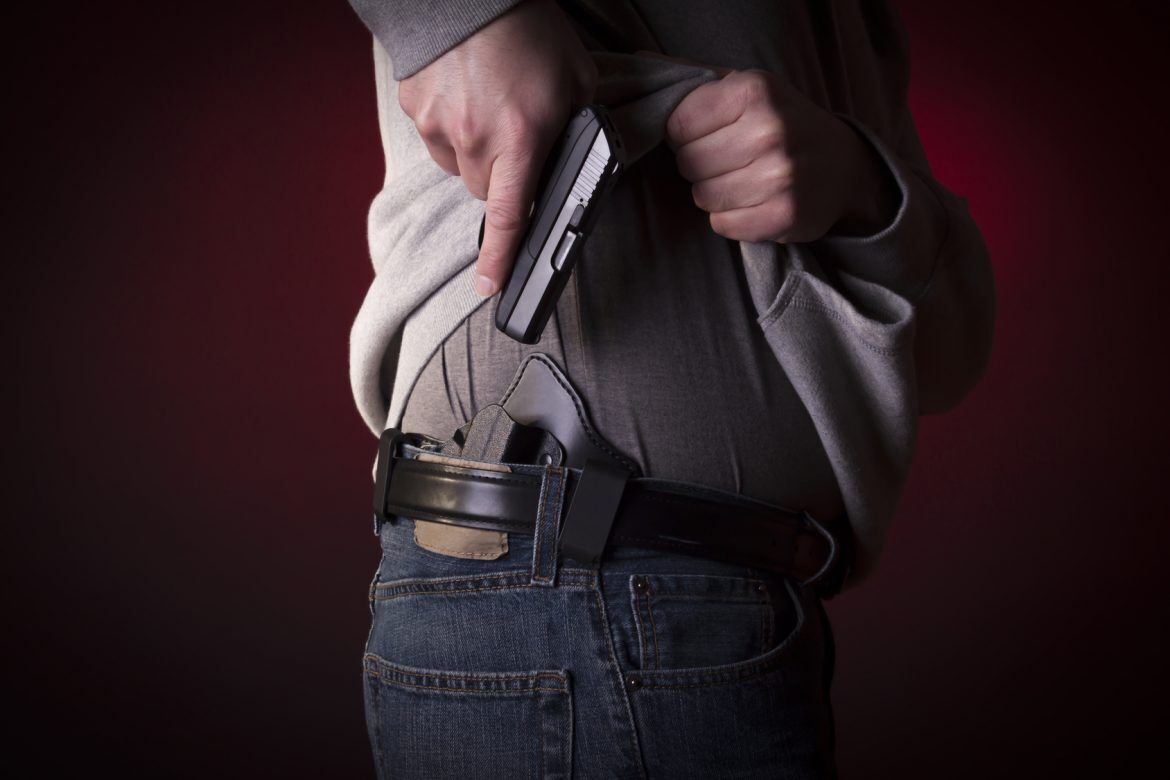
If this is the type of weapon you own or have purchased, you’re likely looking for a G26 holster.
But what type of G26 holster is right for you?
If you want to protect yourself with a Glock 26 pistol but you also need an easy way to carry the weapon, keep reading!
Below you will find the top three G26 holsters along with the benefits and disadvantages of each.
Concealment Express G26 Holster
The Concealment Express G26 holster is a great option because it can also fit a number of other pistols including the Glock 27 and 33. You won’t need to buy other holsters since it can adjust to different types of pistols.
Also, this holster is easy to conceal. The only part still visible when wearing the holster is the retaining clip.
If you’re worried about being out in the rain and damaging your Glock, fear not! The Concealment Express G26 holster includes moisture protection. The Kydex material used to create the holster protects your weapon from water damage.
However, one disadvantage of this model is that it can stick to the skin if you’re outside on a hot day.
Galco KT224B Kingtuk Holster
One of the biggest advantages of the Galco holster is that it can hold many different Glock models including the G26 pistol. If you have other Glock models, you’ll be glad you went with the Galco holster.
It can support the Glock models 17,19,22,23,26,27,31,32,and 33. Also, the Galco holster is made from better materials than other G26 holsters out on the market.
The soft part of the holster is made from leather while the hard parts are created from Kydex, which is a hard plastic that’s difficult to break.
Another great advantage of this holster is its customization. Depending on the size of your belt, this holster can be adjusted to multiple heights and angles.
This holster can support a belt of nearly two inches. However, one negative is that it makes it more difficult to tuck in your shirt.
Pro Carry HD Gun Holster
If you like a G26 holster that can adjust to multiple other models, this is another great choice for you! The Pro Carry HD gun holster can hold the Glock models 17, 19, 20, 21, 22, 23, 26, 27, 29, 30, 31, and 32.
The way this holster was built allows it to hold so many models. The molded leather built allows for some flexibility while still remaining sturdy.
You can choose black or brown colors for this G26 holster. The holster also comes with a secure retaining clip and complete leather construction.
One negative, however, is that the gun holster is rather thick due to its built.
When considering the many options available on the market, you’ll find that the Glock 26 pistol has a variety of different accessories available varying from concealed carry to holsters that hold multiple Glock models.
Out of these three G26 holster options, which do you like the best and why?