I don’t know about you, but I am not made of money. While I am very worried about the economy, international affairs, Terrorism, and Mutant Zombie Bikers, I also have a wedding coming up, a leaky roof, a water heater that is on it is last legs, a sick dog, and TAXES.
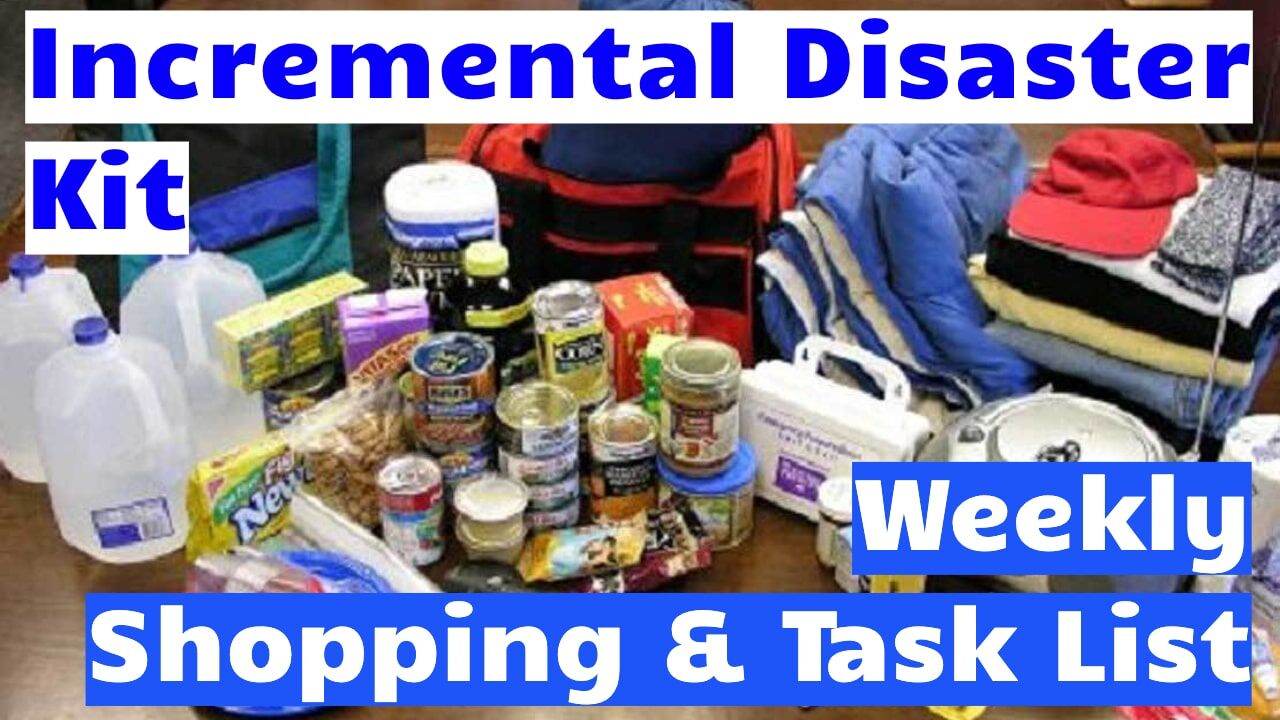
As much as I would like to be able to, I cannot drop $5000 on a made to order 2 person kit that contains a years supply of food and essential items. I have to prioritize my resources and make every dollar count. Because of this I have to make an incremental disaster kit over time.
I have said (as have many others) to store what you eat, and eat what you store. That makes rotation easy. It also makes it pretty painless to buy extra when everything is on sale.
Incremental Disaster Kit Lets You Work One Step at a Time
That being said, looking at the lists out there for 72 hour kits, or buying a pre-made kit can be a little intimidating. So I have decided to post a small list every week that will allow you to put aside a decent emergency preparation kit in about 5 months. The goal is to be as easy on you and your wallet as possible while helping you create a workable kit.
Once you have a cushion, you will find that it takes more and more mistakes and events to constitute an “emergency”. So the ultimate goal is to build piece of mind.
Below is a complete guide that used to be 21 separate posts. The concept is that if you buy a little each week by the end of 20 weeks you will have a incremental disaster kit and will have completed many activities that help better prepare your family.
You can print out this post and have a nice check list.
Week 1
On to the first weeks Incremental Disaster Kit list:
To Buy:
- 1 gallon water (for each person)
- Jar peanut butter
- Large can juice (for each person)
- Can meat (for each person)
- Hand-operated can opener
- Permanent marking pen
- Also, pet food, diapers, and baby food, if needed.
To Do:
- Find out what kinds of disasters can happen in your area.
- Date each perishable food item using marking pen.
Week 2
To Buy:
- Heavy cotton or hemp rope
- Duct tape
- 2 flashlights with batteries
- Matches in waterproof container
- A leash or carrier for your pet.
To Do:
- Complete a personal assessment of your needs and your resources for meeting your needs in a changed disaster environment.
Week 3
To Buy:
- 1 gallon water (for each person)
- A can meat (for each person)
- 1 can fruit (for each person)
- Feminine hygiene supplies
- Paper and pencil
- Map of the area
- Aspirin or non-aspirin pain reliever
- Laxative
- 1 gallon of water for each pet.
To Do:
- Create a personal support network who can help you identify and obtain the resources you will need to cope effectively with disaster.
Week 4
To Buy:
- Patch kit and can of seal-in-air product for the tires of mobility aids
- Signal flare
- Compass and Local Map
- Also, extra medications or prescriptions marked “emergency use.”
To Do:
- Develop a personal disaster plan.
- Give copies of the following lists to your network: emergency information list, medical information list, disability-related supplies and special equipment list, and personal disaster plan.
As you can see this weeks work is on mobility. The ability to “get out of Dodge” is an important part of any disaster plan. Maybe you don’t need to “bug out” but being able to get out to the store is also pretty darn important.
Week 5
To Buy:
- 1 gallon water (for each person)
- A can meat (for each person)
- 1 can fruit (for each person)
- A can vegetables (for each person)
- 2 rolls toilet paper
- Extra toothbrush
- Travel size toothpaste
Also, special food for special diets, if needed.
To Do:
- Make a floor plan of your home including primary escape routes.
- Identify safe places to go to in case of fire, earthquake, tornado, hurricane, and flood.
- Practice a fire drill, tornado drill, and earthquake drill with your network.
Week 6
To Buy:
- Sterile adhesive bandages in assorted sizes
- Safety pins
- Adhesive tape
- Latex gloves
- Sunscreen
- Gauze pads
- Sterile roller bandages
- Also, extra hearing aid batteries, if needed.
To Do
- Check with child’s day care center or school to find out about their disaster plans.
- Ask your local emergency management office if emergency transportation services are available in case of evacuation.
Knowing the disaster plans at your child’s school is essential. A recent freak snow storm here in Nashville illustrated the point. Metro schools stayed open as the roads began to freeze, and then they closed schools without notification causing some parents have no idea where their children were.
Week 7
To Buy:
- 1 gallon water (for each person)
- A can ready-to-eat soup (not concentrated) (for each person)
- 1 can fruit (for each person)
- A can vegetables (for each person)
- Sewing kit
- Disinfectant
- Also, extra plastic baby bottles, formula, and diapers, if needed.
To Do:
- Establish an out-of-town contact to call in case of emergency.
- Share this information with your network so they know whom to call.
- Make arrangements for your network to check on you immediately after an evacuation order or a disaster.
Week 8
To Buy:
- Scissors
- Tweezers
- Thermometer
- Liquid antibacterial hand soap
- Disposable hand wipes
- Needles
- Petroleum jelly or other lubricant
- 2 tongue blades
- Also, extra eyeglasses, if needed. Put in first aid kit.
To Do:
- Place a pair of sturdy shoes and a flashlight by your bed so they are handy in an emergency.
- If Blind, store a talking clock and one or more extra white canes.
- Additionally, if Blind, mark your disaster supplies in braille or with fluorescent tape.
Don’t forget medical items when filling out your disaster kit.
Week 9
To Buy:
- 1 can ready-to-eat soup (for each person)
- Liquid dish soap
- Household chlorine bleach
- 1 box heavy-duty garbage bags with ties
- Antacid (for stomach upset)
- Also, saline solution and a contact lens case, if needed.
To Do:
- Familiarize your network with any areas on your body where you have reduced sensation.
- Choose a signal with your network that indicates you are okay and have left the disaster site.
- If you have a communication disability, store a word or letter board in your disaster supplies kit.
This week adds sanitation items to your kit. Disease follows disaster. Being able to clean and disinfect is essential to surviving a large scale disaster.
Week 10
To Buy:
- Waterproof portable plastic container (with lid) for important papers
- Battery-powered radio
- Wrench(es) needed to turn off utilities
To Do:
- Take your network on a field trip to the gas meter and water meter shutoffs. Discuss when it is appropriate to turn off utilities.
- Attach a wrench next to the cutoff valve of each utility meter so it will be there when needed.
- Make photocopies of important papers and store safely.
Week 11
To Buy:
- 1 large can juice (for each person)
- Large plastic food bags
- 1 box quick energy snacks
- 3 rolls paper towels
- Medicine dropper
To Do:
- Store a roll of quarters for emergency phone calls.
- Go on a hunt with your family to find a pay phone that is close to your home.
- Test your smoke detector(s). Replace the battery in each detector that does not work.
Easy to store food and easily stored liquid makes a kit. I like storing juice in addition to water because of the quick energy and vitamins found in juices. Just be sure not to store only juice in your disaster kit. You need water also.
Week 12
Buy:
- Extra harness, leash, ID tags, and food for your service animal and/or pets
- Litter/pan
- Extra water
Veterinarian
- Obtain current vaccinations and medical records of your animal(s)
- Medications
To Do:
- Develop a pet care plan in case of disaster.
- Make photocopies of all vaccination records and put them in your disaster supplies kit.
- Put extra animal harness, leash, and identification tag(s) in your disaster supplies kit.
Week 13
Buy:
- Whistle
- Pliers
- Screwdriver
- Hammer
- Perforated metal tape (sometimes called plumber’s tape or strap iron)
- Crow bar
To Do:
- Take a first aid/CPR class from your local Red Cross.
- Arrange to have your water heater strapped to wall studs using perforated metal tape.
This week’s disaster kit work is on repair items and tools to prevent issues and repair them.
Week 14
To Buy:
- 1 can fruit (for each person)
- A can meat (for each person)
- 1 can vegetables (for each person)
- Box of plastic eating utensils
- 1 package paper
- Cups
To Do:
- Make sure your network and neighbors know what help you may need in an emergency and how best to assist.
- Practice using alternate methods of evacuation with your network.
Week 15
To Buy:
- Extra flashlight batteries
- Extra battery for portable radio
- Assorted nails
- Wood screws
- Labels for your equipment and supplies
To Do:
- Make arrangements to bolt bookcases and cabinets to wall studs.
- Label equipment and attach instruction cards.
Week 16
To Buy:
- 1 can meat (for each person)
- A can vegetables (for each person)
- Box facial tissue
- 1 box quick energy snacks
- Dried fruit/nuts
To Do:
- Find out if you have a neighborhood safety organization and join it.
- Develop a disaster supplies kit for your car or van.
Week 17
Buy:
- 1 box graham crackers
- Assorted plastic containers with lids
- Dry cereal
- Anti-diarrhea medication
- Rubbing alcohol
- Antiseptic
- Syrup of ipecac and activated charcoal
To Do:
- Arrange for a friend or neighbor to help your children if you are not able to respond or are at work.
Week 18
To Buy:
- “Child proof” latches or other fasteners for your cupboards
- Double-sided tape or hook-and-loop fasteners (such as Velcro® ) to secure moveable objects
- Plastic bucket with tight lid
- Roll of plastic sheeting
To Do:
- Arrange for someone to install latches on cupboards and secure moveable objects.
- Put away a blanket or sleeping bag for each household member.
Week 19
To Buy:
- 1 box quick-energy snacks
- Comfort foods (such as cookies, candy bars)
- Plastic wrap
- Aluminum foil
- Also denture care items, if needed.
To Do:
- Review your insurance coverage with your agent to be sure you are covered for the disasters that may occur in your area. Obtain additional coverage, as needed.
- Purchase and have installed an emergency escape ladder for upper story windows, if needed.
Week 20
To Buy:
- Camping or utility knife
- Work gloves
- Safety goggles
- Disposable dust masks
- 2 Formatted SD Cards or USB Flash-drives
Specialty Store
- Get an extra battery for motorized mobility aids
To Do:
- Use a video camera to tape the contents of your home for insurance purposes.
- Make a copy of the video and send to an out-of-town friend or family member
- Find out about your workplace disaster plan

