How to Build a Snow Igloo With Your Kid


Snow Igloosnow igloo 3snow igloo 2

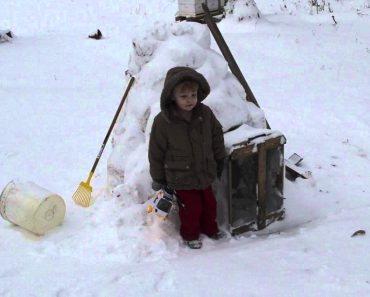
Since this was the first time in a LONG time that I had a job that did not find it essential to be in during disasters my family decided to have fun in the snow.

The easiest way to do that and still secretly teach WT some skills was to build a snow igloo.

Snow Igloo
Buy at Amazon

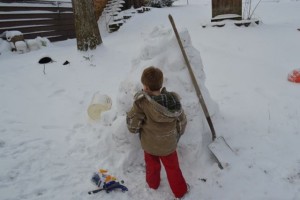
It did not take much to build besides a shovel, a 5 gallon bucket, and a lot of snow.  Basically all we did was shovel snow into a bucket and lightly tamp it down just like making a sandcastle.

We then upended the bucket and let the snow block slide out.

We just used the blocks to form a toddle appropriate circle and then made a new row placing the new blocks in the center of 2 bottom blocks – just like doing any masonry work.

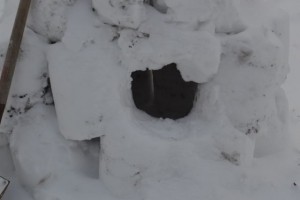
The trick was to slightly bow inward as we worked so that the blocks formed a roof.  It was not that doing that was hard, but WT wanted to kick at his fort because when the block broke he had ready made snowballs.

We used forms for the doors and windows and placed snow around the forms – removing them when the igloo was finished.

In trouble areas I packed in loose snow and rubber it with my hand to smooth it and slightly melt it so ice held the blocks together.

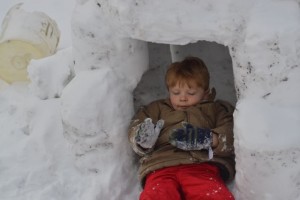
All in all we had a lot of fun and I think the boy learned something cool.

How to Make a Mini Tabasco Oil Lamp


DIY: Mini Tabasco Oil Lamp
Buy at Amazon

We have done oil lamps before, but today we are going to make a Mini Tabasco Oil Lamp.

If you have one of those mini Tabasco bottles – (in some MREs or you can purchase below) its easy to turn it into a lamp.

Use the bottle until it’s empty and then clean it out.

Next, fill ¾ full with oil or lamp fuel, and then either trim down a conventional wick, or insert a pulled out and tightly rolled cotton ball or cotton roving.

The natural fiber will pull out the oil and allow you to have a very lightweight candle that is probably smaller than your lighter.

How to Make a Stump Remover Smoke Bomb

Homemade Smoke Bomb
Buy at Amazon

It is pretty easy to make a homemade smoke bomb using potassium nitrate and sugar.  The thing is, that this mix can be used to make black powder, smoke, or rocket fuel so be careful and mind your mix.

Potassium nitrate can be ordered through online firework supply houses, and pure chemicals are always best, but I find that if you check the label, some stump remover is 99% potassium nitrate.

Once you have the nitrate, the next thing is to get some common sane sugar.

The potassium nitrate is the oxidizer and the sugar provides the fuel.

The proper smoke mix using these two chemicals is 60 grams of the oxidizer and 40 grams of the fuel.

Mix in a non stick pot that you will NEVER use for food again.  Mix with a wooden spoon and keep it on low heat.  You do not want this to catch fire on your stove. (You are warned).

Mix constantly and do not walk away.  When it melts and turns to a light brown peanut butter consistency and look then take it off the heat and pack into your form.

This is hot so be careful – cardboard toilet tissue rolls are easiest, but I used something smaller with the idea to embed in a soda can mortar round later.

I also took some and just rolled them into balls and stuck in a fuse.

Gates of Fire

Gates of Fire
Click the Picture to Purchase

Gates of Fire is a national bestseller!

At Thermopylae, a rocky mountain pass in northern Greece, the feared and admired Spartan soldiers stood three hundred strong. Theirs was a suicide mission, to hold the pass against the invading millions of the mighty Persian army.

Day after bloody day they withstood the terrible onslaught, buying time for the Greeks to rally their forces.

Born into a cult of spiritual courage, physical endurance, and unmatched battle skill, the Spartans would be remembered for the greatest military stand in history–one that would not end until the rocks were awash with blood, leaving only one gravely injured Spartan squire to tell the tale….

The gates of fire is a book worth reading.  If possible it is also worth hearing the spoken version of the text.

The story of the 300 Spartans has captured the hearts of Warriors throughout the ages.  What a few men can do when they have the courage and will to dare is unimaginable.

It was because of these 300 men that Greece was not conquered by Persia.  Imagine if Greece was not free but part of Iran.  How would that have impacted the Iran/Iraq war?  Our modern life?  The impacts of this battle are immeasurable.

Mason Lid Tart

Recipe: Mason Lid Tart

Mason Lid Tart

52 Unique Techniques for Stocking Food for Prepper
Buy at Amazon

Getting into canning means you end up with a lot of Mason jar lids, being a DIY orientated person causes me to look for solutions to problems using materials at hand.

Now to be honest, making tarts is not a huge life problem for me, but after the tuna can cake I thought I would try a mason lid tart.

I enjoyed making single serve desserts, and with my wife wanting me to “get healthy” she wants me to control my portions.

This recipe is adapted from a 10 inch tart shell recipe, so it will make 15 or tarts – if you leave them in the lid for sturdiness, and wrap them they make good gifts.

Ingredients

  • 2 cups all-purpose flour
  • 1/2 teaspoon kosher salt
  • 1 tablespoon sugar
  • 12 tablespoons (1 1/2 sticks) cold unsalted butter, diced
  • 1/2 cup ice water
  • Pear Pie Filling (recipe below)

Procedure

  1. Place the flour, salt, and sugar in a bowl and mix to combine.
  2. Add the butter and mix, until the butter is in small bits the size of peas.
  3. While mixing slowly pour the ice water into the bowl and mix until the dough starts to come together. .
  4. Dump onto a floured board and knead quickly into a ball.
  5. Wrap in plastic and refrigerate for at least 1 hour.
  6. Preheat the oven to 400 degrees F.
  7. Spray your mason jar lids with nonstick spray.
  8. Pull clumps of dough (about 2 tbsp for each mini tart) from the large dough ball and smash them into each lid.
  9. Push the dough so it covers the bottom and sides of each lid.
  10. Refrigerate the formed shells while you prepare the filling.
  11. Set the mason jars on a cookie sheet
  12. Bake for 45 minutes to 1 hour, until the pastry is browned and the pie filling starts to set.
  13. Rotate the pan once during cooking. If the pastry puffs up in one area, cut a little slit with a knife to let the air out.
  14. Loosen the tart with a metal spatula so it doesn’t stick to the edge of the lid. Push the bottom of the lid up, so the ring falls around your wrist.
  15. Allow to cool and serve warm or at room temperature.

Filling

Makes about 28 ounces, enough for a regular size pie

Ingredients

  • 5 cups diced pears (I kept the skin on)
  • 1 cup sugar
  • 1 tsp cinnamon
  • 2 tbsp flour
  • 1/2 a lemon juiced

Procedure

  1. Toss all the ingredients into a large pot, mix until the flour is distributed evenly.
  2. Allow to sit for about 30 minutes.
  3. Turn the heat on medium-high. Stir occasionally with a wooden spoon.
  4. Bring mixture to a boil and lower to low/medium heat. Stir occasionally.
  5. Keep over the heat for about 30 minutes, until it begins to thicken.
  6. Pour into a container, cool, then store in the fridge until ready to use.