Ready Made Resources Homestead Visit

Site Review: Ready Made Resources Homestead
Buy at Amazon

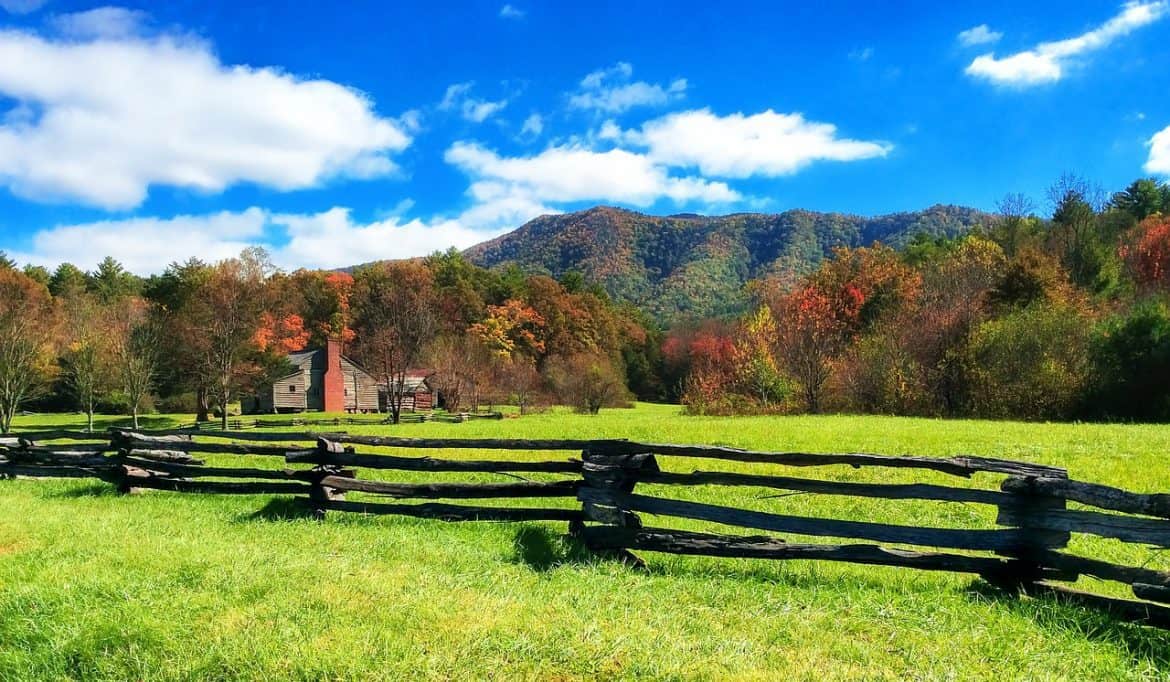
As you might have guessed, I like to combine things and get more than one use out of anything. So when I was out in the Smoky Mountains for a recent training class I decided to stop by at Ready Made Resources and see their store. I have no commercial connection with them, but I have ordered from them in the past, and really like their products. When I drove down I did not anticipate what I would find. I figured they would have a nice little storefront and have a couple clerks I could talk to. Let me tell you, I was very surprised at what I found.These guys are outside of Soddy Daisy, which is a little town in-between Knoxville and Chattanooga, and it is RURAL. As I drove through some very pretty country the directions took me straight to their door, but I was a little concerned that I was not at the right place as their was no sign, just a nice fenced driveway and some very nice looking horses.

When I arrived, I was met by the owner who graciously let me have the run of the place as I looked around the store. He apologized for the lack of space, as the building was jam packed with cases of mountain house food, books, and tons of preparedness supplies. He told me that most everything he had was being shipped out, and that his priority was getting the gear shipped out to the consumer as soon as it was ordered.

Being a book lover, I really spent some time looking at his selection of books, we share a lot of the same books, but he had many that are on my wish list, and a few I had never heard about. I bought a bean recipe book that is the genesis of the tofu project I have planned for this weekend. Until my visit, I never realized you could use bean flour in bread (more on that to come)…

When they weren’t packing and shipping orders the staff was very friendly and even though I had to be in the way, they took the time to converse with me and make me feel welcome.

But besides all of that, what impressed me the most was the fact that this was not a store filled with the typical businessman. They USE the equipment they sell. From the rain barrel attached to the gutters, to the solar on the roof. Ready Made Resources is an actual working homestead. That is really important to me, because before I spend my money I want to make sure that I am getting good equipment because I may one day stake my life on its quality. They can do more than just tell you what shelf something’s on, they can help you find what will work best for you.

I recommend you looking at their website, not only for their professionalism, but because anyone that organically raises Chickens, Geese, Ducks, Goats, and Horses, as well as using solar and wind power on a working homestead is someone you definitely want to support.

90 amp Harbor Freight Welder Review


Gear Review: 90 amp Harbor Freight Welder
Not the same welder (This one is even cheaper)

This review may be a little controversial – it all depends on if a professional welder reads it…

I want to learn to weld, it’s on my “hope I never kick the bucket” list. You know skills I wish I had, but if I had them all I would be 176 years old simply due to the time it takes to learn everything. I also have the unfortunate experience of working somewhat close to a harbor freight store. Due to the cost I tend to buy a lot of consumables there – media for my bullet tumbler comes to mind. I tend to stay away from their durable goods though because I am concerned about quality, but something about a $100 welder just called my name.

I have the willpower to say no when something calls my name once, but this darn thing was persistent, it just kept calling. Finally after getting some overtime from working the last TN disaster I bought it. I bought it after looking at hundreds of reviews that says this thing is junk. BUT, all of these reviews were from professionals that use big name welders for commercial purposes. The lowest cost welder these guys were recommending cost thousands of dollars and with capabilities far beyond my scope of use.

Now, that’s not to say I don’t WANT some of these great welders, just that even if I had the cash to spend on one, my money would be better served buying tools I actually need.

As one review said “Anyone who does fabrication and builds for pay simply needs the ability to lay heavy bead, with long duty cycles. If you were a factory mechanic, and spun wrenches for a living, you wouldn’t use 99 cent store sockets for long term. A full-time logger doesn’t use $100 kmart chainsaws. For the homeowner trimming one tree once a year, it works. You don’t need a $700 Husqvarna ‘Rancher’ chainsaw with a 20+ inch bar for that kind of like duty. Not that it wouldn’t be nice to own….”

I need something simple, and cheap that lets me weld up to 3/8 inch thick steel. And this welder does that.

Out of the box the Harbor Freight Welder comes with one 2 lb roll of flux core wire, a combo brush/slag hammer, and a face shield. I bought some heavy welder gloves when I bought it, and picked up (but set down) a auto darkening helmet. Next time I go back to the store I am going to pick it back up, as not being able to see until the spark is stuck is a little scary for me.

It did take some minor assembly to get it ready, but it took less than 10 minutes and the hardest part was assembling the cheap welding face shield. The instructions were not that hard to follow especially considering they were written overseas.

I tried to weld two things one was a cheap china made charcoal grill that had a leg knocked off during our April storms (it stuck, but I melted through some sheet metal), the other was a set of crucible tongs I made. Once again it made a very ugly weld, but in fairness it was probably more my lack of skill than the limitations of the welder.

I can hit the target with a cheap pistol, but my group size is tighter with a better quality pistol, but when I started shooting I did not know enough to tell the difference.

I have read that with a better quality torch tip and flux core wire it improves its weld capabilities. But it will sputter a lot and cause lots of little balls of slag to be thrown all over your work.

Is it worth it? I say yes if you’re going to use it irregularly and can get it for less than $100. My mind may change after I gain some skills – especially after I make that battery powered stick welder and the alternator welder I have on the project list, but who knows.

Watch the video below to see what it does out of the box, but be warned I don’t know much (anything) about actually welding…

BTW – Constructive comments about how I’m doing it are much appreciated…


DIY Solar Cooker


DIY Solar Cooker
Buy at Amazon

From doing research into solar applications I have come to the personal conclusion that solar energy is misapplied in many instances. Our sun is an awesome source of energy, but all too often we use it to create electricity we store to make heat or light later. While this has some really useful applications, each conversion looses some of the original energy. If we focus some attention on directly using the solar energy we get more “bang for our buck.”

There is a really good book called Sunshine To Dollars that has some really cool projects that give you an immediate return on you investment of time and energy.

So after reading this book and others like it, I decided to make a DIY Solar Cooker. I resisted the urge to make a huge solar oven out of a new fiberglass tub my old tenants inexplicably left in my basement. What I decided to do was to build a small wooden solar box cooker. It would have been easier and faster to build one of the many cardboard cookers that places like Build it Solar shows, but I figured that since the technology was pretty well developed this was not an experiment, and I should probably invest the energy into making a more robust and permanent cooker that I could use rather than a throwaway model for a proof of concept.

I decided on building one modeled after a cooker I saw on youtube. The user supergokuel had a really cool 2 part video, so I basically just modified his idea.

I could not find any replacement glass sheets at the local hardware store, but I did find a sheet of Optix brand clear plastic that would fit very nicely on the box I was trying to make.

The bigger your cooker the more efficient it will be, and the larger the pots you can use, so my 1×2 sheet of plastic will work well. I also bought some screws, hinges, and a 4×8 sheet of exterior grade plywood. The black paint and caulking I already had.

Basically I just cut two side pieces in a rectangle, and then cut a 45° angle down one side. I made the rectangle wide enough so that the angled end would be as long as the shorter side of the plastic. (I know this is confusing, this video helps).

The ends and bottom of the oven are cut to match the side pieces and are screwed together to make a box. The top is simply the clear plastic sheet of Optic attached to the box by hinges.

I painted the box black to absorb heat, and when I get more reflective film I plan on mirroring the inside of the box to help generate more heat. Larger box type collectors can get hot enough to bake or roast meat – upwards of 220°

This is a pretty simple project using hand tools and a power saw, but will allow you to cook many types of foods without electricity. For us disaster conscious types, the ability to bake and cook foods outdoors on something other than a grill or campfire has some serious advantages. For those that choose to reduce the use of resources – whether for ecological or self-reliant reasons, this is also a very useful project.

This is a project that I would highly recommend you duplicate of modify for your own usage.


How to Cast Lead Bullets


Casting Lead Bullets
Buy at Amazon

First of all, let me just say, I am no expert at casting lead bullets and this article is only a basic guide to get started and to show you that this is do-able for the lay person. Please visit forums like cast boolits and read manuals like Lee’s Modern Reloading, and the Lyman Cast Bullet Handbook before you get too involved in this hobby.

Realize that man has been casting lead for thousands of years.  Our forefathers one several wars casting their bullets over a fire using nothing but lead, a spoon, and a mold.  Understand that this is something almost everyone can do.

Factor in the dangers inherent to molten metal, the toxicity of lead, and the engineering problems of casting for modern firearms with their higher tolerances and pressures.  Understand that there are steps you should take to ensure a safe experience and a good finished product.

First thing after doing your research is to find some lead. It is getting harder to find.  In my experience when I find some its free (or cheap) and there is usually at least 100 pounds.

The way I get my lead is either through asking on sites like craigslist, or driving around to tire shops. Some smaller tire shops will give you a bucket full (bring your own bucket) or sell it to you for $20. I know many people that just buy their lead at a reloading store or for about a buck a pound on eBay.

Wheel weights are about 95% lead, .5% tin, and about 5% antimony.  The tin and antimony are added to the lead in wheel weights to help the lead flow and cast a good weight.  I find this ratio of lead to be soft enough to make good pistol bullets without alloying any additional metals to the mix.  The problem with lead wheel weights is that they are not always lead.

A lot of modern weights are made of zinc. Zinc makes casting a nightmare as it makes the lead not flow as easily which makes your bullet mold not fill out properly.

You can do an internet search on this problem, and castboolits has lots of posts on this but:

You can ID zinc weights by hardness, sound, label, or melting point.

  • If you drop zinc on the ground it makes a ringing noise and lead makes a thud.
  • Most zinc weights are actually labeled as “Zn”.
  • I have also noticed that the zinc weights look cleaner than lead, but that may not happen all the time.
  • Zinc has a higher melting point than lead.  If any make it past the sorting process you have a second chance to pull them out before they melt.
    • Zinc melts at 787º F, Lead melts at 621ºF so it helps to keep your pot just hot enough to melt the lead but not enough to melt the zinc.

The way I do it is in steps.

Some years I go on a binge and drive around to every mom and pop tire shop I can find until I get 5 or 6 buckets of wheel weights.  Each bucket is about 75 pounds. I then take a Saturday and dig out my turkey fryer and a cast iron pot.  I only use that pot for lead.  Additionally, I always keep some solid lead in it to make sure its ONLY used for this purpose.  Next I sort and melt all the wheel weights.

Wear gloves as you would not believe all the extra junk that gets thrown in here.  You will find tobacco spit, razor blades, and all types little bits and pieces of all sorts of nastiness…

Do this melt outside (melt all lead outside).  Don’t breathe the smoke and vapor as lead is toxic to your body. Once the pot is full of nice molten lead, I will break off a piece of candle to flux off the oxides that form as scum on the top of the pot. I let that burn off.  Next I ladle the molten metal into my ingot molds.

You don’t have to have special molds.  I use an old muffin pan.  Just ensure that you never use it for anything else besides lead.

I have more than one ingot mold so I can ladle one as the other cools.

When I cast lead I keep a metal bucket nearby.  This is to collect all the steel wheel clips and other junk that comes off the lead. The scrap dealer gets this bucket.

By law it is not hazmat until it’s at the end of its life.  Consequently, as long as its being recycled it is not hazardous waste. If you get caught throwing this junk away you can get hit with HUGE fines.  To learn more check out the Comprehensive Environmental Response, Compensation, and Liability Act also known as the superfund law.

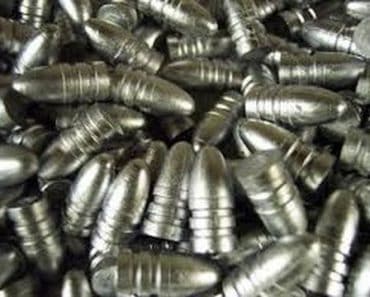
Once I have a couple hundred ingots I have enough to cast bullets for the year.

Personally I use Lee molds. I recommend Lee equipment (as long as its metal) as its cheaper and of good quality.  Some of their stuff (like the Shotshell loaders) take some handiness to get to work perfectly.  However, I have nothing but good things to say about their molds.

Since their bullet molds are aluminum, you don’t have to coat them in oil after use to keep them from rusting.  This means they are really easy to work with.

However, since they are aluminum they aren’t durable enough to use professionally.  This means dont use them to cast thousands of rounds a month. I cast several thousand rounds a year and have done so for several years though and have not had any problems.

The Process is Simple.

Melt your ingots. I use an electric bottom pour pot, but you can use almost anything as a heat source if you have a ladle.

Preheat your mold. I keep mine on the edge of the pot so it gets warm with the lead. If the mold is not hot enough, the lead will solidify as it enters the mold and will not fully form the bullet.

Lube your mold at the pins and moving surfaces,  Don’t lube the mating surfaces.  Ensure you use lube not alox.

This next part takes practice, and is best done than read about.

Fill the mold with melted lead. I find my first couple attempts each time never seem to fill completely.  However, as the molds heat up I quickly get back into the game. I find that if I tilt the mold SLIGHTLY and start at the far end of a 6 mold block and pour the lead at the chamfer at the top of the sprue plate rather than directly into the hole it tends to fill better. As I fill each bullet mold I make sure to leave a little puddle of lead at the top of the sprue.  This is because the lead will shrink as it cools.  The puddle gives the bullet some additional lead to pull from as this happens.

As the lead cools and solidifies, but before it becomes totally solid I take a hardwood stick (wood never metal) and give a good sharp wack to the sprue plate.  This cuts off the sprue of metal and gives a flat base to the bullet.

If I am casting blackpowder bullets that need to be really soft.  I then open the mold and dump them out onto a slightly damp towel folded up nice and thick.

If your casting bullets for centerfire pistols and especially rifles (that will also require gas checks) the bullets need to be harder.  In that case, I drop them into a 5 gallon bucket of water and the sudden cooling helps harden them.

Here is a word of warning.

If we ever meet you can see the scar on my hand and the little shiny bits on my boots. Never, ever, EVER allow anything wet or moist near your lead pot. If you do it WILL explode. Steam is created in the pot faster than it can be released.  A single raindrop will cause a huge bubble of molten lead to coat what ever is closest to the pot. (I know this as I gilded my hand once… luckily only the thickest glob of lead burned me sever enough to scar.)

If you drop a bad bullet into the bucket, or damp towel then pull it out and save it to melt the next time. You can and should re-melt your sprue plates in your pot as they are hot and will melt quickly.

Like I said before, I use Lee’s molds, and mine don’t require sizing, so I am not going to get into that in this article, but depending on the mold you may need to lubricate and size your bullet with a special die for your reloading press. I will do an article on that later if needed.
Casting bullets is not hard, its kinda fun, but you need to be cautious and pay attention to detail. If you are reloading to save money, then this is a nice skill to pick up, but if your reloading in preparation for a time you cannot buy commercial ammunition, then this is an essential skill to put in your tool box.