The title sounds pretty confusing, shoot your gun after cleaning? Wouldn’t that negate the entire cleaning?
The idea is, that after take apart your gun to clean it, you have to put it back together and perform a function check, but since you don’t actually fire it, you aren’t 100% sure that the gun works.
In several law enforcement courses I have taken I have heard anecdotal stories of an unnamed police officer that has some essential piece inside their pistol break during cleaning at the annual firearm re-qualification, carried the inoperable firearm all year and never knew it did not work until the next year’s range.
I cannot verify the story. It sounds like a 1 in a million stroke of bad luck. However, what can it hurt to shoot your gun after cleaning it?
Especially since many glock owners take the marketing hype of glock seriously and never clean their firearms. Seriously, a single round in a clean gun in modern times won’t impact anything – we aren’t talking about corrosive ammo in a WWII bolt gun.
I do think this is a little on the high odds side of things, BUT – getting in a gunfight is also on the high odds against side of things and I still prepare for it.
I bought this $12 adapter from amazon because I needed to figure out how to mount a camera to a scope. The scope I wanted to use immediately was my son’s microscope, but additionally I wanted to be able to put it on a bb gun as well as his .22lr cricket.
I doubt this cheap adapter will work on anything larger than .22lr, However, I have not tried it.
The adapter was too large to fit on my son’s microscope without adaptation. Instead of doing anything permanent, I simply took painter’s tape and wrapped it around the objective tube. This was to increase its diameter.
I went slow so I could keep the tape in the same area. This ensured a smooth wrap and no wrinkles.
It was not hard, and did not take long. However, it was tedious.
The do make commercial adapters and lenses specially for microscopes. Unfortunately, they cost several hundred dollars and are for specific cameras and microscopes.
I wanted something universal and cheap so I had to be okay with a less elegant solution.
Once I had done his scope, I went back to try it on his rifle.
There are three different adjustments, and none are very fine. It takes a minute to get everything lined up and the screws tightened.
Actually, the installation part is a true PITA. Getting the reticle level and lined up on the scope to reduce parallax and allow the bolt to be thrown takes patience.
It also disallows the use of the actual scope when completed, but this setup allows me to watch over his shoulder and see what he sees. With the phone set to video, it also can be used to go back and look at trigger control and follow through.
For the price I am pretty satisfied with the setup, and if he gets into using it I may buy a better setup – something specific to his rifle scope.
I’m no lawyer, so check this yourself. My understanding is that as long as you can legally own a rifle you can make one for your own use. But you can’t build them with the intent to resale. Additionally, the firearm you build must meet the legal guidelines in your area. (i.e no 3 inch anti-aircraft guns).
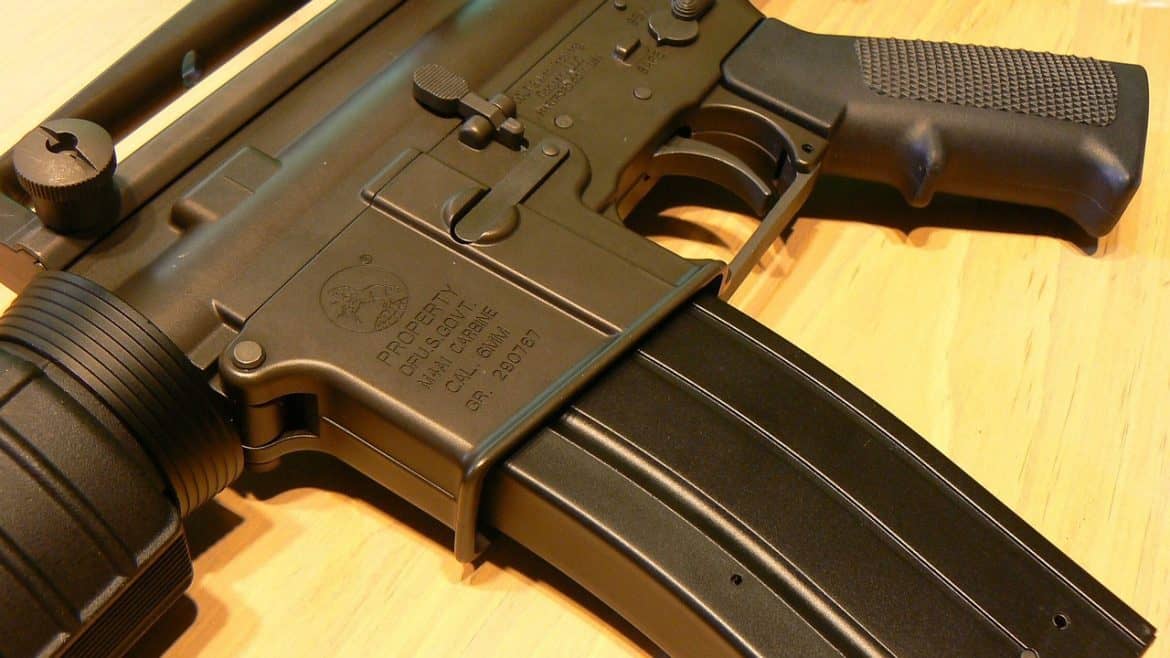
If you can do so legally, building your own rifle is a very worthwhile experience. In this post we will show how we completed our own AR-15 lower build for much cheaper than what the same rifle would have cost already assembled.
When I bought my stripped AR-15 Lower Receiver, I had to give my $10 background check and thumbprint just like I was buying a functional firearm. According to BATFE, a receiver is considered a firearm even if it is is not functional. All the other parts are just “accessories”.
This is the second AR-15 lower I have built. It took me less than an hour. I did not have any specialty tools to make it easier. I would say that this is a simple project if you have good instructions.
You Can get Good Information from Military Manuals
You can use the military technical manual (TM-9-1005-319-23&P) but remember its for M-16s so some of the fire control parts will look different because your rifle is semi-automatic. A simple search search on the internet for AR-15 construction guides will help. Also you can always buy a book on the AR-15 in your local bookstore.
TM 9-1005-249-14 is the operator manual for the M16 Rifle. Like the technical manual, it is not exactly the AR-15, but it is close enough to work
In our free downloads section I have a good amount of manuals and blueprints for the AR-15/M-16. I post them with the hope the manuals will help you. I suggest you visit AR-15.com and look in their forums as they have great step by step instructions.
Some Things Need to Be Done in Order
Some steps can be done in any order, and some pins can be installed from either side, but some steps need to be done in sequence, and certain pins need to be placed a specific way, so be sure you get a decent set of instructions and follow them.
I build my own lowers for two reasons, the first is cost. I save about 100 dollars (sometimes more) by DIYing them, but I also like the feeling of taking MY gun to the range. By putting one together you learn a lot about your rifle which makes troubleshooting and repair a lot easier.
I had to split up the video into two parts and seriously cut it for time, as youtube has a strict 10 minute video policy. Also for those that get torqued over someone calling a magazine a clip, there are several occasions where I misspoke a part name, you make me nervous….
It’s hard to describe the joyful feeling when you finally have the opportunity to enjoy yourself and pursue your shooting/hunting hobby. However, you need a proper scope that fits your needs and a scope that fits your gun; in other words, you need a top quality rifle scope that performs 100% without breaking your bank.
You will find so many rifle scopes out there being sold today, and you might wonder exactly how you are going to choose the perfect scope. That will all depend on what kind of gun you plan on shooting with, shooting you plan on doing, and what type of reticle you need/want.
Let’s browse through the fundamentals that you need to keep in mind when choosing your rifle scope and once you know the basic principles of how the rifle scope work, it will be easier for you to select the perfect scope that fits you the best. It is also important to get a scope designed for your rifle caliber. A rimfire scope won’t last on a large centerfire rifle. If you have a larger rifle you need a stronger scope. Here is an article on how to choose the best scope for a 308
How Does a Rifle Scope Function?
What the rifle scope does is to magnify the image of your target and the area surrounding your target. Depending on your scope’s type, the scope will magnify the image significantly to what the naked eye can see.
But, exactly how is the process that allows your scope to magnify an image? Simply put, inside the scope there is a different type of lenses, and these lenses work to magnify the image that you see when you look through the scope.
Lower power scopes will have smaller lenses, and they are usually shorter while the higher powered scopes include bigger lenses and will come in bigger sizes as well.
All scopes will include reticle (cross-hairs or a dot) that are built in feature to easily mark the center of the Field-of-View that you see when you look through the scope. It will take you a lot of practice to properly shoot accurately using open sights, and there are things that you need to be aware of at the same time you are focused and waiting for your target.
You might be comfortably waiting in complete silence in your spot, having everything ready and set for your target to appear in your scope and then you suddenly start to “panic” and wonder if the front blade is perfectly aligned with the rear for elevation. Exactly at that moment, your prey suddenly appears but is way out of focus because it is farther away from your eye than the sites.
You rush quickly to set the focus, and then suddenly your crosshair appear completely out of focus! Evidently, to avoid this, you need to prepare, do your homework, learn how to use your scope perfectly and practice if you want to be able to shoot perfectly.
A quality rifle scope removes and completely eliminates all these problems. What you are supposed to do with a scope is to focus on the target and align the center where you want the bullet to hit and then squeeze the trigger. That’s all there is to it! Furthermore, a scope will magnify your target prey, and therefore you will see your target clearly. This will give you plenty of space to perform a precise shot. With a scope, it will be significantly easier to shoot and hit bulls-eye of a target than without one.
What Is The Main Parts of the Rifle Scope?
Eye-Piece:
This is the metal unit that holds and supports the ocular lens.
Ocular-Lens:
This is the lens that is closest to your eye when you are looking through the scope.
Power-Ring:
This is the ring that will allow you to change the magnification of the scope, in other words, this feature allows to you change the distance of the internal lenses.
Windage:
Windage adjustment is measured in Mintue-of-Angle (MOA). When you turn the knob on your scope, you will “feel/hear” a click and each click changes the aim point to a certain amount that is measured at every hundred yards. For instance, a ¼ Minute-of-Angel (MOA) will change the aim point ¼ of an inch to the left or right at hundred yards.
Eye-Relief:
This is the distance measured from your eye and to the ocular lens. What you should do is look for a scope that will offer you plenty of eye relief to avoid experiencing the recoil of your gun when it slams back and hits you very hard, then you will end up with a Scope-Eye! Look for plenty of eye relief to avoid the Scope-Eye!
Tube:
The rifle scope is a tube assembled into another tube. The inner tube is made of lenses that work out what to do with the light that enters the scope. On the other hand, the outer tube is intended more for protection purpose and provides a strong objective bell and eye piece bell.
When searching for the perfect rifle scope, it is extremely important for you to know the tube’s diameter because the rings that are attached to the mounts come in different tube diameters.
Nearly all scopes that are made in the United States include tubes with 1-inch diameter (measured just above 30millimeters). It is NEVER recommended to force or tighten down 1inch ring on a tube that is measured 30 millimeters because that will most definitely damage your scope.
Eye-Bell:
This is the house of the eye-piece and tube.
Objective-Bell:
This is the housing of the objective-lens.
Objective-Lens:
This is the lens that gathers the light that will enter your scope. Generally speaking, if the scope has higher magnification, then the objective-lens diameter will be larger. If you happen to own a 4-12x scope, then 40-millimeter objective lens will be fine.
However, if you are interested in buying 50-millimeter objective lens then have in mind that it will be significantly more expensive and most probably not very beneficial for you regarding light transmission. It is not only more expensive but also you have to deal with more weight and higher mount weight.
Elevation-Adjustment:
Elevation Adjustment will shift the aiming point up or down and is used to sight in your scope.
Adjustable –Objective-Lens (AO)
This is the lens that will correct parallax error (more on parallax error below).
Exit-Pupil:
Exit pupil is the diameter of the light that leaves the eye piece and most of the time it is measured in millimeters (mm). A large exit pupil is extremely beneficial under low-light conditions and during the night. The more the exit pupils increase, the brighter image will appear in your scope.
You will need a scope with at least same diameter as the dilation of your eye’s pupil. Your eye will dilate around 2 millimeters during bright sunshine and in darkness around 7 millimeters. It is extremely easy to calculate the exit pupil.
What you have to do is simply divide the diameter of the scope’s objective lens by the magnification that the scope is set at any giving time. For instance: 50-millimeter scope, 50mm/10. A 3-9x40mm scope has an exit pupil of 13 millimeters and 4.4 millimeters at 9x.
Obviously, a 50 mm objective scope will give you considerably more magnification in low light situations than 40mm will offer. Generally speaking, standard eight times (8x) magnification should be enough, but that’s just my opinion. You should investigate and find the magnification that you think will fit your needs the best.
What Else do you need to Know?
Magnification:
Basically, all the rifle scopes out there come with some magnification. Some with fixed with marked with a number and an X (For example, 4x). This means that the scope will magnify the image four times (4x) more than you can see with the naked eye.
Another example: Scope that is marked like this, 3-9x50mm, means that the scope will magnify the image between 3 and nine times (3-9x) more than you could see with the naked eye.
The 50mm (millimeters) means that the objective-lens come with a 50mm diameter. It is extremely beneficial to have variable power rifle scope rather than fixed one because it will allow you to adjust the magnification and adapt to any situation that you are in.
However, the downside is the hefty price tag. If you plan on buying a variable power scope, you have to make sure you are investing in a good quality variable scope. The bottom line is that once you get a great quality scope, you won’t have to worry about losing your –zero- and you won’t require frequent sighting in. If you can afford a good quality variable power scope, by all means, get one!
Field-of-View (FOV)
What you see through your scope when you look through it.
Parallax-Error:
If your scope is not perfectly centered when you look through the lens, a small error can appear that is called parallax error. This usually happens when you shoot at a distance that your scope is NOT factory set for. High power scopes of, for example, 12x and more, are quite affected by parallax error.
Parallax error is not something that you should worry too much about because it’s so minimal and if you are a long-range shooter (over 500 yards), you should buy a scope with adjustable objective lens. If so, you just set the range that you think the target is from you, and you are all set no more parallax error.
Light-Transmission:
Light transmission calculates precisely how much of the light enters through the objective lens and exits the ocular lens. Every top quality scope will let almost all the light enter through the lens which makes the scope easier to use when you are shooting in low light conditions.
Transmission numbers are quoted in % (like 95% resolution), but you should consider that those numbers are hyped by manufacturers of poor quality scopes, they tend to inflate this number significantly. You should be fine by trusting the numbers from the big reputable rifle scope manufacturers.
Resolution:
A top quality scope will, of course, come with good resolution and will have a crystal clear, sharp sight picture, while on the other hand, poor quality scopes will have blurry and reflect bad quality image through your scope. Those poor quality manufacturers can easily fake high-resolution number on their scopes, but it is impossible for them to fake a good resolution.
Reticles:
Generally, part of the scope that shows the center of the Field-of-View. This is where you select where you want the bullet to hit. Not too long ago, all you could get was just a simple cross-hair, but nowadays, the choices are endless. Basically, the reticle that people go for is the Duplex, and there are others top quality products available on the market that you should thoroughly research.
Top quality scopes today include a wide variety of reticle, so it is important for you to choose the one that you think will fit your hunting style the best and if you are a long range shooter, you might want to go for Ballistic Mil-Dot, they are exceptionally easy to use.
Lens-Coatings:
If the scope you plan on buying does not come with coated lenses, please, by all means, don’t buy it! Just about all scope lenses have materials to reduce glare, make a better resolution and protect the scopes from scratching. Also, always use lens covers when you store your scope.
Sealed, Water and Fog Proof:
You should make sure that your scope is properly sealed and also water and fog proof to avoid any small things (dust, moisture, humidity, etc.) entering your scope.
Do I Need a Powerful Scope? What Power Should I get?
That will entirely depend on what type of shooting you plan on doing and how you plan on using your scope. Here are some key points for reference:
100 yards or less = 7x
100-200 yards = 7x-9x
200 yards and more = 9x-12x
You Get What you Pay for!
Like with all products that you buy, you will most definitely get what you pay for. It is obvious that you cannot expect a $150 scope to perform just like a $1000 scope. Spend what you can in your scope, it will pay off eventually. Invest in a good quality scope. Your rifle will always shoot when you pull the trigger, but without a good quality scope, your rifle is useless!
Good quality scopes for the average hunter can range from $400-$1000. If you need a scope with high magnification and you want to shoot +400 yards, then the price tag will significantly increase.
Final Thoughts
Always, no matter what, go for quality! You won’t regret that you did. After you have done your research and found your quality scope that you want to buy, go for something just a little bit better. You will never regret buying something that is a little bit too good. Don’t knock your head on the wall afterward, wondering why the heck you didn’t buy a scope that was good enough!
Douglas Brooks is the founder of ProReviewly.com. He was enthusiastic about hunting from the first shot. He is also Rifle optic guru.