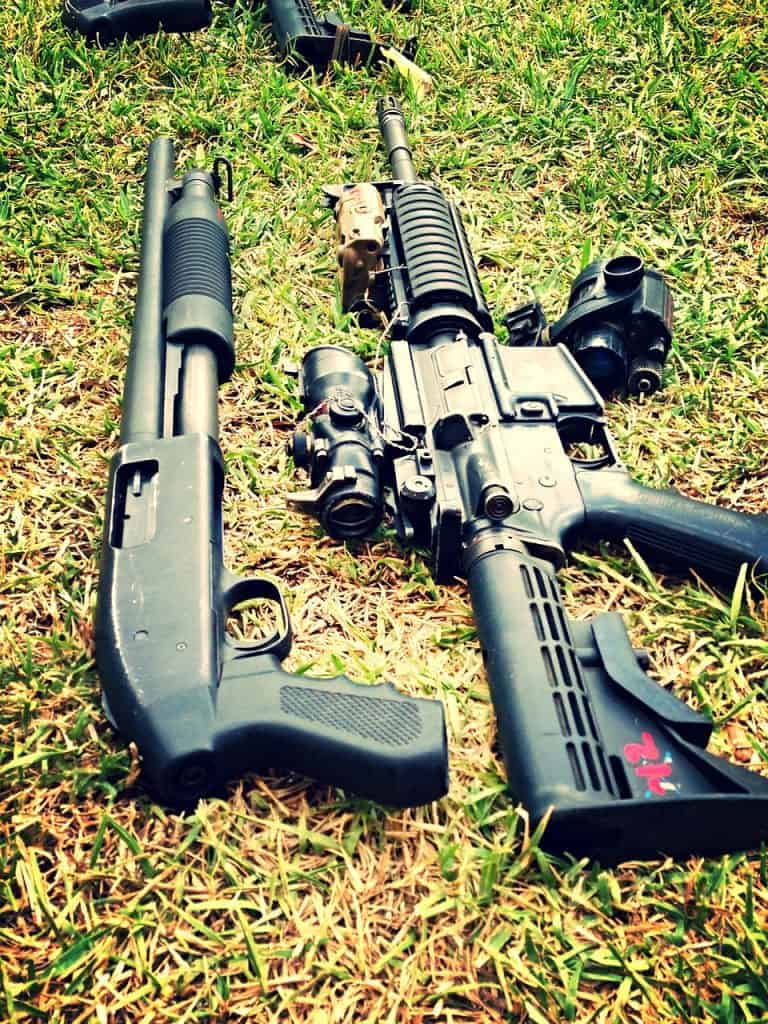
Functional And Affordable Upgrades For Your Shotgun

Functional And Affordable Upgrades For Your Shotgun
Buy at Amazon

The following guest post shows some affordable upgrades for your shotgun.

Everyone likes to have accessories and modify their shotgun in one way or another. Some people will never modify or upgrade the gun, but those same people will buy a precisely fit sling or unique protective case. Those that do upgrade will add any number of add-ons available depending on how they plan to use it. When thinking or accessories or upgrades the best thing to do is to look at all of the products made available for the most popular shotgun in the world, the Remington 870, and then see if that same item is made for the shotgun you own.

The reason you look to the 870 is because the 870 has more accessories and upgrades available than any other shotgun. This way you are not limited to imagining items available for your specific shotgun, you are seeing the entire breadth of available products and then if it is not made for your shotgun, you can have it made.

Some of the accessories available for any gun include shell holders, slings, cases, and cleaning kits. They also include special storage and safety locks. Upgrades include everything from magazine extensions through adding a full length tactical rail. For example, if you are making your 870 into a tactical shotgun, there are hundreds of Remington 870 tactical accessories and upgrades available. Muzzle brakes, pistol grips, other stock configurations, attached shell holders, and even red or green dot sights. You can even upgrade an 870 to do everything you would expect from a Saiga 12 drum combat shotgun, save for the semi automatic action, if that is your goal and at the same time enjoy the widespread availability and affordability of parts. This is the same for any shotgun, not just the 870.

If combat or tactical use is not your goal then while looking at the options for the 870, you can see that any upgrade or option imaginable has already been thought of and put to use. Different barrel lengths, replacement fore-ends, heat shields, unique stocks, and mounted flashlights are common upgrades that make any shotgun unique.

The important thing to remember is that you can get accessories or upgrades all shotguns. Some will have to be custom made or ordered if you do not own an 870, but looking at what is available for the 870 opens your mind to the possibilities

How to Replace the Recoil Spring in a Walther P22


Walther P22 Recoil Spring Replacement
Buy at Amazon

This post is about why I had to do some work on my Walther P22 Recoil Spring.  It also shows how to replace the recoil spring in a Walther P22

I am a huge believer in repetition for any physical skill. If you want to be good at something you have to put in the time practicing perfectly. I have heard that to be a master of something you need to spend at least 10,000 hours practicing the skill. Dry firing can be a big part of that time block, but you will HAVE to get out to the range.

I haven’t won the lottery, or invented the next widget so spending 10,000 hours of range time is cost prohibitive shooting centerfire ammunition, but I since still have to practice I decided to try a .22 rimfire.

After hearing a lot of good things about the Walther I bought myself a P22. I was told that it needed a long break in period using premium ammunition and repeated cleanings in order for it to function properly. However, even after firing 500 premium rounds through the gun, I was still having malfunctions with the gun.

A weak grip is notorious for causing malfunctions, so I spent time looking into that.

Not the problem.

Early model P22s had a magazine problem.  The newer (marked with a “b”) magazines have a 1inch slit cut into them for the rimmed cases to stack.  This is also not the problem

Several internet forums state that bulk green box federal rounds are not powerful enough to cycle the gun…

BINGO

In my search for cheap shooting those 550 round Wal-Mart boxes of ammo is pretty much all I shoot in my .22lr caliber firearms.

Now, that doesn’t help me much – higher velocity .22 ammo is getting expensive – I want to shoot as cheaply as possible so I kept searching for a solution. A gunsmith friend of mine told me that they changed out the recoil spring in later designs of the Walther P22. The new recoil spring is lighter.

I had also read on the interwebz that “cutting a couple turns off the spring” helped – Now I am not willing to butcher my gun by cutting springs – but I am willing to try a new factory spring. I called Walther customer service, explained my problem, and asked if I could purchase a spring. They were very helpful and sent me a new spring at no charge.

The one I received was a bit longer than the original, but it had a lot more “give”.
I replaced the Walther P22 Recoil Spring and as the video shows I was able to rapidly fire the firearm without any malfunctions. I don’t have enough rounds through the gun with the new spring to say the problem is fixed, but I am quite pleased with Walther working with me fix the problem.

As a value added tip for following along this far I am going to tell you an easier way to reassembly the slide back on the frame without using the little tool they send you:

How to Replace the Recoil Spring in a Walther P22

  • Put the recoil guide rod in your palm(non-dominant hand), and insert the spring over it.
  • Compress the spring, once compressed use your thumb and forefinger to grasp the recoil spring and rod. Several inches of rod should extend past your fingertips.
  • With your dominant hand pick up the slide and push the guide rod through the hole in the slide.
  • Grasp the end of the rod with your dominant hand. Once you have a firm grasp (otherwise you will shoot the rod across the room), let go with your non-dominant hand.
  • The Compressed spring should be inside the slide, with your hand holding on to the majority of the guide rod sticking outside the muzzle end of the slide.
  • Guide the slide onto the frame, with the barrel inserted into the slide and slightly extended outside of the slide.
  • Slowly, and carefully release tension on the guide rod so that it retreats back into the slide. Once the guide rod is touching the frame wiggle it until it slides into the detent inside the frame.
  • Let go of the guide rod
  • Rack the slide
  • Press the slide down over the ears in the frame
  • Ride the slide forward
  • Push the locking bar back up
  • Function check the pistol

It takes some practice to do it this way, but it is a much simpler way of doing things.

Understanding the USE of Handguns for Self-Defense

The Gun Digest Book of .22 Rimfire: Rifles ·Pistols ·Ammunition

How to Replace a Remington 870 Shotgun Barrel

How to Replace a Remington 870 Shotgun Barrel


How to Replace a Remington 870 Shotgun Barrel
Buy at Amazon

I get questions on occasion about “sawing off” shotguns. My first question is why – what do you want out of it, and my first comment is about the legal ramifications.

There are some legitimate uses of a short barreled (under 18.5 inches), and I do think the idea is cool so don’t Zumbo me, but in general for home defense use I do not think a regulated short barrel shotgun is worth the hassle and a standard pump with an 18.5 inch barrel gives you everything you need.

However, if you want a shorter barrel on your 870 shotgun you need to know how to replace a Remington 870 shotgun barrel

If you want to cut down the total length of a shotgun so that you can maneuver it easily 18.5 inches works fine. This length also balances spread with energy transfer – if the pellets have too extreme a spread then less of them with strike the target.

Besides that if you go with a 18.5 inch barrel it is easy to buy a new barrel and just replace the barrel that came with your shotgun. That way if you ever want to go hunting or shoot skeet or trap you can just put the older barrel back on.

If you cut your barrel down it’s a permanent solution…

As I said in the video, a coworker asked me to show him how to switch barrels – since we both commute to work, and work is a national guard armory I could not bring in my gun to show him or store it in my car until after work. Besides, this gives me a legitimate reason to make a video – and you know how I need that…

I made the video and burned it to a disk – when he watched it he said “Is that all there is too it, anybody can do that”. I agree, and if you have a pump shotgun I think you should consider getting a few specialty barrels – a 18.5 cylinder or improved cylinder bore for defensive work – a longer hunting barrel, maybe a slug barrel for deer – they are cheaper than buying new guns, and turns your shotgun into a true multi-purpose arm.

Procedure

  • Clear the firearm. In the video I reversed the steps.  I checked the chamber and then the magazine.
    • In my defense I did it prior to filming.  The shotgun used is my home defense gun and was loaded and had the 18.5 barrel on it.  No excuse I know.
  • Pull the slide to the rear.
  • Unscrew the magazine cap. The magazine cap is located at the very end of the slide, just underneath the barrel.
  • Grip the barrel just in front of the magazine tube and pull it straight out. It should come out easily, but you may have to twist it a little
  • Insert the new barrel into the receiver and push it back as far as it will go.
  • Screw the magazine cap back on
  • Function check your firearm to ensure you installed everything correctly
How to Replace a CETME Stock with HK Parts

How to Replace a CETME Stock with HK Parts


CETME Stock Replacement with HK Parts
Buy at Amazon

I have done several basic gunsmith videos with my CETME rifle.  As I have said before it is a very decent and inexpensive 7.62×51 battle rifle. In this article what I am going to do is show you how to install a HK G3 stock set on your CETME rifle.

A CETME Stock Replacement with HK Parts really isn’t a necessary change to your gun.  However, I like having my equipment match.  I have a green Glock and wanted green furniture on my CETME.

I know this is borderline to breaking my “don’t modify your firearm without a purpose” rule.  However, the new stock has a place to hold the retaining pins during field stripping.  It also has a place for a sling both features my original black stock set did not.

There are a couple ways to use HK stocks on CETME rifles.  Some work better than others. If you can keep your CETME buffer do so.  It is a little better for your rifle.  The HK equipment is supposed to be easier to cock. In my experience neither are readily user apparent.

I tried to go the cheaper way from the first. I bought a green HK stock set and tried to bolt it directly to the CETME Buffer and recoil assembly. This did not work, some skilled individuals are able to grind away the internal stock to fit the buffer, as well as find the proper bolts.  The bolt that connects the buffer to the butt stock is larger and larger on the CETME. The buffer on a CETME also has a single bolt hole on its face, whereas a HK has two. I quickly gave up as I did not want to make any permanent alterations to my stock or my firearm

Next I ordered a HK buffer and install parts set. While this connected perfectly to the stock, the CEMTE recoil assembly is slightly different, and I could not the buffer to fit flush inside the assembly. I tried grinding some metal off of the upper buffer bolt hole so it would not catch on the recoil spring. But even with the buffer fitting in the recoil assembly, the lower bolt hole on the buffer did not line up with the single bolt hole on the CETME recoil assembly. I tried smoothing out and shaping inletted area of the butt stock to better fit the buffer tube, but it quickly came to the point where I had to decide to take my chances and majorly alter my parts or take a different approach.

What I did was to buy a G3 recoil assembly. This fit my CETME receiver perfectly. All I had to do was to sand down the nylon recoil spring bushing slightly so that it would fit in the bolt assembly. Being a HK part – the G3 buffer and the G3 stock bolted to it correctly.

Now I have a CETME Receiver, Trigger Assembly, and internals, with a HK G3 stock set mounted to a G3 Recoil Assembly with A G3 Buffer.

Not counting tax and shipping here are the parts and their costs from http://www.robertrtg.com/g3.html (once again they are not the only source – just the one I used)

Parts Ordered

3-Pack: German OD Green Surplus Stock Sets $30

Complete Recoil Assembly complete and assembled $24

Nylon Guide Ring Surplus $2.50 (I bought a few nylon buffers just in case I damaged one shaping it to fit but I did not need them)

Buffer $6 (complete with internal parts)

Mounting Hardware Set $6.50 (3-screws, 3-washers, lock plate)

Large Push Pin $2.25 (While I was at it, I also got 2 new large retaining pins for the buttstock)

Total

$77 (plus tax and shipping)

I am pretty pleased with the results.  In my opinion. the rifle looks really nice with the green furniture.  I am thinking about welding on a HK Shell Deflector or a port buffer to keep the brass from getting thrown into the next county, and I may get a scope mount.  However, I probably won’t as I like iron sights.

All in all, it was a nice project.  I am quite pleased with the gun.  Now that it is looking good, and I bought several action proving dummy rounds I am going to start collecting magazines.  I also need to look for a good way to accumulate some 7.62 NATO rounds.

CETME Reliability – Firing Without an Extractor


CETME Reliability - Firing Without an Extractor
Buy at Amazon

So I traded a .45 1911 for a CETME – and while CETME’s built by century arms have a terrible track record, I did not mind because the pistol was a remnant from my divorce and USED to be part of a matched set that my ex demanded be divided.

I have more than one pistol, but not more than one .308, and I wanted to get a CETME to play with. You see from what I have heard every CETME owner eventually either gives up of becomes a CETME gunsmith, and once tuned they are really good battle rifles.

One of the reasons these rifles are so reliable (and every defensive gun is judged by a standard of 100% reliability IMHO) is because of its delayed roller blowback system. This is funny because the DRB system is the cause of most of the complaints about the rifle (other than the drunken sledge hammer toting monkeys that like to weld guns together without ensuring the sights are aligned over at CAI). The flutes machined in the chamber help blow the fired brass back out of the gun. To demonstrate this I have actually removed the extractor from my CETME and tried firing without and extractor. The rifle functions and extracts the brass. It does not throw the rounds as far or as hard as it did with the extractor installed, and it stovepipes pretty often, but it is a simple matter to sweep the stovepipe round out and recharge the gun to fire it as a single shot.

I really didn’t have a reason to do this other than I wanted to build a little confidence in my gun and explore its capabilities. It’s funny, but the big difference I saw in reliability was not from firing with or without the extractor, but from good magazines versus beat up magazines. That is something to remember when some knucklehead recommends using the magazine feed lips to pry out the pins holding the gun together. I know it might be in an old army manual somewhere, but not only do I have an old military manual that recommends standing in a field shoulder to shoulder with your buddies waiting your turn to shoot back at them, they also had the benefit of a military supply chain to replace magazines as they got damaged.


While I do not like the CETME beating up on my brass, I love the reliability, the concept of a CETME Firing Without an Extractor is pretty cool and speaks to the design.