How to Replace a CETME Roller

How to Replace a CETME Roller


CETME Roller Replacement
Buy at Amazon

In previous articles we talked about the importance of bolt gap on delayed roller blowback rifles like the CETME or the HK G3s.

We even touched on how to increase bolt gap by adding oversized rollers to correct wear of internal parts.

What we did not do is give instructions for replacing the rollers.

Now, as I have said before, I am not a gunsmith, but I will present an easy way of changing rollers.

You don’t need much in the way of tools – a pair of pliers, a roll pin punch (I used a nail) and a hammer.

Procedure:

  • First ensure you have NO ammunition in the room. This is imperative to make a habit whenever you are cleaning, working on, or dry firing your firearm.
  • Next strip the rifle (we have an article on that)
  • Remove bolt assembly by twisting – you probably can do this without tools if you have decent hand strength
  • Remove Bolt head from Carrier (twist and pull)
  • On the top of the bolt head you will see a small hole with a roll pin. Using a small punch tap out the roll pin, I did not have a punch nearby that was the right size so I used a small finishing nail. Retainer plate and rollers will now slide out the side
  • Shake bolt head until the roll pin falls out.
  • Insert your plus sized rollers on the retainer plate (one side of the roller ill have a small divot in the center. This divot corresponds to a tip on the retainer plate.
  • Slide retainer plate and rollers back in the bolt.
  • Reinstall pin (may take a tap on the punch with a small hammer)
  • Reassemble firearm function check to ensure you put everything back properly
  • Check bolt gap (it should have increased) If it has not or it is still out of specification you may have to consider getting the barrel repressed – there are not a lot of gunsmiths that are willing to do this, but luckily I found two in my area.

Resources for CETME Parts

(I have no connections to any of these companies, but I have been their customer)

I buy my rollers from RTG International Surplus Parts in Arizona

And for barrel work, I use wither Dave’s Gun shop in Cookeville TN (I’ve been in firearms classes with Terry their gunsmith – great bunch of guys)

Or Lock Stock and Barrel in Franklin TN (sorry no website)

How to Measure CETME Bolt Gap


CETME Bolt Gap
Buy at Amazon

First off let me say, I am not a gunsmith.  I am even less an expert on delayed roller blowback (DRB) rifles like the CETME or an HK 93. However, let me say that this post from military firearms.com does an OUTSTANDING job of describing what is going on inside your rifle.

If you’re not interested in knowing how it works and just want to know how shoot, my article will tell you what you need to know to ensure your CETME or G3 has proper bolt gap.

However, I would highly recommend you read the military firearm post by bladeworks123, because the more you know about your rifle the easier you will be able to keep it running.

Bolt Gap is Not Headspace

You need to know that there is a difference in bolt gap and headspace. Headspace is the distance measured from the part of the chamber that stops forward motion of the cartridge to the face of the bolt. This is important.  If the headspace is incorrect, ammunition will not chamber correctly.  Alternatively, it may rupture and cause damage to the firearm or the shooter.

In locked bolt guns like an AR-15 you can buy gauges that are machined to look like cartridges.  The gun should lock up on a “go gauge” and fail to lock up on a “no-go” gauge. When a DRB rifle barrel is pressed into the receiver, it is not pressed to the face of the bolt.  It is pushed even further so that the rollers in the bolt head are pushed against the locking piece.  The locking piece is putting pressure on the bolt carrier creating a gap the bolt head and the bolt carrier.

Bolt Gap is Critical

This gap is critical.  It is the point that the action is about to open.  Consequently, it is the measurement that allows the rifle to function correctly. If the barrel is pushed in too far the action will open too soon. Alternatively, if the barrel is not pressed in far enough, the rollers will have to travel too far to unlock the gun.  Since the back pressure from the gun’s firing may not last the full trip the gun probably won’t cycle. If it is extremely short than then portions of the neck of the cartridge will be unsupported and may rupture.

In a DRB a go or no-go gauge will both seat in the firearm. There is no true way to measure headspace in a rifle such as this, but the bolt gap measurement achieves the same result and is a more accurate measure of what you are trying to check.

Here is the procedure:

  • First, remove any magazine and check that the chamber is empty.
  • Perform the HK slap by pulling the charging handle to the rear and locking it. Then, slap the charging handle down with the palm of your hand sending the charging handle forward using spring pressure only. This is important to get a true measurement.  Riding the handle forward may cause it to bind at the end of the cycle.
  • Pull the trigger so the hammer is down.
  • Invert the firearm so the empty magazine well is pointing up.
  • Next, open the feeler gauge up to .5mm.  Try to slide it into the very slight gap between the rear surface of the bolt head and the front surface of the bolt carrier.
  • The .5mm measurement is the maximum the gap should be.
  • Open the feeler gauges to the .25mm leaf and try to fit that between the bolt head and carrier. The feeler gauge should fit without forcing it.  Additionally, if the gap is smaller than .25mm the likelihood is that the gun will have problems with extraction / ejection.  In fact, it may not run at all.

Buy the Right Gauges

You should buy a feeler gauge set that has several leaf sizes between .25mm and .5mm.  This will let you get a good idea of the bolt gap. Checking this measurement regularly will let you track accurately the bolt group wear.

If the bolt gap is not between .25mm and .5mm, there are oversize and undersize rollers manufactured.  Next, you can swap them with the stock rollers to either increase or decrease the bolt gap. Finally, if the gap is substantially out of spec, changing the barrel or reinstalling the barrel either further in or out may be required.

As a side note (I am not paid to say this)

I buy my rollers from RTG International Surplus Parts in Arizona

And for barrel work, I use wither Dave’s Gun Shop in Cookeville TN (I’ve been in firearms classes with Terry their gunsmith – great bunch of guys)

Or Lock Stock and Barrel in Franklin TN (sorry no website)

How to Easily Remove Carbon From Revolver Cylinder

How to Easily Remove Carbon From a Revolver Cylinder


Revolver Cleaning Tip
Buy at Amazon

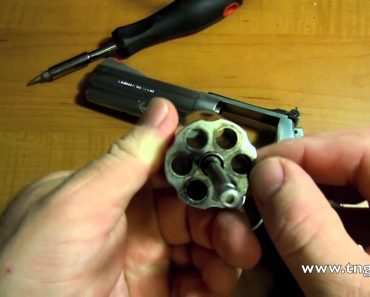
Do you want to know how to easily remove carbon from a revolver cylinder? It is easy. Remove the cylinder from the revolver first.

I really love shooting revolvers.

(I love shooting double action so much I modified my Glock 17 to have a trigger that is more like a double action revolver.)

However, cleaning the cylinder is not something I enjoy, rubbing lead remover cloth around the face of the cylinder has always annoyed me because the crane and extractor rod always get in my way.

When I was going through the TN Department of Correction firearm instructor course (TDOC uses revolvers at its institutions) I learned this really cool trick.

How to Remove a Revolver Cylinder

If you remove the screw that holds the cylinder crane to the frame the crane and the cylinder will slide out.  This will allow you to easily clean the cylinder.

The cylinder will slide back in the firearm when you are done.  (Generally this is the single screw right below the bore end of the cylinder, on the frame, on the side opposite the cylinder release)

Do not over tighten the crane screw.  If you do, the revolver  will not easily open and close.  Use proper screwdrivers, as this is a common place to “bugger” up your gun.

This tip is pretty simple, just don’t loose the screw, and always use the proper screwdriver for the screw.

Cetme Field Strip

How to Field Strip a CETME Rifle


CETME Field Stripping
Buy at Amazon

Today’s post is to show you how to go about CETME Field Stripping.

As with all gunsmithing, remove all ammunition in the room while you work on your CETME.

I know you are an adult, and smart enough not to accidentally load and fire your gun negligently.  However, but so were thousands of other folks right before they fired an “unloaded” firearm.

I am light on the pictures because I was videotaping the process of CETME Field Stripping, so if anything is unclear just watch the video.

How to Field Strip a CETME Rifle

  1. Remove the magazine. A forward press on the magazine catch will release it. Then just pull it down.
  2. The cocking handle will not work if the firearm is on safe, so put your CETME selector on anything buts “S” – some rifles have “T” for single shot and “R” for burst, mine just has “S” and “F” for fire.  In case you are wondering “T” stands for “Tiro a Tiro” (shot by shot) and “R” stands for “Rafaga (burst).
  3. Pull firmly the cocking handle rearwards.  (The cocking handle is on the left side of the gun forward of the receiver and almost to the front sight).  This is not the easiest thing to do, it’s not like a poodle shooter – you are fighting the resistance of both the recoil and hammer springs.  When you get the handle fully to the rear, push it up into its lock notch.
  4. Check the chamber both physically and visually for any rounds – then do it again – You may think its stupid to do it twice, but there are no records of a negligent discharge by checking twice, and many of them for failing too.
  5. Next perform an “HK Slap” to release the cocking handle so as to relieve the tension on the spring. (Just take the palm of your hand and give a slap to the top of the charging handle to knock it out of its locking slot – This action adds enough cool points to make up for checking the chamber twice – sometimes I do it just so I can feel “Teddy Tacticool”.

Remove the Buttstock

  1.  The buttstock assembly is kept in place by a couple of pins. Those pins are just pushed out like the pins holding an AR together.  Some CETME buttstocks have two holes to put the pins in so you don’t loose them.  (some may tell you to use your magazine feed lips to help remove the pins, but that is stupid because the magazine lips are one of the most stressed parts of your rifle, pretty fragile, and damage there WILL cause cycling problems.
  2. Pull on the butt stock to release the assembly – mine takes a good slap, and not a gentle tug, but they all slide out.
  3. Next you need to remove the fire assembly, it tilts downwards.  A nice slap on the back of the pistol grip towards the muzzle will release it.
  4. Now, with the rear of the gun angled downwards, grab the charging handle and pull it back a little.  The barrel assembly should slide right out.
  5.  That is pretty much fully field stripped, however, if you want to remove the bolt and get to the firing pin, you will have to rotate the bolt head counterclockwise 180°. This can be a little tricky, so you may need to use a pair of pliers.
  6. Next rotate the bolt carrier 90 degrees counterclockwise and remove it to expose the firing pin and spring.
  7. Pull out the firing pin and the firing pin spring.

To Reinstall, Reverse the Order

When installing the barrel, the two round rollers will be pushed out and locked, and the assembly will not slide into the receiver.  The bold has to be retracted to allow the rollers to unlock.  The way I do it is to reverse the bold and slide it backwards and “slam” it – (forcefully, but not violently) in the gun, this unlocks the bolt rollers, so I can then pull the assembly out, and reinstall it normally and it will then slide right in the gun.

Remember, once you get it all back together to function test it to make sure it works.  That is another reason you don’t have ammo in the room.

When function testing a defensive gun that I keep loaded (say my carry pistol) I will then say OUT LOUD “I am done cleaning my gun and am not loading it”  It may seem overkill, but it sets up a mental stumbling block to keep me from function testing my gun after I load it – another way of preventing a negligent discharge from “cleaning my gun”

M6 Scout Sling Swivel Modification

How to Install a Sling Swivel on a M6 Scout


M6 Scout Sling Swivel Modification
Buy at Amazon

One of the first guns I ever bought for myself was a Springfield Armory M6 scout rifle. Like almost all owners of the M6 scout, I really like the concept, but I find it needs a sling swivel to really fit my needs.

What is the M6 Scout

For the uninitiated, the M6 scout started life as a survival item for Air Force pilots. It is a hinge action over under that breaks into two parts for storage. The air force version is normally a .22 hornet over .410, but mine is a .22 long rifle over .410. The actual military model’s barrel is shorter than the National Firearm Act allows for unregistered firearms, so the civilian barrel is about 4 inches longer. It has two cutouts on the sheet metal stock that are supposed to be improvised wrenches, but I have never attempted to use them. In my opinion, other than the size and weight of the gun, the best feature is that the butt-stock opens to hold 4 .410 shells and 15 .22 (only 9 if it’s a .22 hornet).

While I am an unreconstructed tinkerer that loves messing with things, I am pretty conservative with my firearms, and do not modify them without having a clear and specific goal in mind. I don’t own any “safe queens” or Barbecue guns, all of my firearms are tools, primarily for my family’s or my own self defense. Over the years I have seen too many overly modified guns lose reliability with each “improvement” to the designer’s specifications.

A Few Nice Modifications

However, there were four areas that my scout needed improvement, and none of them modified the actual mechanical function of the firearm in anyway. Since the purpose of this gun is to forage in a E&E (escape and evasion) scenario its intended use makes it perfect for a GHB (Get Home Bag) kept in a car trunk. My first addition addressed this and was the purchase of the optional blue plastic case to hold both the gun, a 100 round box of .22 long CB caps and two .45 caliber bianchi clips that I stretched and forced 12 .410 shells into (an appropriate mix of 6 #6 shot, 4 slug, and 2 00 buck).

Remove the Trigger Guard and Add Para-cord

My next mod was to remove the trigger guard from the “trigger” which is actually a bar that you can squeeze with you entire hand if needed. All I did was pry the stock apart slightly and pull the guard out (its stamped steel).

Next, I wrapped a long length of para-cord along the barrel as the gun does not have any furniture on it. This provides me with a cool place to put my hand if I somehow shoot enough to heat the barrel, and it gives me some cordage for emergency use. According to some, crewmen were taught to do this using paracord from their chutes if they ever bailed out.

Adding a Sling Swivel

My last modification, and the subject of the video below, was the addition of a sling swivel on the butt-stock. For years I have tried to find a factory sling swivel to attach to my scout. The barrel has a hole at the muzzle for attachment, but the butt-stock does not. The only furniture on the gun is a small rubber pad on the butt-stock, but the screw that holds it in is not substantial enough to do its designed job and hold a sling.

While at the reloading store the other day, I saw a sling swivel for an AR-15 hand guard. I knew immediately that it would work. It was a normal QD swivel on a stud, a round spacer/washer, and an aluminum nut with a round base.

Basically, I used a drill press to drill a hole the aluminum nut could fit into, then screwed the swivel stud into it through the washer. Later I may trim it up a little with my Dremel, but for now it works well enough for my purposes.