Category: How To (How I Did)
You could call this a How To – but people often tell me I did it wrong – now to be fair you can’t really tell me I can’t do it that way, when the video shows I actually DID do it that way – so to cool down the hateraide – lets just call this HOW I DID
-

How to Build a Homemade Kydex Press
Buy at Amazon Being a carry permit holder I have a thing for gun holsters, being a big guy, I spend a lot of time baking sure that my holsters are comfortable and work well with the clothing I wear. Something I have noticed “gun guys” is that we all have a box of old holsters. The majority of holsters I use on a daily basis are either Kydex or combination’s of both leather and Kydex.
That is no surprise when you look at the benefits of Kydex. Its cheap, rugged, non-marring of your gun’s finish, moldable for good retention, smooth for a consistent draw, and does not react to normal temperatures or gun solvents or oils.
You Need a Press to Work with Kydex
If you want to experiment with kydex you need a kydex press – like all my projects, I wanted something cheap and simple to test out before I invested in quality tools – this post’s kydex press is just such a tool.
Being a DIY enthusiast, it did not take me long to want to try my hand at molding Kydex. For those of you that do not know, Kydex is the trade name for a propriety thermoplastic sheet. It’s rigid and strong, but when heated it becomes pliable. Kydex does not have a memory, so that once it has cooled; it retains the shape it was molded to fit. Kydex is not the only plastic compound that has this property. However, what makes Kydex so useful is that unlike plastics, Kydex doesn’t off gas toxic fumes at forming temperatures.
Tools to Form Kydex
Most people use either an oven or a heat gun. Often I use a goodwill toaster oven. It really depends on the thickness of the Kydex your working with. Also the size of the piece your molding will impact on your heat source. Normally I find the oven works best to begin the project, and I use a heat gun to spot heat for adjustments.
Besides a heat source, gloves, and trimming tools, one of the most basic tools to mold Kydex is a press. A Kydex press normally costs from $80 to $180 depending on size, but it is a simple tool that I decided to make one myself.
Simple Homemade Kydex Press
At its simplest a Kydex press is a rigid board with a thick piece of foam glued to it as a base, with top made the same way. The heated Kydex is wrapped around whatever it will sheathe, and then sandwiched between the two pieces and then clamped or weighted heavily until the plastic cools.
I went a little more complicated, as I put a set of hinges to connect the top and bottom pieces. I connected them this way because I plan on making knife sheaths. At least until I got enough skill to try more complicated gun holsters. Also, by being connected, it gives me more leverage for clamping.
If I was making a press for larger items like gun holsters I would make modifications. Either I would not add a hinge, or I would make the hinge adjustable.
-
How to Weave a Handle Using the Portuguese Sinnet
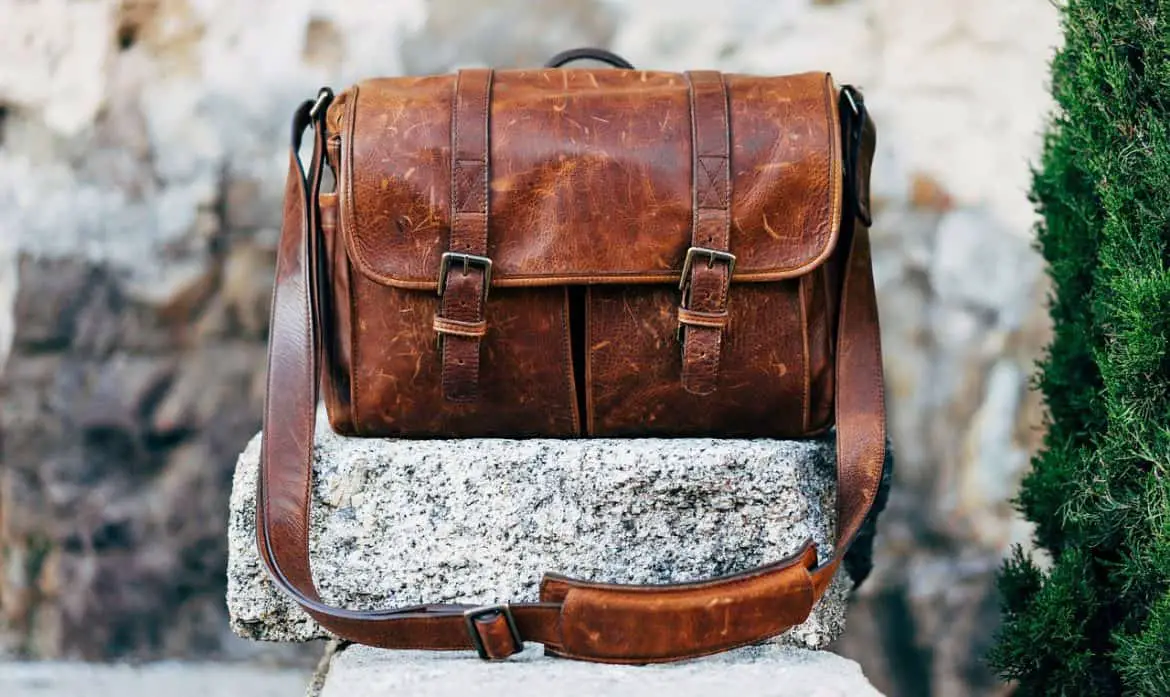
Buy at Amazon Being an EDC (everyday carry) kind of guy, especially one that’s a fan of MacGyver and 24, it should be no surprise that I normally carry a messenger bag. I know its not the coolest thing in the world for a guy to carry a purse. Even if it has such nifty names as Jack Pack or Bauer Bag. My lovely bride calls it my murse a lovely portmanteau of Man-Purse.
I used para-cord to create a simple Messenger Bag Handle using common para-cord weaving techniques.
I bought my Bauer Bag at a local Army Navy store for about $20. It’s an Israeli Paratrooper Bag. I just started shoving things inside.
What is in my Messenger Bag
I have a collection of Altoids tin kits inside for sewing, medications, various small repairs, and on occasion a small survival kit. A small knife sharpener, lighter, electric tape, batteries, USB drives, Leatherman, screwdrivers, gun bore light, flashlight, sharpie, pens, a garbage bag, and tissues. On the occasion I am not going to work a Taurus 85 fit in as well. It also holds my various papers and lesson plans.
I like the bag; it is pretty study and well designed. Unfortunately, the strap leaves a lot to be desired. It is small and bunches up. Being a shoulder bag, it can be awkward to fetch it out of the car.
Being in a DIY mindset the other day, and having a lot of para-cord left over from the neck knife project I decided to fix it. I then happened upon an Instructable for installing a Portuguese Sinnet handle on a bag exactly like mine.
Here’s the link for the Instructable if you want to check it out: Instructable on Making a Portuguese Sinnet Handle
This was way easier than I imagined, and it’s the same knot they use to make those para-cord bracelets that sell online for $20. as well as gun slings and belts.
The only thing I changed when following this Instructable was that instead of using two foot long pieces of cord, I used a single piece that was about 3 feet long.
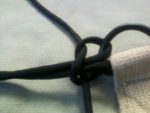
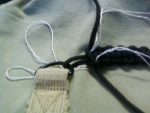
Process for weaving the Portuguese Sinnet Knot
The process is pretty simple: double the rope around one of the loops in the bag and then make the knot over and over until you get the length you want, loop the ends around the other ring and pull them threw the center of the knots using some thread you braided in the sinnet.
This is exactly the same process for making a para-cord bracelet with a jig. The only difference is that instead of a jig I used the metal rings on either side of my bag to hold the ends of my cord.

-

Modification of the Cold Steel Bird and Trout Neck Knife
Buy at Amazon Recently while working outside I misplaced my neck knife, it was a CKRT Neck Peck. This was a huge loss for me. I really like having a neck knife, its easy to carry, and always there. I do know that there is a lot of tactical questions about a neck knife. Questions come mostly from those with a ground fighting perspective. However, my opinion come from a middle aged fat guy that works from a desk. I doubt I will be ground fighting near as much as I will be cutting open amazon.com packages….
My Favorite Neck Knife was Discontinued
What made the loss so painful was that I could not get a replacement. In its infinite wisdom Columbia River Knife and Tool has discontinued the Neck Peck knives. I was forced to find a suitable replacement.
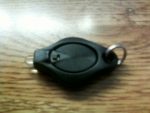
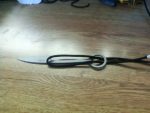
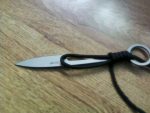
After searching online and in a couple different stores I decided on a Cold Steel Bird and Trout. I did not come out of the box as sharp as the I wanted, but it sharpened easily. What I really love about it is the finger ring on the handle. Being able to dangle it on my pinky while performing tasks is nice. That will keep me from setting it down in the woods and getting it lost in the leaves (like its predecessor).
Turning a Good Knife into a Better Kit
While searching online for good neck knives I found a couple of you tube videos about mini survival kits that were attached to different models of neck knives. I must admit I like the idea, but its more important for me to have my neck knife small and concealable rather than have a EDC (everyday carry) wilderness survival kit.
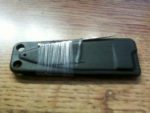
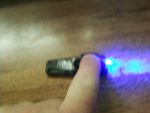
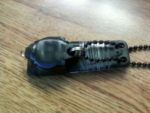
Something I did like with the survival kits was the flashlight idea. So I purchased a small blue led light (I think it was a photon microlight), and while I was at it, I also decided to install a sailcloth needle with about 10 ft of mono-filament line since it takes up almost no space and adds negligible weight.
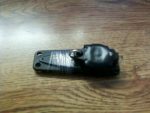
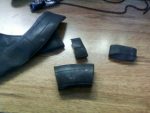
First I added the sewing needle, then I electrician taped the light over the sheath. For added security, I ran the chain through the flashlight so it would not be able to fall out. I then used a Ranger Band (cut up bike inner tube) to waterproof the sheath and electrician taped it tightly to the sheath.
You Must add Para-cord
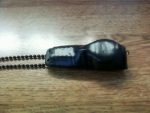
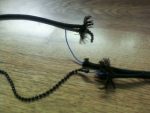
Next I took out the innards of some para-cord and used a stiff wire to thread the ball chain necklace in the center of the paracord. I did this mostly for looks but in deference to the idea that somebody may try to choke me to death with my chain, I did it in two sections after putting the chain on the knife sheath so that it can break at the clasp, or at either hole of the sheath.
Lastly I wrapped about yard of 7 strand para-cord around the handle. While this makes the knife easier to hold, and gives me some cordage, it does tend to overcome the friction fit of the bird and trout sheath. Unlike the Peck, which had a raised dot that “locked” into a dimple in the sheath, the Bird and Trout relies on friction only. This makes it extremely easy for the knife to fall out of the sheath.
Still Not Done
Since I have been planning on experimenting with Kydex sheaths for some time, I am going to have to make a new sheath that has a more positive lock on the knife. If Cold Steel’s sheath held the B&T better, this would be a near perfect knife for my usage.