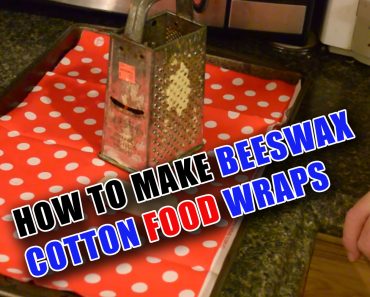
How to Make Beeswax Cotton Food Wraps

How to Make Beeswax Cotton Food Wraps


52 Unique Techniques for Stocking Food for Prepper
Buy at Amazon

I take a lot of leftovers to work.  Normally I use plastic containers or plastic bags to carry them.  However, the convenience this gives me comes with the cost of buying the containers.  Additionally, I have concerns over BPA and other chemicals in the plastic.

While neither of these concerns alone are great enough (to me) to necessitate a change.  I am interested in learning what to do in the event I would not be able to easily buy plastic sandwich bags or cling wrap.

It did not take me very long on the internet to find beeswax cotton food wraps.  There are several commercial sites that sell the wraps.  I also found numerous websites that also showed how they made the wraps.

One is My Healthy Green Family  and alternative method (which I discuss on the video) can be found at DIY Natural.

Since I did not want to dig out the ironing board or my iron (I have an iron for projects and the wife has a clothes iron.  Having two saves on divorce lawyer expenses) I choose to use the oven method.

Equipment

  • 100% cotton cloth (about the thickness of sheets) – I imagine muslin would work but I used a quilting square cut up.
  • Beeswax -I used some from my own beehive, but you can easily find either beeswax ingots or the easier to use beeswax beads in craft stores in the candle making supplies
  • Cookie Sheet – Once you get hot wax on the sheet it will forever be useless for baking cookies on – once again I have project cooking utensils and food cooking utensils because I do NOT like being hit about the head and neck with a rolling pin…
  • Grater (if using solid beeswax ingots)

Procedure

  • Preheat oven to 170-190 – Beeswax is highly flammable and melts between 143 and 151 deg. F so don’t try to overheat it to speed up the process (unless you want to call the insurance adjuster)
  • Cut your cloth to the desired size – this is up to you – you can hem the edges or use pinking shears to make a nice edge, but I just wacked at it with an old pair of scissors and was done.
  • If using ingots, grate them using your cheese grater. If using beads you can skip this step
    Set your cloth in the cookie sheet and lightly dust with the bits of wax – you want an even coat. In the video you see both how much I used, and how stiff the finished product was. In my opinion the amount I used was perfect for wrapping food (sandwiches, vegetables, and the like) – if you plan on using it to replace cling wrap, then you may want to use more wax.
  • Less wax will let more moisture pass though, more wax make a stiffer cloth.
    Put the cookie sheet with the cotton and wax into the oven. 5 minutes will do just fine. Longer may cause problems, so if it is not all melted at 5 minutes keep a very watchful eye.  (In the video not all of my “wax” melted – some of it was junk left over from the hives – you should not have this problem using store-bought wax)
  • After you take the cloth out of the oven – immediately remove from the cookie sheet and hang to cool. It should appear darker – any light spots did not receive as much wax so be on the lookout for this.
  • Once cool you can use immediately.

If your wrap gets dirty, you can easily clean it with cold water – don’t use soap or hot water as this will impact your wax.

I hope this helps…

How to Make Homemade Desiccant Out of Sheetrock

How to Make Homemade Desiccant Out of Sheetrock


How to Make Homemade Desiccant Out of Sheetrock
Buy at Amazon

Moisture is one of the largest threats to long term storage, and over the years a variety of commercial products have been created to absorb moisture in gun safes and other storage areas.

I came across a unique DIY Sheetrock desiccant discovered during WWII as the Department of Energy at Oak Ridge experimented with devices to help with civil defense.

An Engineer by the name of Cresson Kearny designed a homemade device used to measure radioactive fallout. This device used materials easily scavenged, and it included a homemade drying agent made by heating common gypsum wallboard (Sheetrock).

Do NOT use calcium chloride, use gypsum Sheetrock only.


Instructions:

Obtain a piece of 3/8 inch thick gypsum wallboard approximately 12 inches by 6 inches

Cut off the paper and glue, (easiest done by wetting the paper)

Break the white gypsum into small pieces no larger than ½ inch

Heat the gypsum in an oven at its highest temperature (which should be above 400 degrees F) for one hour.

Heat the gypsum no more than two pieces deep in a pan.

Alternatively you can heat the pieces over a fire for 20 minutes or more in a pan or can heated to a dull red.

Anhydrite absorbs water from the air very rapidly, so quickly store in an airtight container while it is still hot. A Mason jar is ideal.

This works great for me as I have hundreds of pounds of Sheetrock desiccant available as I am still tearing down the trailer.

52 Prepper Projects Book Review

52 Prepper Projects: Book Review


Book Review: 52 Prepper Projects
Buy at Amazon

52 Prepper Projects is a book about self-reliance and the journey toward a more self-sufficient life.

The author, David Nash, has been a “prepper” his entire life, and has always tried to learn how to do things instead of searching out where to buy things.

This book is designed to start with simple projects and progress to more complex projects.  The projects get better as the reader gains more skill and confidence.

Each project in this book can be completed with simple hand tools and many projects build upon tools and skills created in earlier projects.

The 52 Prepper Projects Book is full of projects like the ones in this site.  Actually some of the projects are on this site.  However, in the book they are better documented and arraigned in a manner that makes sense.

The Book Is Similar in Content to This Site

This book is a companion to the tngun website.  I feel like the projects in the book are worth having on paper in the even the internet is ever throttled or shut down.  At one time that idea seemed like a 1984 type conspiracy, but Google and other internet giants have been working to reduce this type of information on the web.

This is more likely to happen than most American’s think.  Therefore, having paper copies of things you find important is becoming more vital every day.


How to Make DIY Mosquito Repellent Holders

How to Make DIY Mosquito Repellent Holders

How to Make DIY Mosquito Repellent Holders
Buy at Amazon

My boy loves being outside, but kids are especially sensitive to mosquito bites, due to the bees we cannot use traditional pesticides, but I did see this idea on an Alaska bush craft site and decided to try it out while camping.

It worked very well for us last summer, and I finally got around to documenting it.
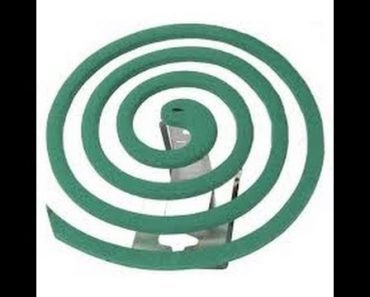
One of the most popular bug repellent to cover large areas such are patios, decks, and yards is the mosquito coil.

These coils use an incense style delivery system where you light one end and it burns as an ember producing smoke containing the repellant. As the air currents spread the smoke around the bugs high tail it out of the area. This is handy when you are working in an area and need wide coverage.

The problem is the small metal coil holders aren’t always appropriate for putting the coils around your work or recreation area. The ones that are able to hang can cost up to $7 to $11 a piece.

Here is a method to make as many as you want for less than a dollar each.

I happen to have some left over rabbit cage wire I used, but if you don’t have scrap, purchase a one foot by three (or four) foot piece of metal screen at your local hardware store.

How to Make Mosquito Repellent Holders

  • Cut the pieces of screen into units that are 5 inches wide and 12 inches long.
  • Fold the piece in half.
  • On either edge adjoining the folded edge, bend the screen over itself, thereby creating a holder with two sides open.
  • Insert a wooden pencil or dowel between the two halves of screen and gently reshape the metal fold to create a bit of a space or gap between the two sides so that it won’t pinch the mosquito coil. (The coil may extinguish itself if the screen is pressed tightly against the coil.)
  • Add a loop of cord or an “S” shaped piece of wire for hanging on whatever objects are handy around the area you want to protect.

Hang several in large areas or where changing air currents require positioning coils in many locations.

DIY Homemade Mouthwash

DIY Homemade Mouthwash Recipe


DIY Homemade Mouthwash
Buy at Amazon

Hygiene is very important in a disaster situation, in a long term catastrophe or in a world without good insurance (Thanks Obamacare) taking care of your teeth will be much harder and much more important.

Products like mouthwash are also pretty expensive so being able to roll your own makes economic sense also.

I like this recipe for homemade mouthwash because few ingredients are needed and the flavor is not horrible.

Also since it uses baking soda, it deodorizes your mouth (just like it does your fridge),instead of masking it with mint.

You should try this DIY homemade mouthwash at least once, or take the time to look at the book “where there is no dentist“.

Oral hygiene is doubly important during a long term disaster where medical resources are not readily available.


Ingredients

  • 1 cup water
  • 1 tb baking soda
  • 5-8 drops peppermint/mint essential oil
  • Some kind of sealable container to keep it in

Procedure

Mix it, gargle it, and tell me what you think

Notes on Homemade Gargle

as you can see the homemade mouthwash ingredients are few, and it is a simple mix.  you can even take it one step further and look at my mint extract video and make your own flavorings if you want to get truly DIY on your homemade mouthwash.  This gargle is not essential for oral health today, but in a large scale collapse or economic downturn it would be handy.