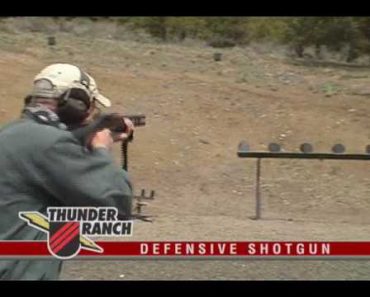
Clint Smith Defensive Shotgun


Clint Smith Defensive Shotgun
Buy at Amazon

Clint Smith is an expert on the use of Defensive Firearms.  He is a Marine Corps Infantry vet, SWAT officer, and has been running Thunder Ranch since 1993.

I like his style, this thought process, and how he teaches.  When I teach firearms classes, there are several techniques and lessons that I share that I gleaned from Mr. Smith.

I have searched YouTube for good training videos to share, and I have found several clips of Thunder Ranch training videos.  Think of them as advertisements for their full length training videos.  (I don’t gain anything from this, but I do think there videos are a valuable and worthwhile purchase.)

This particular video discusses the often misunderstood Defensive Shotgun.  I enjoyed watching it, and I learned some new ways to share information with others.  It is worth the time to watch.

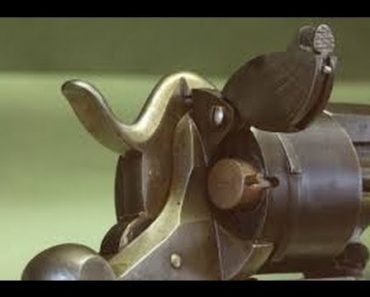
Revolver Loading and Unloading

Revolver Loading and Unloading
Buy at Amazon

As I have said before, I believe that proper technique is crucial to consistent performance under stress. We learn proper techniques from refining what works and discarding what does not. On the range I see several ways of manipulating revolvers, but those that consistently follow a proven manual of arms tend to do much better than those that “just put the durn bullets in the gun”.

The Revolver Loading and Unloading technique I am demonstrating today stems from the FBI method. It is not the only accepted method, but it is the most widely accepted method. Ayoob’s stress fire method is designed around perceived weaknesses in the FBI method and I recommend any person that uses a revolver for self-defense study both. I am not going to discuss Mr. Ayoob’s method because it is proprietary, and I am not a certified instructor in his method. I will however link to a video of him describing it for those interested.

Any method of action that an individual performs under stress should be simple, free of unnecessary actions, use gross instead of fine motor skills, and be proven –as always I will tell you what, and try to explain the why so that you can decide for yourself what works.

Procedure

  • With the revolver in a two handed shooting position, use your shooting hand to engage the cylinder release. At the same time remove your non-dominant shooting hand from the gun. Bring your free hand underneath the revolver and place your ring and middle finger on the cylinder. Your pinkie and index fingers should be extended and touching the right side of the revolver framing the cylinder.
  • Using the two fingers on the cylinder, and as you are engaging the cylinder release, press the cylinder so that it swings out of the frame. (Your hand should remind you of the international sign language motion for “I love you” or “hook ‘em horns” if you’re from Texas). When this is done you should have good positive control of the handgun and can now remove your shooting hand from the grip. This is done for a couple reasons. It is simple, it provides great retention of the gun, its ergonomic, it frees your dominant hand for the fine motor skill of loading the bullets in the cylinder, and it allows your non-dominant thumb and index finger to control the motions of the cylinder to rotate for loading.
  • With the cylinder open, rotate the handgun to orientate the muzzle skyward. If the cylinder is full of unfired cartridges, they will most likely fall out due to gravity. If the rounds are spent, then they have expanded inside their chambers and will need help to be extracted. With the palm of your shooting hand come over the top of the gun and deliberately strike the extractor rod. You need to make sure your force is centered on the top of the rod of and perpendicular to the rod. Strike it forcefully to cause the rounds to move freely, but not so hard that you damage your palm. If you don’t have the help of gravity, have large aftermarket grips, and/or press the extractor rod hesitantly and with too little force, the spent rounds my hang up and not be fully extracted.
  • Now reverse the orientation of the revolver so the muzzle is pointed downward at a slight angle. This also uses gravity to help the process.
  • Use your dominant hand to feed rounds into the cylinder, and your support thumb and index to rotate the cylinder. You may do this one round at a time, or if the stars aligned and you have put in your practice sometimes you can insert two rounds into adjoining chambers at the same time. Because this process is time consuming there are devices designed to speed the process.
  • I use Bianchi strips for my carry revolvers. A Bianchi strip is a piece of rubber that has cut outs to hold 6 rounds in a row. You can use the strip to insert two rounds at a time in your cylinder. This cuts movement from 6 similar actions to three. It is also great because it keeps the rounds together and orientated correctly. It’s MUCH easier to reload from a strip than 6 loose rounds in your pocket. I choose the strip instead of the speed loader because it is flat and easier to conceal.
  • Speed loaders come in all sorts of configurations, but they generally are a reverse model of the specific cylinder of a revolver model with a means to hold rounds by their rims. This leaves the bullets hanging out. Since the loader matches the cylinder, the bullet tips line up with the cylinder chambers allowing all 6 rounds to drop into the chamber once the loader’s release is activated.
  • No matter what method is used, once the rounds are loaded into the cylinder, reacquire a firm shooting grip with your dominant hand. As you use the thumb of your non-dominant hand to press the cylinder closed rotate your middle fingers out of the gun.
  • Establish a two handed grip, and raise the gun to proper shooting level.
  • Lastly, I feel the need to explain that as long as a round is lined up with the barrel when the hammer is fully rearward and cocked the gun will go off. It does not have to be fully loaded. Academically I understand that is overly simple, however, there have been officers killed while reloading who have had rounds in the cylinder. If you only have a few rounds in the gun, but a bad guy is on you, you can accelerate the process and fire the gun as is. However, if you just blindly close the cylinder the rounds may or may not line up with the barrel – if they are not, you will just pull the trigger without the gun firing. Also if you put close the cylinder in such a way as to ensure the round is in line with the barrel as the cylinder closes, that round will be rotated away from the barrel as the hammer is cocked.
  • If you know what direction the cylinder of your brand of revolver rotates – ensure that your live rounds are placed so that they are directly beside the top-strap so they are rotated one click to align with the barrel. Smith and Wesson rotates counter clockwise, so a single round will need to be to the immediate right of the barrel. Colt on the other hand rotates clockwise, so a round will need to be in the chamber to the left of the barrel.

I know that may be a little confusing, so feel free to watch the video for a live explanation.

Handgun Immediate Action for Malfunctions

Handgun Immediate Action for Malfunctions
Buy at Amazon

Typically in most basic firearm classes the student is told that if they have a malfunction they should put the firearm on safe, finger off trigger, table the firearm or keep it pointed downrange and raise their support hand to call for and instructor to clear the malfunction. That is a proper method when the students are brand new, however, in a self-defense class you should get training on handgun immediate action for malfunctions. Obviously in a two way range, you cannot raise your hand for a timeout, so you need to know how to get your own weapon back in service.

Tap, Rack, Assess (TRA) A.K.A. Immediate Action

Luckily a single procedure solves the majority of firearm malfunctions; therefore it should be ingrained as “Immediate Action” upon the firearm malfunctioning during an actual use of force event. Magazines sometimes are not always seated fully during reloads, or you may have inadvertently pressed the magazine release – so the first thing to do is “TAP” the magazine to ensure it is fully seated. Your gun will not break if you use a little force here, so don’t give a love tap – smack it with enough force to seat it properly.

Next you rack the slide. This will insert a new round in the chamber – which solves a problem caused by a mis-seated magazine, a misfired round, and solve any number of other cartridge related problems. It will also re-cock the firearm and prepare it for use.

Assess is the last step. At this point the firearm SHOULD be ready to fire, so if you are in a defensive situation, you are legally and morally responsible for each round fired, so you need to always assess the situation to ensure you need to fire the handgun. In the Marine Corps the immediate action drill is Tap, Rack, Bang (TRB) and once the semi-auto is re-racked, Marines are taught to fire a test round. Mechanically this makes sense, however, Marines are under a completely different set of rules than us civilians. Just imagine having to testify that the reason you fired a particular round is because “you needed to see if the gun worked”.

Lastly, I have said that TRA needs to be an ingrained action, and its true you need to practice this until it is second nature. However, there is some danger to this. If the reason for your malfunction is a squib load (that did not fully clear the barrel and is stuck inside it), you can “grenade” your gun if you fire it with a barrel obstruction. During a situation where someone is actively trying to kill you, the odds of them doing so is MUCH greater than the low statistical probability of a squib load. In this case I would act in accordance with the greater threat. On a practice range, I the risks of a squib load outweigh the risks of taking time to properly clear the firearm. Basically use some sense and choose your tactics based upon your risks.

Stovepipe

Another malfunction of a semi-automatic is a failure to fully eject. It can be caused by an excessively dirty firearm, a broken ejector, or improper shooting position. If the ejected round does not clear the firearm before the slide returns, it can be caught by the slide and will stick out of the ejection port like a stove pipe sticks out of a roof.

Some instructors teach TRA to clear this malfunction, and that works most of the time, as well as being a simple training solution. I teach a specific method because with a stove pipe the diagnosis is clear. The gun isn’t working because a spent round is stuck – remove stuck round…

The procedure is simple. While holding the firearm with your shooting hand, make a karate chop hand with your support hand. Place your index finger of your chopper on the top of the slide somewhere between the ejection port and the front sight post (hand angled to keep your pinky well away from the muzzle). Forcefully but smoothly run your hand along the slide toward your body. Your finger should catch the stovepipe round and rip it out of the slide. You will then need to grasp the slide and rack it. Assess the situation, gun is back in service.

Double Feed

This is a more complicated problem that requires a more complicated fix. If you get a double feed in a defensive situation its best to go to a backup gun. If this is not possible get behind cover (if your not already – why aren’t behind cover already). TRA won’t work in this situation because even if you manage to eject the round attached to the extractor, the slide will want to pick up a new round and since you have a round already in the chamber, you will just cause a new double feed.

Before you can fix the problem you will have to remove the magazine. This is problematic as the slide has tried to push a round into the chamber. This causes the round in the top of the magazine to still have a portion of it under the feed lips of the magazine, but the bullet tip is partially in the gun. That means that the magazine cannot fall free. You must pull the magazine out manually as you simultaneously depress the magazine release.

I added a “finger grooved” floorplate to my Glock magazines specifically to give me leverage in the event of a double feed. If your magazine fits flush inside the magazine well you may not be able to pull it out. If that is the case, you can always fall back on the physics of inertia. With your shooting hand depressing the magazine release, rapidly and forcefully bring the gun down towards your knee (karate chopping again) while rapidly and forcefully bringing your knee up (like kneeing someone in the face with your wrist being the face). You want your wrist to contact your knee and abruptly stop movement. If the magazine release is activated the weight of the rounds in the magazine will cause it to want to keep moving downward and should cause the mag to fly out of the gun. If you miss your knee with your wrist and smack it with the butt of the gun, the gun may fly out of your hand and you may hop around exclaiming some descriptive but socially unacceptable words.

While the magazine is out of the gun, forcefully rack and re-rack the slide several times until the extractor hook pulls the cartridge out of the firearm.

Insert a fresh magazine if possible – if not check the extracted magazine to ensure rounds are seated properly and reinsert it.

Rack and Assess.

Obviously, this is a concept you need to practice with dummy rounds, and use as applicable. If you are crouched behind a car, you may not be able to perform this exactly as shown on the video. Inertia applies just as well with you smacking your wrist on a car tire as your knee, be flexible and make it work.

In closing, no video or article can replace your learning and practicing these techniques in the presence of a skilled instructor. If you learn it wrong, you will perform it wrong, and without guidance you cannot be sure your performing it to perfection.

How to Reload a Handgun Quickly


How to Quickly Reload a Handgun
Buy at Amazon

How to quickly reload a handgun is one area of firearm manipulation that many people take for granted. I have found that many take the instinctual path.  They try to rush it rather than take the time to learn the proper process.  Master the process before attempting to add speed.

Going to fast causes students to fumble their magazines rather than smoothly inserting it into the firearm.  Remember, slow is smooth, and smooth is fast.

For the purpose of this article, I will only reference the semi-auto.  Additionally, I will only address reloading from a completely empty firearm (slide lock). I actually prefer revolvers in many situations, and address reloading revolvers elsewhere.

Before attempting tactical reloads and “reload with retention”, the shooter should master the basic slide lock reload.

Fire 3 Fire to Slide Lock

Typically, (learned through after action reports), we see that if an individual fires more than 3 rounds they generally stop counting rounds.  Statistically, if they fire 3 rounds they fire until the slide locks to the rear.

That makes sense – Bang… bad guy is still attacking… Bang Bang… OH $#!^ BANGBANGBANGBANGBANG….

In a slide lock situation, your running full tilt.  Your Adrenalin is raging, your heart is pounding.  The ability to think calmly is reduced.  Most importantly, your fine motor skills are compromised due to vasodilation.  This created the adage; In a fight fingers turn to flippers.

What you need in this situation is good training and perfect practice.

What we are going to do is to give you a overview of the steps and explain WHY we do what we do.  As always, no matter how awesome the internet video is or how articulate the article is, neither substitute for live instruction from a qualified instructor.

Slide Lock Reload Procedure:

  • Keep your shooting arm up. Remove support hand from pistol and reach for magazine while rotating gun in your shooting hand to bring your dominant thumb to the magazine release. (Watch video for clarity). TIP: take some white out or a paint pen and place a small white dot on the inside of your magazine well (right side if your right handed – left if otherwise, about 1/8 inch from base of magazine well and about 1/8 to ¼ from front right corner of the well) When inverting the gun practice inverting it until you can see the dot.
  • Grasp full magazine in your support hand. I personally do not care how you orientate your extra magazines as long as you are consistent. I keep mine forward of my left hip with the bullet heads facing the rear. Place your index finger along the front of the magazine (bullet tip side). This allows your body to unconsciously track the magazine and allow you to bring your index finger to the magazine well (tip of your dominant hand pinkie). It may sound silly, or be confusing until you watch the video, but I guarantee that with your eyes closed you can stick your index finger of one hand into the palm of your other hand.
  • Press the magazine release with your dominant thumb. Let the magazine fall to the ground. Simultaneously draw your fresh magazine and bring it to the gun. Practice this repeatedly until you can literally do it with your eyes closed. The gun is still up – you are looking PAST it toward the threat… If you bring the gun down toward your body and reload it by vision instead of by proper body mechanics and touch you lose all sight of your attacker and may have the fight ended for you by getting shot in the back of the head.
  • Firmly insert the magazine into the gun, ramming it home with your palm. Depending on the type of handgun, the condition of the magazine lips, and the intensity of your action, the slide may or may not move forward on its own.
  • If it goes home on its own – AWESOME, you just earned a cool point, reestablish your proper two handed grip, index the gun on the target and assess the situation.
  • If the slide stays to the rear, it has worked exactly as designed, rotate the gun back into a proper one handed grip, and while pointing it in the general direction of the threat, reach over with your support hand, placing the middle of your palm on the rear sight. Grab the slide and pull it back slightly to release the slide lock and then let go to let the slide ride home under its own spring pressure. Reestablish your two handed grip and assess the situation.

The key to this is twofold – PRACTICE and more PRACTICE. Get some dummy rounds to add weight, stand over your bed so the dropped mags are easy to retrieve and perform this over and over until you can reload like Travis Tomasie….

You have to keep the gun up and resist the urge to bring it and your eyes down – don’t let the bad guy out of your sight

I appreciate your time, hopefully this has helped you, and as always I welcome any constructive comments.
and with practice….


Three Step Handgun Draw

Three Step Handgun Draw
Buy at Amazon

It seems like drawing your handgun from a holster is a pretty intuitive action that does not need a lot of comment, and in reality it pretty much is, however, there is a difference between doing something and doing something smoothly, effectively, and quickly. Today we are going to talk about the fundamentals of the Three Step Handgun Draw of your firearm as well as the reasons behind the methodology.

Anytime you are learning a new skill it is best to break it into the component parts and master each step individually. Don’t try to add speed until you master the entire sequence. A common saying in the firearm training/Law Enforcement field is “slow is smooth, smooth is fast”. If you try to run before you can walk all you are going to do is bust your head.

The first step is simple – Establish the grip on the gun. Before you attempt to draw the firearm from the holster you need to have a firm grip on it. I have seen an officer try to reload his firearm in a simunitions training exercise get in a hurry drawing his magazine and end up flipping it out and across the room because he did not have a strong grip. The other piece of the first step is to get your non shooting hand out of the way of your draw stroke. The best place for your hand is on your stomach – that keeps it from being muzzled by your handgun as it is being drawn. Obviously if you are in a contact distance fight, then the best place for your non shooting hand is your opponent’s throat, but all things being equal the stomach is a good default area.

Practice step one over and over, bring your dominant hand to the gun and the non-dominant hand to stomach (both actions simultaneously). Once you can do this without thinking, learn step two.

Step two is to rock the gun up and out of the holster, your upper arm should be close to your body, your elbow bent, and your dominant forearm and pistol perpendicular to your body. This is pretty close to the idea of the “speed rock” as you can fire from this position if needed, (and your non-shooting hand is safely away so as not to get shot). I have seen several teach the “speed rock” draw for contact distance shooting by having the shooter (defender) lean back at the waist as they draw. Personally I dislike the backwards lean as it brings you off balance, and with a charging or aggressive attacker could end up with you being knocked down.

Step three involves bringing the gun forward and upwards to establish your shooting stance. At the same time you are bringing the gun forward, you are also bringing your support hand to the gun also. It is very important to move the support hand TO the gun by moving it faster and coming in from behind rather than moving the gun to the support hand. You do not want to muzzle your non-nominant hand (especially in the stress of a lethal force incident).

Once you master each step separately, combine them and practice them in sequence. In the beginning it helps to call out each step and perform them separately, but consequtively. Step 1, Step 2 Step 3…. Gradually speeding up and dropping the act of calling out each step. A tip I used was that each morning as I donned my holster was to perform three perfect 3 step draws slowly with an emphasis on perfect technique. Each night as I doffed the holster, I repeated the action with here more perfect draws.

Over time you will notice an ease of action that only comes through practice.

One last tip is that while there are several incidents that may cause for a “quick draw”, there are no reasons to perform a “quick reholster”. ALWAYS HOLSTER RELUCTANTLY, after scanning for threats and ensuring there is no longer a need for your handgun to be out.