I have to say, as someone that spent 4 years working as a emergency management planner assigned to our Nuclear Power Plant Safety program, and dedicated to training first responders in how to remain safe during a power plant response, I have little tolerance for the fear-mongering and nonsense that some people in the preparedness community spout about nuclear power.
Radiation is a well understood scientific principle, and it is pretty easy to find, shield, and stay away from acute levels of radioactivity.
As a hazardous materials technician – and someone that has plaid a part in more than one actual radiological emergency I would tell you that I would much rather deal with a radiological event than a extreme hazardous material event.
Anyway, for those that live near a nuclear power plant here are some tips:
Stay ready at all times: have a disaster plan and drill it often. Have second-nature knowledge of official evacuation routes – or, better yet, a map showing them (available from TVA). Have a specific place to meet if you and yours become separated. Have an emergency kit – stocked, on hand and ready to take at a moment’s notice.
A siren is not an evacuation signal – it might only be a test, and the correct response to a real event varies with the specific type of event. Your reaction to a siren should be to tune to local radio, TV or NOAA radio for instructions.
Stay off telephones unless absolutely necessary. Much of the communication by emergency response workers is via telephone, and lives could be lost if they can’t complete calls.
NEVER call 911 to get information!
If told to shelter-in-place: close doors and windows; turn off anything that allows or draws air into the house like furnaces, air conditioners and fireplace vents; if you must go outside, protect your lungs with a damp cloth or towel over your mouth.
If told to leave: stay calm, don’t rush; take your emergency kit with you; turn off lights, appliances and water; follow the evacuation route, using your own transportation if possible; hang a white towel or cloth on your front door so emergency workers will know the building has been evacuated.
As soon as an all-clear is given, check on your neighbors.
If you have children, know the specifics of what to do about them when they are in school.
If you farm or garden; listen to the emergency information from the Tennessee Department of Agriculture.
If you live within 10 miles of a nuclear power plant and would need special help in an event, contact TVA now.
Bow hunting is a difficult form of hunting and many turn to it because of that. If you care about becoming a better bow hunter then you need to push youtself, learn your limits, and fight to be successful.
There are many things that can go wrong in every scenario, but hopefully these 9 tips to becoming a better bow hunter will help prevent some common mistakes while bow hunting.
1. Practice
Michael Jordan, Tiger Woods, and Jerry Rice: these three individuals have the same thing in common — their work ethics and practices. These men gave majority of their lives to their sport.
Understandably, not everyone can go and dedicate their entire life to shooting a bow. But one can spend a little time each day or at least each week shooting a bow depending on how accessible a range or pro shop is.
When it comes to practicing, most people just grab a handful of arrows and their rangefinder and start flinging.
Every time you pull back, try to build muscle memory. In order to be sure that your anchor point is the same each time, draw your bow with your eyes closed (once confident) and then open your eyes. You should be looking right down your peep sight. This means that during crunch time, you won’t have to think one bit about drawing your bow and anchoring perfectly.
Another thing to practice is shooting a farther distance than you would hunt. The farther the distance is, the more extreme your flaws and inconsistencies are. This allows you to see and fix the problems you wouldn’t have seen at 20 or even 50 yards.
One thing that a lot of archery hunters don’t realize is that once your bow is sighted in just right, then it is wise to shoot in the exact gear you will be using during the hunt.
Learning the Hard Way
I unfortunately learned this the hard way when I went deer hunting in January. There were about 2inches of snow and a single digit on the thermometer so I was decked out in several layers of clothes, including my large coat. I had my binoculars in a case on my chest. I snuck within 60 yards of a buck and drew my bow.
As I released my arrow, I didn’t realize how far my binocular case stuck out and my bow string caught it. It ripped my case and broke one of the straps. It scared me to death! Needless to say, my arrow shot off into the trees and the buck bounded off.
2. Flight Path
A lot of hunters get buck fever or tunnel vision when they have an animal in their sights. It’s not necessarily a bad thing, as it is great to be focused on your goal. But for safety purposes you need to know what is beyond or in the vicinity of your target.
It is smart to take a second or two to glance around and beyond the animal to make sure that an erroneous shot with a rifle or bow won’t hurt another person or even a different animal.
When it comes to archery, it is wise to get rid of tunnel vision and make sure the flight path of your arrow will not clip any branches or hit any trees. Even if your 60-yard pin has an open path to the animal, the arc of the arrow when released may hit branches you didn’t notice before.
A great tactic to practice and use when shooting through some trees is to pull back and get your pin on your target, then glance up all the pins to your 20-yard pin and make sure none of them are on a branch. Of course your arrow is extremely flat shooting at 20 yards. But the farther out you go, the more arc it will have.
3. Hold Your Finish
Anyone who has ever played any sport out there understands the importance of “holding your finish.” It is only natural to want to watch your arrow in flight as soon as you release it. But if you start dropping your bow to watch the arrow, then there is a chance that as your bow is moved, it will cause the arrow to start out on a bad line.
If you watch any professional archery when they release their shot, their bow slowly rotates forward with their outstretched arm still held in the same position. So as you practice, keep in mind to hold your finish. Recently I have had to remind myself to do this, even after shooting for over 25 years.
4. Broad Heads
Something that not too many archers do is to practice shooting their broad heads, and this is completely understandable. It is hard to fling a brand new broad head into a practice target since a set is a bit pricey.
A lot of hunters have noticed that some broad heads will change your flight path even slightly. In some cases, such as my wife’s shooting, her fixed broad heads shot close to a foot right and one inch low to where her field tips shot at 70 yards.
I’m not sponsored and I don’t have an unlimited supply of broad heads, so we only use one arrow with one broad head and a lot of walking back and forth when we are trying to sight in a broad head.
Know Your Game
To be accurate as possible, you have to shoot at least one broad head to double check.
Also when thinking about broad heads, you must know the animal you intend to hunt. Some hunters swear by fixed blades and others only shoot mechanical broad heads.
I personally shoot both kinds. I have my favorite mechanical that I only use on deer, antelope and varmints. But when I am hunting elk, I prefer to use a fixed blade as a lot of kinetic energy is lost when a mechanical broad head opens. So when it comes to a large tough animal such as an elk, I want as much penetration as I can get without wasting energy.
5. Practice Range Estimation
Distance is an issue that slaps a lot of hunters in the face. Guessing yardages during crunch time is something that doesn’t come easy. Anytime you are out and about in the hills or even when driving around, it is a great idea to have your rangefinder with you. Try to guess the distances of trees, rocks or even buildings, and then verify it with your rangefinder.
This is also wise to do while out scouting or looking for the specific game you will be hunting. By doing this, you will in a way train your mind to judge the size of the animal at different yardages; like how big a deer is at 20 yards versus how big it is at 60 yards.
Practicing distance guessing is critical for archery hunters as there are times when it is not possible to range the animal before taking a shot. It’s handy if you need a second opinion if your rangefinder isn’t working correctly.
6. Wind/Thermals
Any hunter knows that the wind can be your best friend or your worst enemy. But a typical understanding of the wind is a great tool to have in your pocket.
Thermals are something that not everyone understands. As soon as the ground is warmer than the air (from the sun hitting it) regardless of the way the wind is blowing, heat rises which means the thermals are going to pull your scent up.
A mountain or hill is the same, except it will either pull your sent up or down the hill depending if the ground is warmer or cooler.
So if you are hiking a hill where there might be animals on top, make sure to go up on the shady side in order for the thermals to pull your scent down. Unfortunately during midday, most of the time, an animal will smell you regardless of what side you trek as everything is pulled up.
It would be best to wait for the game till you can see that the outside temperature is cooling off.
Familiarity is the Key
You have to know what the wind does on a “normal day” on the location that you plan to hunt on. Where I live, the wind blows west the first thing in the morning until around 10:00 AM, and then it shifts and blows east the rest of the day. So all of my morning stalks, I make sure to incorporate this to my plan.
Example if the deer is in my west, I check the time to guess how long it may take to get to the animal. If it is going to be after 10:00 AM, then I make sure to stay east of the animal.
7. Hold Steady or Float
The argument of which method between the 2 is better for archery:
Place the pin on your target and hold perfectly still as you aim and shoot, or
Float your pin and only release when you pass over the target.
If you have a surgeon’s hands and you are as steady as they come, the answer is obvious. But if you are anything like me who don’t have the steadiest shot, then floating the pin may be your best option. Or at least give it a try at the range.
Floating your pin means that you don’t hold perfectly still, you slowly move the pin around the target. This means that you are the one in control and you know when the pin should be dead center as you can anticipate your own movement.
But on the downside of this method, it could cause you to pull your trigger too soon, or jerk hard when you pull the trigger.
So practice both methods and see what works best for you.
8. Shoot Your Bow in the Field
Piggybacking on the practice tip is something that I do quite often but what helped me immensely is that I shoot my bow in the field. You can’t practice kicking a field goal in the Super Bowl while down by two with one second left in the game. That kind of pressure can only be felt when you are in that situation.
Just like the pressure from drawing on a trophy animal can only be replicated by doing it: drawing your bow back on a trophy animal. However, as soon as archery squirrel season opens up where I live, I take my filed tips off and toss on blunts and judo points.
Of course I lose and break quite a few arrows. But when I make a shot on a squirrel or rabbit, it sure makes deer and elk look a whole lot bigger.
9. Inspect Your Equipment
With the invention of carbon arrows, the speed of the current bows seems to put Robin Hood to shame. However with the use of these arrows, it is imperative that you flex and inspect them as often as possible.
I personally inspect them after every shot to my target. It is a little overkill I know, but if you ever feel like seeing some horrific images, try Googling “carbon arrow accident”. It seems to give a whole new meaning to the term “safety first”.
The amount of energy that a modern compound bow generates is unreal. And if there is any nick or flaw in the carbon arrows, then there is a chance that it could fail as soon as you trigger your release.
Along with inspecting your arrows, it is wise to inspect your bow too. During your regular maintenance of waxing your string, make sure to do an overall check and look for frays or cuts. Also remember to survey your cams for any dents or gashes.
Learning the Hard Way
As I was stalking an elk, I got within 40 yards of a decent 360-inch bull. I slowly stood up from the tall grass I was hiding in. As he looked over me I drew my bow; just as I hit the let off, I heard a pop and my bow string went limp.
I stood there in shock as the elk bugled my direction and slowly walked off down a hill. I looked at my bow and saw that the string had slipped off the top cam and cut into it which caused it to be stuck at full draw. Until now, I still don’t know what caused my bow to do that.
But if I inspected it before hunting that morning, there was a chance I may have prevented it from happening.
Luckily I wasn’t hurt. I sure got off lucky and since then, I make sure to check my arrows, my string and the rest of my bow before and after I shoot each session.
Chris Waters was born and raised in a small town in west Arizona of around 5,000 people. At a very young age, he was introduced to hunting by his father and since then he has hunted everything from muzzleloader to archery, including deer, elk, antelope, ducks and more. He loves every minute of being outdoors
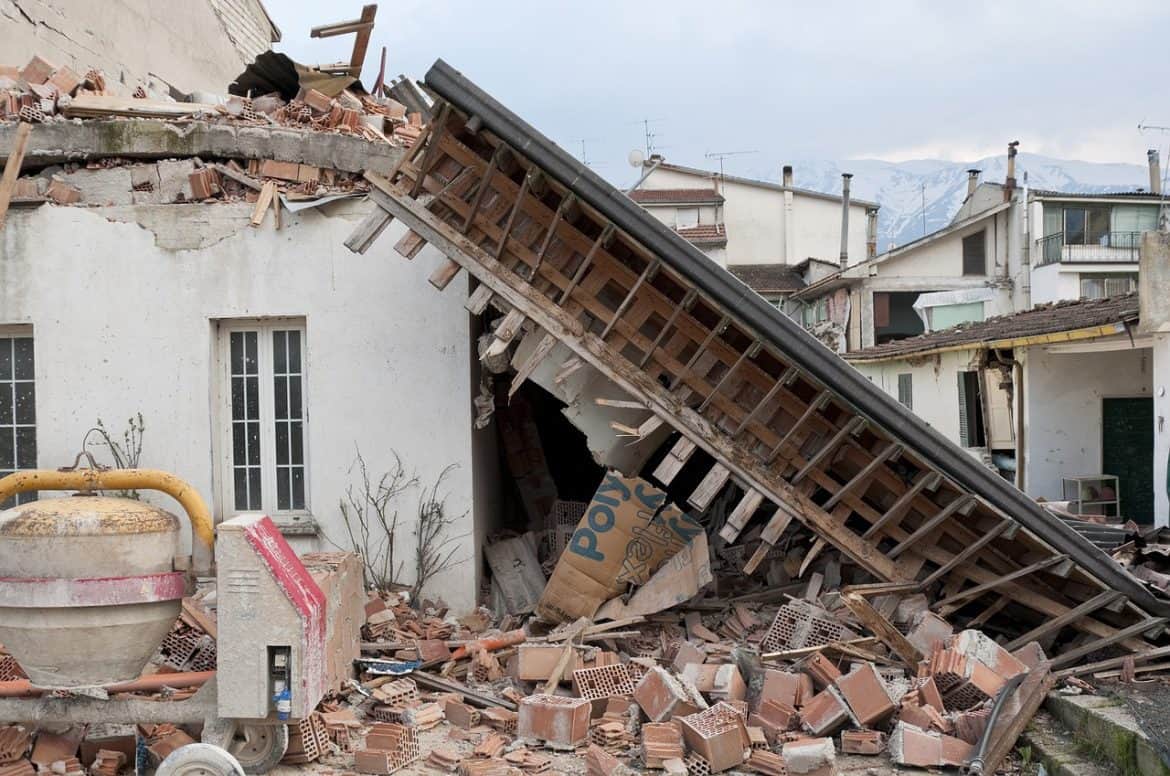
Compared to other natural disasters like hurricanes and fires, earthquakes strike without warning anywhere in the world.
There’s no telling when they’ll happen and most of the time, they bring extensive damage.
During an earthquake, your own home itself can become a danger to you and your family. How can you prepare your own home for an earthquake?
Preventing Structural Damage
The first step in quake-proofing your home is to prevent the damage where it is most likely to occur. Providing structural support to areas that are weak such as the front porch, glass doors, wooden decks, and the garage. Consulting a professional engineer is the best option in order to evaluate the structure of your home and make the necessary improvements in order to strengthen these areas. Making use of the best materials is essential in protecting your home as well. Concrete dries fast and is one of the sturdiest materials that are earthquake-resistant.
Securing Furniture
It’s common for furniture to get thrown around when a quake starts, especially if it’s a strong one. The danger of cabinets, light fixtures, and other furniture to fall down and injure you or your family is high when these things are unsecured. What you need to do here is bolting or fastening them safely in place. This ensures that they won’t fall down easily and pose any danger for people inside your home during an earthquake. Use the best available framing hammer to fasten nails on the feet of cabinets and fasten dressers to the walls to prevent them from toppling over and hurting anyone.
Placing Objects Safely
Head injury is quite an expected injury during earthquakes. This is because of heavy objects falling on people’s heads during all the shaking and this can even be serious at times. If you don’t want this to happen, be smart in storing objects in your home. To make sure safety is a priority, pack heavier things such as tin cans, bottles, and glass on the lower cabinets and cupboards as they won’t be falling from a great height. Store the lighter objects on the upper bins to prevent potential hazards. In addition, always lock your cupboards since they may jar open during a quake.
Check Your Electronics
Power outlets can also be damaged during an earthquake. Knowing how to apply and repair switch wiring can help prevent electrical hazards at home. Due to the intensity of the shaking, some wires and panels can be dislodged or worse, completely broken and exposed. This would then lead to electrical hazard or even a potential for fire, so securing your homes electronics is a priority for earthquake preparedness. Consult an electrician to secure the electrical wires in and around your house, making sure there are no live or exposed wires before a quake. Repositioning outlets that are near potential hazards like the sink or the gas would also make it a lot safer.
Having a Safe Roof
A roof made from strong materials can easily survive an earthquake. If a roof does get damaged, not only does it make repairs hard, it also poses a danger of taking the whole house with it. Using lighter materials such as aluminum or metal is a great way to reduce weight on the roof and prevent extensive damage. Applying asphalt shingles is also a good alternative because they’re lighter and more flexible than other roofing materials. If you’ve bought an already-built house, asking a contractor to replace the roof with lightweight materials can be done beforehand.
Water Heater and Gas Appliances
Getting clean water after an earthquake can be difficult if some services end up unavailable. Your water heater can easily be damaged during an earthquake if it’s not secured properly. Faster the water heater against the wall, making sure that it stands upright. Replacing the metal pipes with more a flexible material will also prevent damage during the quake. Gas-powered appliances also benefit with more elastic connections and prevent possible gas leaks.
Additional Earthquake Proofing
Taking the pre-emptive measures for earthquake-proofing your home is important. A house can become a dangerous place during a quake and ensuring the safety of your family is a must. Securing doors and packing up supplies beforehand will also help save you time when disaster does strike. Knowing what materials to use for your home will decide whether your house can survive or not.
Conclusion
We can’t really predict when and where an earthquake might hit. If you know the right things to do, then setting your home right, you can save a lot of money and time in repairs
We have made a Kale Chips Post before, kinda like the multiple brandied strawberry posts. However the first time I showed this William was a baby, and when Genny went to make this on Sunday William wanted to participate.
With WT wanting to cook with mommy, and Genny needing content for her Healthy Life group on facebook (its secret so you have to ask her to join) we decided to just go and tape him messing in the kitchen.
William is much more fun to watch than I am, even if he doesn’t really follow direction well.
We used the same recipe as out original post, because this is the one she always uses, but because the salad spinner go broken in an “experiment” Genny got creative and used a hair drier to fry her kale.
You don’t need to dry the kale, but the drier it is the crispier the result and soggy greens are not “chips”
To make kale chips:
Preheat oven to 375 degrees F
Pull Kale leaves from the stem and put in a pot.
Ensure the kale bits are rather large.
Add olive oil one teaspoon at a time and toss to cover. You want to cover the leaves but with the smallest amount of oil possible. Otherwise instead of crispy the leaves will be gooey.
Mix in black pepper or other desired seasonings
Put parchment paper on a cookie sheet
Spread oiled kale in a single level on the cookie sheet
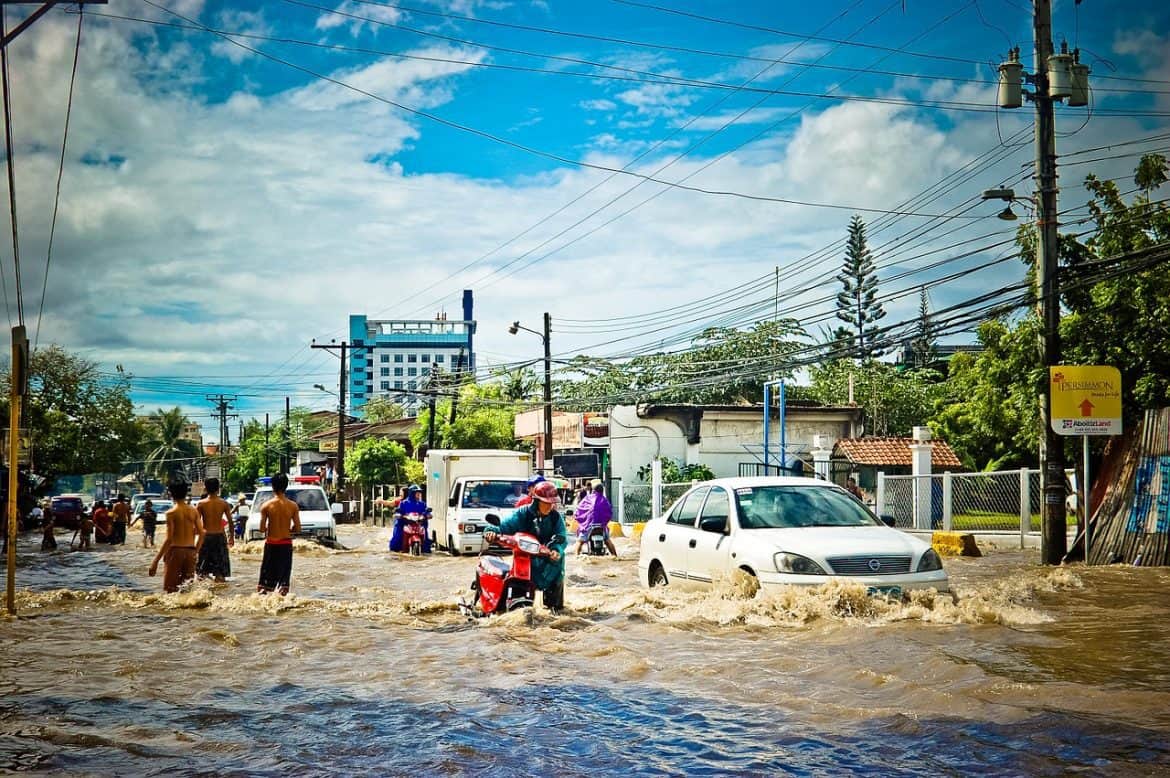
Take Floods seriously – floods kill more people each year than any other natural phenomenon including tornadoes.
Ask your local emergency management office if you live in a flood-prone area. Learn the area’s flooding history, flood warning signs and alert signals. Get a copy of the community flood evacuation plan.
Have a fully-supplied emergency kit on hand.
Develop an emergency communication plan, and a plan for getting back together in case family members are separated during floods.
Ask an out-of-state relative or friend to serve as the “family contact.” After a disaster, it’s often easier to call long distance, and it’s unlikely this contact will be involved in the same disaster.
Teach all family members how and when to turn off gas, electricity, and water.
Teach children how and when to call 911, police, and fire, and which radio or TV station to tune to for emergency information.
If a flood comes, go to an upper floor (if outdoors, climb to high ground and stay there); if told to leave, do so immediately.
Never attempt to walk or drive through floodwaters. Even 6-inch-deep water can sweep you off your feet; even less can cause loss of control of a vehicle. Turn around don’t drown
Flood dangers do not end when the water recedes. Listen to a radio or television and don’t return home until authorities indicate it is safe to do so. Even then, listen for and follow all instructions they give you.