How to Save Money on Gas for Your Car

save money on gas
Buy at Amazon
With the price of gas on the rise it is important to take measure to save money on gas for your car by cutting down the amount of fuel that you are using. There are some tips on how to save money for gas for your car.

Drive Less

Instead of running errands several times a week combine them into one trip. Instead of driving from store to store walk whenever possible. All look for stores that carry a variety of items so you will not have to travel to so many different places. The less you drive the less gas you will need to put into your car, t his will obviously help save money on gas.

Shorten the Warm Up Time

During the winter months many people think that they need to let their car warm up for several minutes before driving off. You only need to warm your car up for 30 seconds to one minute before driving. If you leave the car idling for more than a minute you are wasting gas. Not only that you are putting greenhouse gasses into the air. Many modern cars do not need a long period of time to be ready to go even during cold mornings. One minute is all you need. This will save you both time and gas.

Use Cash to Pay

Many gas stations charge an additional fee to customers that pay with credit cards. This fee is due to the processing fees from the credit card companies. When paying with cash or a debt card the cost of gas is often a couple of cents less. This can add up to savings over the year.

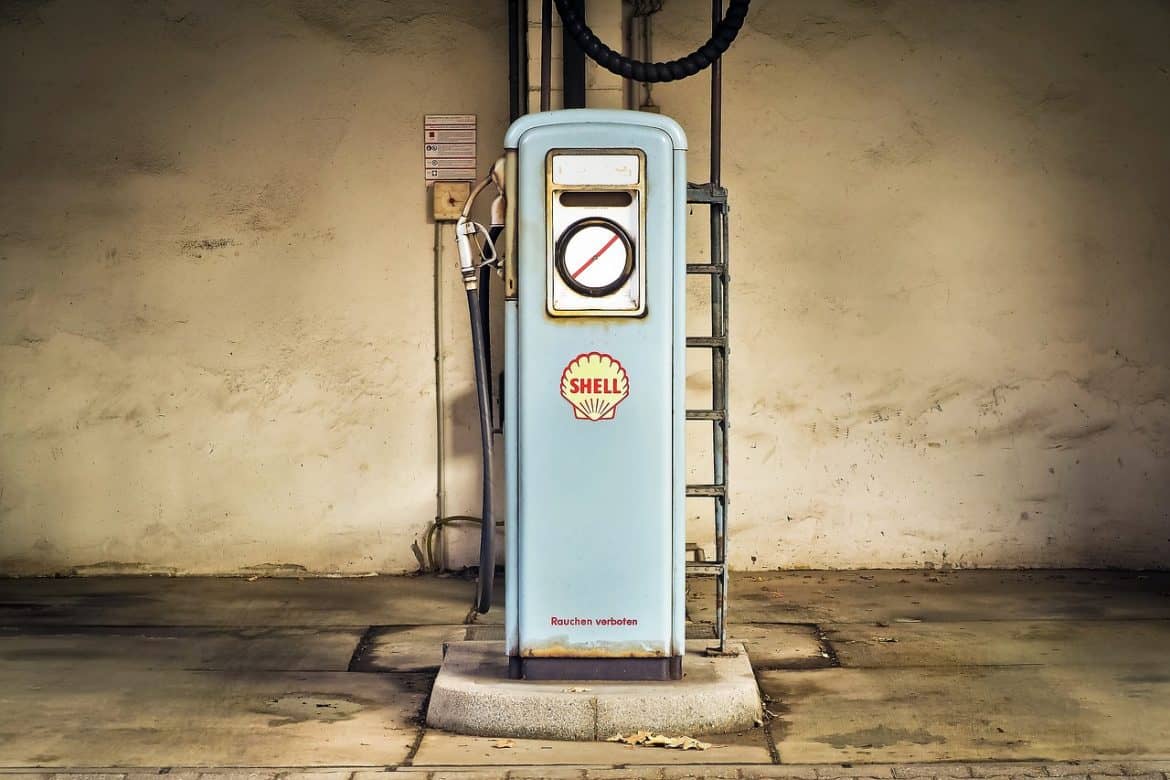
Find the Right Station

When getting gas the location of the station can play a role in the price. Often stations that are right off the highway charge more money for gas than those that are in town. To find the gas station with the lowest price be sure to check an app. There are several apps that will show the prices for gas from various stations around town. When passing by that gas station get the gas while it is cheap. If you belong to a club store be sure to get gas while shopping there as the price is often less than even the cheapest gas station.

Time Your Purchases

The time of the day that you purchase gas can affect the price that you pay. You should either purchase gas early in the morning or later in the way. Due to the cooler temperature the gas will be denser and you will get more gas for your dollar. If the price is gas is going to gas up it usually happens in the afternoon. Getting gas early can help you save several cents per gas.

Slow Down

The faster you drive the more gas your car is going to use. The drag is increased on your car and in order to provide the power that is needs the more gas your car will use. Driving at the speed limit or below it will allow your car to use more gas efficiently. Also be careful not to accelerate too quickly. The faster you accelerate the more gas your car will use.

Watch Your Braking

The more you brake the more gas your car is going to use. Frequent braking will also wear down your brake pads faster. In order to brake less you maintain a safe distance from other cars. This way if they slow down you will not have to hit the brakes. You can also begin to brake earlier and slowly. This will help you save money on gas.

Keep an Eye on the Tires

Make sure that the tires are inflated properly at all times. Be sure that the tires are properly inflated as this will help you get better gas mileage. When there is a change in temperature the tires can lose two to three pounds for every square inch. If you decide to use snow tires in the winter months once spring comes around replace them. While snow tires will help create extra friction and grip to the road they will use more gas.

Close the Windows

During the warmer months many people like to open their windows to feel the cool breeze. While this may feel nice it is wasting a lot of gas. Wind can cause the car to drag and will require more gas to get it moving. Close the windows when possible.

Remove Extras

It is not unusual to see cars with racks and carriers on the top and the back. While these are useful for those on the go and can carry bikes and skies they can also use additional gas. When these items are not being used to carry things take them off. Also do not use the car to store items or keep unneeded things in them. The heavier the car is the more gas it will use to keep going. Be sure to unpack the car and is something is not being use get rid of it.

Conclusion:

These are some tips on how to help you save money on gas. You need gas for your car to run but these simple tips can help you save money and get more gas and mileage for your dollars.

How to Keep Eating Healthy in the Wild

How to Keep Eating Healthy in the Wild
Buy at Amazon

Camping outdoors is one of those activities that makes a seasonal break complete. It’s always fun, regardless if you haul a pop-up canopy, a hammock, or a tent, so long as food’s there.

The only concern of new health-conscious campers, however, is that there are limited meal options outdoors. In truth, it just seems like it because many prefer to bring chips and canned beverages during a camping trip. But it does not mean that you have to follow suit and forget your food principles.

Hence, let me shed some light on how to keep eating healthy in the wild today.

What can you do to ensure you’re eating right outdoors?

How to keep eating healthy out there isn’t rocket science. You can do it once you do the following:

Begin with a smart strategy.

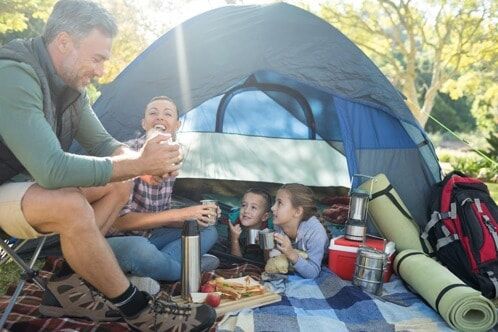
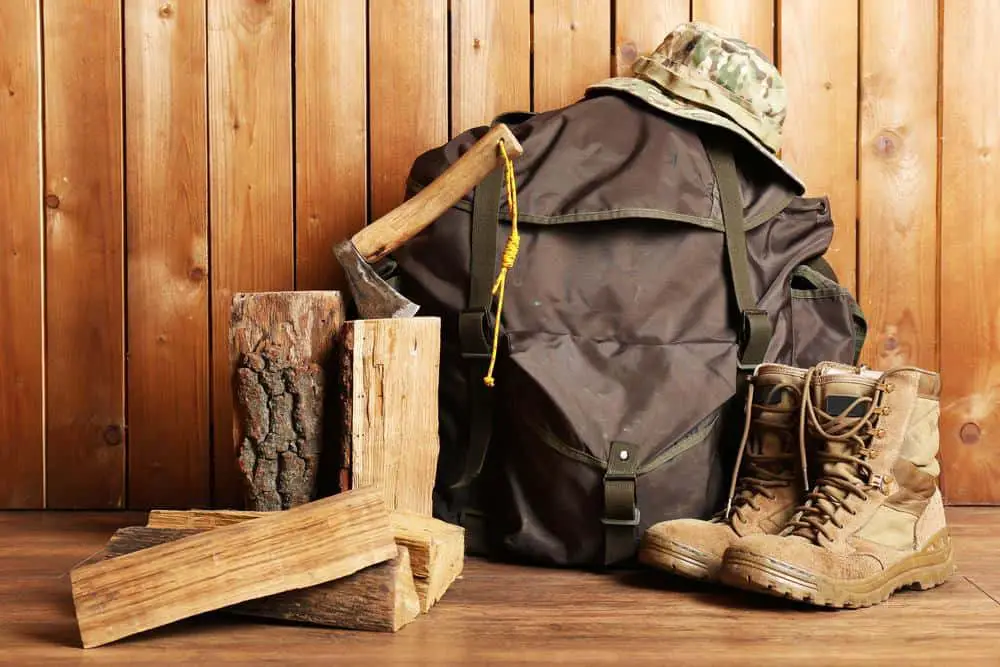
You should spend some time planning the foods and beverages that you will bring in the campsite.

A wise strategy is to include lightweight foodstuff in the bag, in case you are going solo. It will allow you to take extra gears without huffing and puffing along the way. Having plenty of water can’t be amiss either, even though you may want to carry juices and other drinks too.

Pack at least a day before.

Nothing astounding comes out of being a procrastinator and preparing your backpack a few hours before the trip. It is vital to do so prior to that, so you can obtain all the missing items from the supermarket. The homemade side dishes or cold meals that you intend to transport can also remain as fresh as possible.

Go for non-perishable foods.

How easy can your camping experience be when you only have nuts, granola bars, and canned goods to worry about? These non-perishable products are still healthy and full of nutrients, so they can keep your stomach satiated.

If you wish to have fruits and vegetables on the table, you may carry them in dried or freeze-dried forms. It can’t be too difficult to process such produces, especially when it entails that they won’t deteriorate and become inedible. Should you not have the luxury to pencil this work in your schedule, the local grocery store may have some ready for you.

Manage food preparation with care.

The germs spoil not just the foodstuffs but also your chances to keep eating healthy in the wild. For this reason, you should practice how to handle the former properly.

One practical rule of thumb is to never touch food without washing your hands first. It will be cool if you stake your tent near a creek or river so that you can clean up there. If a body of water isn’t available, wet wipes will do fine as well.

For a non-vegetarian, the plate you use for the raw meat should be different from where you place the cooked pieces. This way, it isn’t impossible to prevent the microbes from transferring to the latter.

Is a cooler necessary?

To be honest, the answer can be a yes or a no. A chiller is not required, considering it is winter and you don’t plan on bringing steaks and perishable products. A portable cooler comes in handy, on the contrary, once the warm weather cannot maintain foods at a low temperature.

The trick to ensuring that the cool box can perform its job well is to separate the beverages from the foodstuff. You will most likely open the container for the drinks often; that’s why the coldness in there can’t be maintained. It’s alright for fluids, but not for raw and chilled foods, so you need to put them in diverse spaces.

In case the campsite isn’t very far from the town where there are stores, you can also restock the ice. Doing so will help you decrease the heat inside the cooler. Thus, you will be able to sustain the freshness of the items you store in it.

What else should you think about to keep eating healthy while camping?

The advice-giving session is far from over. Here are a few more tips that you may find useful in the wild:

Take care of the meat well.

Grilling meat is the high of your adventure, so you shouldn’t miss out on it. Despite that, isolate the raw cuts beforehand to stop the germs that may be stuck on them from infecting others. Rather than leaving the pieces out in the open to thaw, it’s better to move them in a warmer cooler.

Wash fruits and veggies in running water.

Simply dropping the fresh produces in a bowl of water cannot clean them thoroughly. You should allow water to run over them instead to ascertain that the fluids will flush away the bacteria. In case there is no tap or natural body of water in site, the bottled one you’ve brought is okay.

Consume cold dishes immediately.

The mayonnaise-based foods that you’ve prepared prior to the trip should always remain in the chiller to avoid spoilage. Take them out once you’re ready to dig in. But, please, remind yourself that their shelf life at room temperature only lasts for two hours, so finish them fast.

Take filling food varieties.

Camping sometimes denotes hiking and climbing; that’s why you may feel hungry more often than when you’re in the city. Due to that, you must bring foodstuff that has enough protein and good carbohydrates to replenish your energy.

In Conclusion

The shelf life of your food outdoors heavily relies on how you prepare them beforehand. A cooler is not an absolute necessity, in case you only plan to stay there overnight. It becomes essential, though – along with proper food-handling methods – when you decide to extend the trip.

You can then keep eating healthy in the wild once you heed the suggestions written above.

Good luck!

How to Stay Prepared When On a Hunting Trip

How to Stay Prepared When On a Hunting Trip

How to Stay Prepared When On a Hunting Trip
Buy at Amazon

Are you planning on going outdoors for a hunting expedition soon? You must be prepared and know what to pack.  Don’t endanger yourself while you are in the field! So if you’re wondering about how to stay safe and prepared outdoors, here are the tips you should follow.

Pack For Protection

One of the essential things you’ll need to bring when going hunting would be protective gear, such as cold weather hunting gloves, bulletproof vests, and warm clothes. This will ensure that you are safe from colder inclement weather and that the clothes will cushion the blow in case of falls. It will keep you comfortable while you are out as well.

Ready Your Equipment and Some More

When you are packing, you will need to ready your equipment to stay prepared when targeting game and to remain undetected. This will mean airing out your clothes to stay odor-free or to clean and polish your firearms to use with ease. Pack accordingly and pack extra necessities, such as ammunition or food. Do not overpack on clothes and unnecessary items. Leave heavy items like books or extra gadgets (for recreation) back home.

Research and Scout the Area

Plan the area you will be hunting in and secure your permit if needed. Read up on the rules and regulations and if possible, scout the area to know where the strategic points are and where it’s safe to stay in. This will prevent you from getting lost or detected from your game while hunting.

Prepare for Survival

Always remember that you are in the wilderness and there are chances that you’ll end up having to defend yourself for anything that MAY happen. While the chances of getting lost or in trouble are rare (as long as you do your research), they may happen, and it’s crucial to prepare for it. Always have first aid and survival kit that consists of your necessities, from emergency blankets down to food and medicine.

Train and Practice

You won’t be able to hunt successfully if you aren’t well-equipped with the knowledge of how to hunt! When you have the time, use it for target practice so you can stay safe when handling your gun and ensure a catch every time you hunt. Practice safety first, too!

In Conclusion

Through these tips, you won’t worry about the dangers or risks while you are hunting in the field. Whether you’re catching a mullet in the waters or hunting for deer on the field, following this article will help, you have fun without the harm or risk of injury.

I hope I helped through these tips! Don’t wait any longer and try them today to see if it works for you. If you have any questions or would like to share your tips and experiences when hunting, then comment down below. I would love to hear what you have to think.

3 Simple Homestead Canning Recipes

3 Simple Homestead Canning Recipes

Buy at Amazon

If you want to try making food by yourself, you should try the homestead approach. In this kind of lifestyle, you are going to grow food in your backyard. But if there is one thing more fun than this, it must be homestead canning.

Canning is actually a great hobby and survival project. It allows you to preserve your grown food as long as possible. These food items could come to your rescue, whenever you are trying to be frugal. But of course, canned foods are also great gift ideas!

When you are canning, it is recommended that you only create a recipe that you are familiar with. In this way, you won’t have any trouble in making the food. As a result, you are simplifying the overall cooking process.

But if you are still new to homestead canning, then don’t fret. I can pull certain recipes on my cooking repository that you can try. They are fairly simple to create since they only involve minimal ingredients and preparation. Take a look at each of these recipes and see which one you can try first!

Homestead Canning Recipes

Canned Tomatoes

Tomatoes are always a favorite ingredient when it comes to homestead canning. They are very accessible and relatively cheap, too. Since there are a lot of tomato varieties today, your options are pretty limitless. However, for those tomatoes that are relatively sweet, you should include a minimal amount of acid in the equation. With this, you can prevent botulism from happening.

Ingredients:

  • Tomatoes (2 pounds)
  • Lemon juice
  • Salt

Materials:

  • Mason jars

Instructions:

  1. Start by peeling the tomato. Use a sharp knife to this process. If you are working with huge amount of tomatoes, the peeling could take time. Therefore, it is better if someone will help you out.
  2. Next, blanch the tomato. You can do this by removing its core. After that, make an X cut on its bottom. Once done, you can put the tomatoes in a pot of boiling water. Let them be simmered for around 30 seconds. After simmering, put the tomatoes in a bucket of water with ice.
  3. If the tomatoes are all naked already, you should start preparing the jars. Make sure that your jars are clean by running them on a dishwasher.
  4. Put the tomatoes in the jar. Include at least two tablespoons of lemon juice per jar. This will stabilize the acidity level of the canned tomatoes. Adding the salt is optional, but you can still add one teaspoon of it per jar.
  5. Fill the jar with water. After that, put the lids and close the jars tightly. Afterwards, put the jars in simmering hot water. Let them be boiled for around 45 minutes.
  6. Store the canned tomatoes in a cold and dark storage.

Canned Fig Jam

The fig is a seasonal fruit. Therefore, it would be a pain to crave it on the wrong season of the year. But if you are quite ingenious and creative, you can solve this problem by canning the fruit. One way to do it is making a puree or jam out the figs. They are great ingredients for various desserts like smoothies! The fig jam is also a great baby food, too.

Ingredients:

  • Figs (2 pounds)
  • Sugar (1/4 cup)
  • Lemon juice (1/2 cup)
  • Dash of cinnamon

Materials:

  • Mason jars

Instructions:

  1. Slice the figs into small quarters.
  2. Put the quartered figs in a pan together with the sugar. I recommend that you will use an unrefined sugar for this canning recipe. But of course, you can utilize whatever sugar you have right now!
  3. Cook the mixture in a low heat setting. Stir them properly until they become a puree.
  4. For better results, you can use a handheld blender to mash the puree while the cooking. This is not a necessary procedure, but doing this can smoothen the texture of the puree.
  5. Throughout the heating process, you can notice that the color of the mixture turns dark while its texture begins to thicken. Just continue stirring until such time the mixture is thick enough to be called a jam.
  6. Before you remove the jam in the pan, add the cinnamon and lemon juice. They can certainly enhance the flavor of this recipe.
  7. Store the now fig jam into the jars. Let them be cooled before you store them in your refrigerator.

Canned Apple Butter

We like making food from scratches. Even if we have the option to buy them, the pleasure and satisfaction of making your own food are still an irreplaceable thing. That is the story of the apple butter.

We can see a lot of commercial variants for this food item. But didn’t you know that you can actually make this delectable treat by yourself? Check out the procedure below to get started.

Ingredients:

  • Applesauce (9 quarts)
  • Cloves (1 teaspoon; ground)
  • Cinnamon (2 tablespoons; ground)
  • Sugar (4 cups)
  • Allspice (1/2 teaspoon)

Materials:

  • Mason jars

Instructions:

  1. The first thing that you need to acquire is the applesauce. You can make this ingredient, or you can buy it on the market. It is your choice.
  2. Use a crockpot and pour the applesauce there. The pot should be semi full. If you have a lot of applesauce, you can pour them later. Put the pot on the stove and cook it over low heat until the applesauce boils.
  3. While the applesauce is not yet boiling, add the rest of the ingredients. You can use honey as an alternative to sugar if you are quite distancing yourself from the latter.
  4. The cooking process of the pot will take around 8 hours. Therefore, if you want to quicken the process, you can increase the heat of the stove to medium heat.
  5. Once the mixture is already cooked, cover the pot with the lid. Don’t tighten the lid too much. Otherwise, the moisture won’t be able to escape. Leave the pot for another 10 hours. You can stir the mixture from time to time to prevent it from sticking to the sides of the pot.
  6. After the period, the mixture will only be half of its original volume. This time, you can already pour additional applesauce and some sweeteners. Let it be cooked for another 4 hours.
  7. Once the cooking is done, pour it into a bowl. Let it be cooled for awhile before putting it in your blender. Blend the mixture until the texture becomes fine and smooth. Pour the apple butter in your jars and cover them tightly. Place them in your refrigerator afterward.

Conclusion

These are just a few recipes that you can try for homestead canning! If you can finally learn all these, you can already explore some other options, too. Don’t limit your food palette. I am pretty sure that you can discover other great homestead canned recipes sooner!

Hello! Rose here! I am a full-pledge mother and a kitchen warrior at the same time. I created the GimmeTasty.com blog so that I can share my cooking knowledge to each interested individuals out there. If you want to catch up with my culinary adventures, just visit and subscribe to my site! I am excited to see you there!

Where to Keep Your Gun Safe: The Essentials

where to keep your gun safe
Buy at Amazon

With a burglary taking place somewhere in the US every eighteen seconds every single day of the year, it is no wonder that many of us choose to keep a gun in our homes.

Yet, as soon as we make the decision to do this another issue crops up; where to keep you gun safe. This is something that needs some thought put into it or else you could end up worrying that you aren’t as well protected as you had hoped to be.

Clearly, putting the firearm in a safe is the smartest way to get started but where will you put the safe? The truth is that the answer should be fairly obvious one you think about the main factors.

In the Bedroom

One of the most common places to keep a gun is in the bedroom. This makes sense, as it means that you can quickly get hold of the firearm if you are woken up by strange noises in the middle of the night.

Of course, some people feel nervous about having a gun in the bedroom. This is especially true if there are young children in the house who could get access to it. So, you will want to keep it in a good gun safe that only you or other adults in the family can open.

You could put your gun safe under your bed, on the wall next to the bed, or in a small safe in your nightstand. As long as you can open it swiftly in case of emergency you can sleep more easily.

Where No-one Can See It

Would it make sense to put your gun safe in a place where intruders should never be able to even see it? You might also think that hiding it away out of sight is a good idea if there are youngsters around who might stumble across it.

Not everyone uses a professional safe though, which means that this idea can cause more harm than good. Hiding a gun in a box or disguising it in some way means that anyone who finds it has easy access to it.

If you are going to put your firearm inside a good safe then there should really be no need to look for a hiding place. Indeed, some people like to put a big, solid gun safe in an obvious place as a sort of burglar deterrent.

The Living Room

Another idea that you might consider is that of putting your gun safe in the living room. This is likely to be of interest to you if you have a nice collection of firearms and would like to show them off in the likes of a wood cabinet with reinforced glass panels.

The downside of this approach is that your gun may be too far away from you if you need to react to an intruder during the night. If your main reason for having a firearm at home is for home security then you will probably want it to be closer to your bed.

On the other hand, if you use a gun for sporting reasons then this is a good spot to let visitors see your prized firearms. You might then have an additional gun next to your bed for security purposes.

In Different Parts of the House

Naturally, you simply don’t know in which part of the house a burglar could enter. Well, some surprising figures show that about a third of them enter through the front door. Around 30% or so find an easy way in through an unlocked door or window.

If there are no obvious weak spots in your home security then you won’t know where they will enter or at what time this will happen. Most burglaries happen between 6am and 6pm, while people are at work, but it could be when you are cooking in the kitchen, working in the garage or doing anything else.

Therefore, it might make sense for you to have more than one gun around the property. Would you feel more secure knowing that you are going to be near to a firearm no matter where you are when you hear the sound of shattering glass or splintering wood?

Provided that you a great safe to keep the guns in, there is no harm in choosing a number of strategic spots around the house.

Summary

By considering your needs, your lifestyle, and your main concerns it should be possible to find the ideal for where to keep your gun safe. It is then a question of enjoying your property while knowing that you can easily reach for a weapon if you ever need to.  I hope today’s article on where to keep your gun safe was useful.  Please let me know what you want to see on this site.