Superfood: 30 Great Food Items That Make You Healthy

Buy at Amazon

We all know that when a person suffers from bad health, he can’t enjoy the pleasure of everything. In order to achieve the optimum health, nutrition experts and health practitioners suggest loading up on superfoods.

Believe me, no single food can improve or upkeep someone’s health.

It is a combination of several foods definitely about fruits and vegetables. Superfoods are considered full-packed nutritious foods that will sweep your illnesses away. What are superfoods and why are they called as super-foods?

What are Superfoods?

Certain foods do provide greater health benefits than most. We refer to them as “superfoods.” Superfood does’t have its own food group yet consuming these kinds of foods that are packed with nutrients is definitely a good idea.

Superfoods don’t just make you ten times healthier or keeping diseases away, but they can also bring you other wonderful health benefits. These foods have extra-large doses of vitamins and minerals that can help us sweep off diseases and live a longer, healthier and life.

The nutrients that superfoods contain include antioxidants, use to ward off cancer; healthy fats, for preventing heart disease; fiber, believed to prevent diabetes and digestive problems; and phytochemicals, the chemicals in plants responsible for deep colors and smells, that have numerous health benefits.

Can’t wait to know about these superfoods? Well, here’s a list of the 30 Superfoods, that will make you Super Healthy. You might want to include these in your grocery list.

Chinese Cabbage

This belongs to the cabbage family which has low sodium content, which means it can help regulate your blood pressure. It can also fight anemia and fatigue because it has a high iron content, which is responsible for producing hemoglobin in your blood. Chinese cabbage is rich in antioxidants, which can boost eye health and provide you with healthy, glowing skin.

Carrots

Carrots help with good vision and can help prevent cancer. It can also help slow down the aging process of cells. Studies show that carrots can lower the risk of heart diseases, and can have a cleansing effect by providing Vitamin A in the liver.

Lentils

They’re easy to prepare and high in protein, iron, and other essential nutrients plus it’s pretty cheap. Lentils are low in calories and high in nutrition and the perfect legume to eat in the summer in salads, spreads, and crackers. Eat lentils and reap their health benefits such as it can lower cholesterol, promotes heart health digestive health and stabilized blood sugar.

Cucumbers

Cucumbers are a good source of water, and they help to rehydrate the body in a different way. Pick a firm, dark green cucumber and pop it into your shopping basket to see its impressive health benefits. Aside from they keep you hydrated, cucumbers also help fight heat both inside and out. It flushes out toxins when you eat this superfood regularly.

Spinach

Spinach is another popular superfood that can be easily found in markets today. They are high in niacin and zinc, as well as protein, fiber, vitamins A, C, E and K, thiamin, vitamin B6, folate, calcium, iron, magnesium, phosphorus, potassium, copper, and manganese.

Did you know that cooked spinach actually has more nutrients than raw ones? Because cooked spinach contains a bit more iron and vitamins A, K, B2, and B6.

Green Leaf Lettuce

Green Leaf lettuce contains high amounts of vitamins A, C, K, and B vitamins, along with a number of essential minerals and also has protein and calcium. It can significantly aid brain function as it is rich in dietary nitrate, which helps prevent deterioration of brain cells.

But take note that green leaf lettuce may have the tendency to spark food allergies, especially if you already have some known allergies.

Broccoli

They are a good source of folate (folic acid) and also provides potassium, fiber. Vitamin C – builds collagen, which forms body tissue and bone, and helps cuts and wounds heal. It’s got fiber to help with regularity and keeping blood sugar levels optimal, it helps the heart and eyes with lutein, and can help prevent cancer.

Garlic

Aside from a popular spice, garlic is also used to treat anything from high blood pressure and heart disease to certain types of cancer. Plus, studies suggest garlic extract can be used to treat yeast infections in women and prostate issues in men.

Turmeric

The spice refers as Turmeric is actually the dried and ground rhizome of a plant in the same family as ginger. Turmeric is a powerful spice with an impressive list of uses and benefits. It’s known for its antioxidant content and ability to work as an anti-inflammatory.

Tomatoes

They’re super because they contain lycopene, an antioxidant rarely found in other foods. Studies show that it could protect the skin against harmful UV rays, prevent certain cancers, and lower cholesterol. Plus, tomatoes contain high amounts of potassium, fiber, and vitamin C.

Beans

Beans are a good source of protein and fiber, that helps you stay full and satisfied. The protein and fiber in beans also temper the rise in blood sugar that occurs after a meal, which can help stabilize mood. Eating beans regularly may decrease the risk of diabetes, heart disease, colorectal cancer, and helps with weight management.
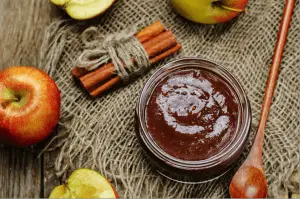
Apples

Apples are extremely rich in dietary fiber and important antioxidants. It helps digestive process and contains polyphenols that offer a variety of benefits. The most notable of which is they’re able to help regulate your blood sugar levels. Apples are so nutritious food that you can still eat them even if you have diabetes.

Bananas

Most of us know that bananas contain a good amount of potassium, but it’s also a good source of fiber. When combined, these two features make bananas one of those foods you should try to consume on a daily basis. Why is potassium so important? It helps to regulate your blood pressure, and this does a great service to your overall heart health and well-being.

Avocados

Avocados do contain a decent amount of fat that is known to have heart-healthy monounsaturated fats. They also contain more potassium than bananas! The potassium in it can help you maintain healthy blood pressure levels. For those who wish to get rid of extra pounds, eat more avocados often because it is loaded with fiber.

Lemons

Lemons are one of the best ingredients for detox water because they are rich in vitamin C. They are best for aiding one’s digestion, shedding off pounds, and even boosting one’s energy. It can also treat internal bleeding because of its antiseptic and coagulant properties.

Watermelon

Watermelons can surely help you hydrated because it is made up of about 92% water. This fruit has a good number of electrolytes, which can protect you from heat stroke. They also contain more lycopene than tomatoes. Lycopene is an antioxidant that promotes heart and eye health, keeps bones strong, boosts brain function, and prevents various cancers.

Berries

Many types of berries can offer you plenty of antioxidant support, as well as add a burst of flavor to a dish, a meal, or all by themselves. Blueberries have been shown to help the belly fat fight and help you avoid cardiovascular diseases. Cranberries can help with yeast infections, tooth health, and certain types of cancers. Goji Berries rank extra high in antioxidants. And raspberries contain a good amount of potassium which can help with blood pressure levels.

Mangosteen

Mangosteen is a healthy fruit that is rich in water, energy, protein, carbohydrates, and fiber. It is among the fruits that are known to contain powerful antioxidants that are useful to the immune system and the entire body. Incorporating mangosteen in the diet may be effective in weight loss. The various nutrients found in mangosteen also ensure good health and well-being.

Mangoes

This tropical fruit helps strengthen your memory as well as your digestion. It may also fight cancer and Alzheimer’s disease.

Eggs

A powerful source of protein is found in eggs that helps you lose weight. It is also a great source of omega-3 fatty acids, which are essential for normal body function and heart health. They are also rich in nutrients such as amino acids, choline, vitamin D, and a whole lot more.

Dark Chocolate

This is one of the superfoods that many people will not have a problem eating. A cacao bean confection that is rich in flavonoids that can help lower blood pressure and regulate blood circulation in the body. It also promotes heart health, boosts brain function, and reduces the risk of several types of cancer.

Pineapple

Never miss a chance to eat pineapple. Not only is it absolutely delicious, it may also strengthen your digestion, your bones, and can aid with weight loss. This tropical fruit is a great source of vitamin C known to help boost immune system.

Oatmeal

Oats got plenty of fiber without a lot of calories so you can feel fuller longer without dipping too far into your daily calorie budget. If you do start adding more oats to your diet, be sure to go organic so you’ll have the peace of mind knowing that you’re not ingesting grains that were treated with pesticides and other chemicals.

Honey

Honey offers a lot of variety when it comes to foods. It can help you prevent things like cancer and heart disease, and if that’s not enough it can also help regular blood glucose levels. Try adding a teaspoon of honey and the juice of half a lemon to a cup of hot water in the morning. It can make a great replacement for a cup of coffee and can prepare your digestive system for the work ahead of it for the day.

Sweet Potatoes

Start to consider adding sweet potatoes as side dishes to your meals throughout the year. Sweet potatoes are high in many important nutrients which contain a good amount of fiber. They’re a good source of iron, as well as magnesium and Vitamin D, C and B6. They’re also great for reaching weight loss goals and are a good carb.

Here are its benefits:

  • Stabilizes Blood Sugar
  • High in Antioxidants
  • Boosts Brain Function
  • Enhances Immunity
  • Promotes Vision Health
  • Aids in Weight Loss

Salmon

Salmon is another superfood that can definitely give you a healthy heart. With its high dose of omega-3 fatty acids, salmon can reduce the risk of cardiovascular diseases. When you are exposed under the heat of the sun, there’s no need to constantly apply sunscreen lotions. Why? Because salmon has anti-inflammatory properties and it can boost your skin’s natural protective shield against the damaging effects of UV rays.

Raw Milk

You may think that milk is a beverage it’s actually considered a food. Raw milk, especially kefir, provides the body with a rich source of vitamins A, D, C and B. It’s also loaded with calcium, magnesium, phosphorus, essential fatty acids (medium-chain triglycerides, or MCT oil) and trace minerals.

Wheatgrass

Wheatgrass is a must have in your daily diet. This is a young grass of the common wheat plant, Triticum aestivum. It is loaded with the iron, calcium, magnesium, amino acids, vitamin A, C, and E. But what adds to wheatgrass’s value is the high amount of chlorophyll it contains. Chlorophyll is a much-needed nutrient that the Westerner’s body often goes without.

Raw Nuts

Raw almonds, walnuts, cashews, and other nuts provide a hearty dose of fiber and omega-3 fatty acids. They’re also loaded with vitamins and minerals, such as iron, magnesium, and calcium. Nuts may help lower your risk of heart disease and diabetes, especially when you use them as a protein substitute for red meat.

Coconuts

Coconut and coconut oil are both high in medium-chain triglycerides, a type of beneficial fatty acid that can help support the health of your gut due to its bacteria-fighting, antioxidant properties. These fatty acids are also easy to digest, can be burned up as fuel rather than stored as fat and are able to provide immediate energy. Coconut oil has been credited with aiding in weight loss, keeping hair healthy and smooth, and even preventing bone loss.

You are what you eat!

Whether you’re searching for ways to boost your immune system, fighting fatigue, or recovering from an illness, doctors often recommend healthy lifestyle changes. The foods you eat can often help with the prevention and management of symptoms.

So if you want to achieve overall good health, go ahead and stock up on these amazing eatables today. A good goal would be to eat at least one superfood a day, but of course the more the healthier. One of life’s pleasures is sampling new tastes, and if you find that you haven’t tried some of these foods before, start with those so you can broaden your taste horizons.

5 Tantalizing and Delicious Christmas Turkey recipes

It’s the festive season and we all get to spend precious time with our families and friends. We have all had a busy year. So this year let me share some of my family’s favorite turkey recipes.

It has always brought joy to our Christmas table. They are all simple and easy recipes so you can easily manage them.

This will also be your chance to use that best ceramic knives you just bought yourself as a holiday cooking tool treat.  We all owe ourselves a treat so why not have a stunning knife to ease your cutting this holiday season.

 Citrus Turkey

The turkey must to be room temperature and not frozen.

Preheat oven 180°C

Ingredients

  • 5 kg turkey
  • olive oil
  • sea salt
  • 2 chopped carrots
  • freshly ground black pepper
  • 1 orange cut in half
  • 2 onions, chopped
  • fresh rosemary
  • 2 chopped celery sticks

Stuffing

  • olive oil
  • 2 onions, finely chopped
  • sea salt
  • black pepper
  • ½ teaspoon nutmeg
  • sage
  • 300g mince
  • 250g breadcrumbs

Method

  • Drizzle olive oil and sprinkle salt and pepper all over it. Massage the entire turkey getting the mixture all over.
  • Add a bit of oil to a pan over medium heat and fry your onion until soft. Add in salt and pepper, along with nutmeg and chopped sage leaves. Fry for another 2 minutes.
  • Put the mixture in a bowl and allow cooling, then add in breadcrumbs and mince. Mix.
  • Take the turkey and pull the skin by the neck back so you see the hole and put half the stuffing inside.  When done pull the skin up and over the hole.
  • The rest of the stuffing along with the halves of orange, rosemary and fill the other hole.
  • Take your chopped veg and place it in the roasting pan and place the turkey on that.
  • Cover the turkey with foil and place into the oven.  Cook for 35 to 40 minutes per kilo. So 5kg bird will cook for 3½ hour
  • Check on it regularly and spoon some of the juice from cooking over it keeping it moist.
  • After 2½ hours, remove the foil and allow to crisp. After 3½ hour, remove from the oven and allow resting for an hour.

Mamma’s Lemon Breast-Down Turkey

Most turkeys are frozen when bought. Pop it in the microwave and defrost. Preheat oven 180°C. This size turkey should give you 10 servings. It’s a very simple and uncomplicated recipe and is for the health conscious that are watching calorie intakes but still celebrating the holiday season.

Ingredients

  • 1 turkey (5kg) – defrost in the microwave and let it get to room temperature
  • Lemon juice – if you can’t do freshly squeezed then bottled lemon juice will do
  • Salt and pepper
  • Olive oil
  • ½  a  finely chopped  onion
  • 2 finely chopped celery sticks
  • 2  finely chopped carrots
  • bunch of parsley finely chopped
  • Some fresh rosemary and thyme – finely chopped

Method

  • Sprinkle olive oil  and lemon juice all over the turkey
  • Liberally sprinkle with  salt and pepper all over
  • Using your fingers rub the turkey, massaging in the oil, lemon juice, and spices.
  • Take all the other ingredients onion, celery, carrots, parsley, rosemary and thyme and place inside the turkey.
  • Liberally squirt lemon juice inside the turkey.
  • Pull the legs together and tie with a cooking tie
  • Pull the skin over the neck cavity and tuck under to keep the moisture in
  • Wrap the turkey in foil
  • Place in roasting pan – if you don’t have a large one you can use a purchased foil roasting tray that can be disposed of afterward. Most stores sell them.
  • Place in oven with the turkey’s breast area  facing down
  • After 2½ open the foil up and allow to brown and crisp
  • Remove after 3½ hours and allow resting for an hour or so

Honey Roasted Turkey

The initial steps

  • Turkey to be defrosted and at room temperature
  • 45 min prep time
  • 2½ hours to cook and 3 ½ hours to ready
  • Preheat the oven to 200C

Ingredients

  • 1.5k Turkey
  • 1 lemon cut in half
  • Salt and pepper
  • 1 peeled apple
  • small peeled onion
  • 1 peeled potato
  • 3 tablespoons of butter
  • 6 tablespoons of honey
  • 1 cup of chicken stock

Directions

  • Rub the lemon all over the turkey
  • Season the turkey with salt and pepper (inside and outside)
  • Place the lemon halves, onion, apple, and potato into the turkey
  • Place turkey into a roasting pan
  • Using a small pan melt butter and honey together on a medium heat
  • Spoon the honey and butter mixture over the turkey coating the entire exterior.
  • Leave to stand for 30 minutes
  • Then reapply the mixture a few times
  • Place turkey in the oven at 200C for 30 minutes
  • As the honey mixture drips off baste the turkey a few times
  • Reduce the temperature to 175C and cook for 30 minutes
  • Baste frequently
  • If needed then use the cup of chicken stock to keep the juices from drying out
  • Now cover the turkey with foil and cook until no longer pink on the bone
  • You can check this by a small piercing into the turkey and see that the liquid runs clear
  • Leave in the oven for a further 1½ hours
  • Remove the foil and for about 15 to 30 minutes basting regularly
  • Then remove from the oven and cover with another layer of foil completely
  • Allow it to rest in the wrapper for about  15 minutes before opening and slicing

Roast Turkey with garlic & lemon

  • Prep time 30 minutes
  • Cooking time 3½ hours
  • Two days before cooking season
  • Crispy and delicious
  • Preheat oven to 180C

Ingredients

  • 1 x 5kg turkey
  • Half of an onion
  • 1 lemon half
  • Whole bulb of garlic

Salt Mix

  • 2tbsp  sea salt
  • 1tbsp thyme
  • 1tbsp peppercorns
  • Butter mix
  • 100g butter
  • 1tbsp vegetable bouillon powder
  • 1 lemon zested (grated skin from the lemon above)

Method

  • 2 days prior to cooking you will have rubbed your salt and pepper mix onto your turkey and left in the roasting pan uncovered in the fridge. The longer the salt stays on it the moister it will be.
  • Take the butter, vegetable stock, and lemon zest and mix together in a bowl. Cover and chill in the fridge
  • Take the turkey out the fridge and let it stand to get to room temperature
  • Take your butter mixture from the fridge
  • Using your hands spread the butter mixture under the skin and between the thighs and the main part of the turkey.
  • Place the onion, garlic and lemon halves into the inside of the turkey
  • Cover the roasting pan with foil
  • Cooking time is about 3 hrs. It’s about 40 minutes per kilo of turkey
  • About 30 minutes before cooking time is up, increase the oven temperature to 200C
  • Remove the foil
  • Baste the turkey and place back in the oven
  • When the turkey is beautifully brown remove from the oven
  • Leave it to rest for at least  15 minutes covering it with foil
  • The juice left in the roasting pan can now be used to make your gravy

Turkey Breast stuffed with walnut & cranberry

If you don’t want to roast a whole turkey perhaps try just turkey breasts

Ingredients

  • boneless turkey breasts with skin (about 2.7kg)
  • 5 cups chicken stock
  • 1/3 cup olive oil
  • 1/3 cup plain flour
  • 2  lemon thyme pieces

Stuffing

  • 60g butter
  • 2 onions, finely chopped
  • 4 cups fresh breadcrumbs
  • 1/2 cup dried cranberries
  • 1/2 cup finely chopped dried pears
  • 1/4 cup finely chopped walnuts
  • 1/4 cup finely chopped sage leaves
  • 1 lightly beaten egg

Method

  • Make the stuffing first. Melt the butter in a pan
  • Add in onions – cook until soft
  • Put into a bowl
  • Add the breadcrumbs, pear, walnut, cranberries, beaten egg and sage
  • Mix them all together
  • Season with pepper and salt
  • Preheat your oven to 190C
  • Place your turkey on a board with the fat piece towards you
  • From where the breasts join cut a slit into the breast at an angle
  • Cut the turkey breast horizontally through the meat but not all the way through
  • This will give you a flap
  • Flap the breast open
  • Place the stuffing in the middle of the breast
  • Fold the flaps back to encapsulate the stuffing
  • Using kitchen string tie them to secure the stuffing inside
  • Pour a cup of stock into the roasting pan
  • Add in your turkey breasts with the skin facing upward
  • Lightly brush with 1 tablespoon of oil
  • Season with salt and pepper
  • Roast in the oven for about 100 minutes
  • Baste regularly
  • Remove breasts from roasting pan
  • Cover with foil and let it rest for 15 minutes
  • The juice that remains in the pan is perfect to make a gravy with

The Christmas holidays are always a special time of the year. Be kind, Be gentle, and Be forgiving and share what you have with those that are dear to you. Take the time to say I love you and share a smile with a stranger.

If after Christmas day you have some turkey left over (if your family is like mine you won’t), then there are some lovely quick and easy recipes to use that leftover Turkey for.  From a simple Turkey salad to a Turkey sandwich or even a Turkey Pâté


Knife Cuts

Cutting Techniques: Four Knife Cuts That You As A Cook Should Know


Knife Cutting
Buy at Amazon

Working in a kitchen is not a child’s play, and those who work are completely aware of this.

Cooking in the kitchen could be boring or fun.

Those who find it boring are not experimenting at all, which is not right because kitchens are like laboratories.

People should experiment with different food items in order to create something magical.

One of the important kitchen related tasks is ‘cutting’. If you know how to cut properly, then working in the kitchen will be a lot more interesting for you.

It is important for you to know how a knife cuts and in how many ways a knife can be used.

But first, you need to have the best kitchen knife set for cutting vegetables.

Four Main Cutting Strokes You Should Know:

  1. Slicing
  2. Chopping
  3. Back-slice.
  4. Back-chop.

You can’t use all these strokes with a single knife, so you need to have a set of different knives that you can use for performing different tasks. For chopping and back-slicing, you can use santoku-style knives, whereas, for slicing and rock-chopping, you can use western-style curved blades.

If you have no idea regarding using a knife for a particular stroke, then you will get a decent idea by the end of this post.

The Slice:

Slicing is a stroke with which you cut meat and vegetables. You can also cut herbs with a knife that is used for slicing. In order to slice vegetables or meat, you must place them on a solid and stable surface. Then, slice the food item in half followed by holding the food item with your free hand and curling your fingers to a claw. Tuck your knuckles underneath.

The tip of the knife should be in constant contact with the cutting board with the angle of the knife in an upward direction. Press the knife in the downward and forward direction and use the entire length of the knife to slice food. Repeat the process using a circular motion, but make sure that the tip of the knife remains against the board all the time.

The Chop:

If you are looking for a precision while cutting your vegetables or herbs, then the concept of chopping is used. Chopping is same as slicing, but it’s just that chopping is done to style up the vegetables. For chopping, you need a very sharp knife in order to get precise cuts. The surface on which the vegetables are placed needs to be firm and stable. If chopping a long vegetable, then cut it in half. Hold the vegetable with your free hand and curl your fingers to make a claw followed by tucking your knuckles underneath.

Use your knuckles to hold the flat side of the knife blade and life the knife above cutting board. Press the knife in the downward direction making smooth and even stroke. Move the knife in the forward direction to chop further. Lift the knife after one stroke and repeat.

The Back-Slice

This stroke allows you to cut vegetables or herbs into fine, small slices. While slicing herbs, you need to stack leaves and roll them up so as to create a bundle. Hold the bundle tightly with your free hand and curl your fingers into a claw followed by tucking your knuckles underneath.

After that, place the knife’s tip against the cutting board with the rest of the knife resting against your knuckles. You should hold the knife at a very low angle and pull the knife in the backward direction after each stroke, as this will result in the slicing of the food properly. Don’t move the knife in the downward direction.

The Rock-Chop

This stroke is used to finely mince fresh herbs or zest. You don’t have to be that much precise while chopping as you were at the time of back-slicing. Just roughly chop the ingredients using the chop or the slice, then accumulate those into a small pile. Start rocking the knife up and down from one side and regather the ingredients in between. Keep repeating the process until you get finely minced ingredients.

When accumulating the ingredients, make sure to drag the knife blade at a low angle to the cutting board as dragging the blade perpendicular to the cutting board is going to make the blade dull at a much faster pace.


3 Simple Homestead Canning Recipes

3 Simple Homestead Canning Recipes

Buy at Amazon

If you want to try making food by yourself, you should try the homestead approach. In this kind of lifestyle, you are going to grow food in your backyard. But if there is one thing more fun than this, it must be homestead canning.

Canning is actually a great hobby and survival project. It allows you to preserve your grown food as long as possible. These food items could come to your rescue, whenever you are trying to be frugal. But of course, canned foods are also great gift ideas!

When you are canning, it is recommended that you only create a recipe that you are familiar with. In this way, you won’t have any trouble in making the food. As a result, you are simplifying the overall cooking process.

But if you are still new to homestead canning, then don’t fret. I can pull certain recipes on my cooking repository that you can try. They are fairly simple to create since they only involve minimal ingredients and preparation. Take a look at each of these recipes and see which one you can try first!

Homestead Canning Recipes

Canned Tomatoes

Tomatoes are always a favorite ingredient when it comes to homestead canning. They are very accessible and relatively cheap, too. Since there are a lot of tomato varieties today, your options are pretty limitless. However, for those tomatoes that are relatively sweet, you should include a minimal amount of acid in the equation. With this, you can prevent botulism from happening.

Ingredients:

  • Tomatoes (2 pounds)
  • Lemon juice
  • Salt

Materials:

  • Mason jars

Instructions:

  1. Start by peeling the tomato. Use a sharp knife to this process. If you are working with huge amount of tomatoes, the peeling could take time. Therefore, it is better if someone will help you out.
  2. Next, blanch the tomato. You can do this by removing its core. After that, make an X cut on its bottom. Once done, you can put the tomatoes in a pot of boiling water. Let them be simmered for around 30 seconds. After simmering, put the tomatoes in a bucket of water with ice.
  3. If the tomatoes are all naked already, you should start preparing the jars. Make sure that your jars are clean by running them on a dishwasher.
  4. Put the tomatoes in the jar. Include at least two tablespoons of lemon juice per jar. This will stabilize the acidity level of the canned tomatoes. Adding the salt is optional, but you can still add one teaspoon of it per jar.
  5. Fill the jar with water. After that, put the lids and close the jars tightly. Afterwards, put the jars in simmering hot water. Let them be boiled for around 45 minutes.
  6. Store the canned tomatoes in a cold and dark storage.

Canned Fig Jam

The fig is a seasonal fruit. Therefore, it would be a pain to crave it on the wrong season of the year. But if you are quite ingenious and creative, you can solve this problem by canning the fruit. One way to do it is making a puree or jam out the figs. They are great ingredients for various desserts like smoothies! The fig jam is also a great baby food, too.

Ingredients:

  • Figs (2 pounds)
  • Sugar (1/4 cup)
  • Lemon juice (1/2 cup)
  • Dash of cinnamon

Materials:

  • Mason jars

Instructions:

  1. Slice the figs into small quarters.
  2. Put the quartered figs in a pan together with the sugar. I recommend that you will use an unrefined sugar for this canning recipe. But of course, you can utilize whatever sugar you have right now!
  3. Cook the mixture in a low heat setting. Stir them properly until they become a puree.
  4. For better results, you can use a handheld blender to mash the puree while the cooking. This is not a necessary procedure, but doing this can smoothen the texture of the puree.
  5. Throughout the heating process, you can notice that the color of the mixture turns dark while its texture begins to thicken. Just continue stirring until such time the mixture is thick enough to be called a jam.
  6. Before you remove the jam in the pan, add the cinnamon and lemon juice. They can certainly enhance the flavor of this recipe.
  7. Store the now fig jam into the jars. Let them be cooled before you store them in your refrigerator.

Canned Apple Butter

We like making food from scratches. Even if we have the option to buy them, the pleasure and satisfaction of making your own food are still an irreplaceable thing. That is the story of the apple butter.

We can see a lot of commercial variants for this food item. But didn’t you know that you can actually make this delectable treat by yourself? Check out the procedure below to get started.

Ingredients:

  • Applesauce (9 quarts)
  • Cloves (1 teaspoon; ground)
  • Cinnamon (2 tablespoons; ground)
  • Sugar (4 cups)
  • Allspice (1/2 teaspoon)

Materials:

  • Mason jars

Instructions:

  1. The first thing that you need to acquire is the applesauce. You can make this ingredient, or you can buy it on the market. It is your choice.
  2. Use a crockpot and pour the applesauce there. The pot should be semi full. If you have a lot of applesauce, you can pour them later. Put the pot on the stove and cook it over low heat until the applesauce boils.
  3. While the applesauce is not yet boiling, add the rest of the ingredients. You can use honey as an alternative to sugar if you are quite distancing yourself from the latter.
  4. The cooking process of the pot will take around 8 hours. Therefore, if you want to quicken the process, you can increase the heat of the stove to medium heat.
  5. Once the mixture is already cooked, cover the pot with the lid. Don’t tighten the lid too much. Otherwise, the moisture won’t be able to escape. Leave the pot for another 10 hours. You can stir the mixture from time to time to prevent it from sticking to the sides of the pot.
  6. After the period, the mixture will only be half of its original volume. This time, you can already pour additional applesauce and some sweeteners. Let it be cooked for another 4 hours.
  7. Once the cooking is done, pour it into a bowl. Let it be cooled for awhile before putting it in your blender. Blend the mixture until the texture becomes fine and smooth. Pour the apple butter in your jars and cover them tightly. Place them in your refrigerator afterward.

Conclusion

These are just a few recipes that you can try for homestead canning! If you can finally learn all these, you can already explore some other options, too. Don’t limit your food palette. I am pretty sure that you can discover other great homestead canned recipes sooner!

Hello! Rose here! I am a full-pledge mother and a kitchen warrior at the same time. I created the GimmeTasty.com blog so that I can share my cooking knowledge to each interested individuals out there. If you want to catch up with my culinary adventures, just visit and subscribe to my site! I am excited to see you there!

How to Make a Month of Freezer Meals in One Day

52 Unique Techniques for Stocking Food for Prepper
Buy at Amazon

Cooking in any sort of way has been my passion since the age of 9. My mother used to cook dinner on Fridays and Saturdays. Most of the time she complained how stressful it was for her to cook day-after-day after a hard day at work.

A very-good neighbor shared to her the idea of cooking a month of meals in one day. She gave it a thought and had consider the idea. Since often there’s always “what’s for dinner and who’s making it” debate at home, mom had it as her weekly strategy.

The idea of cooking a month of freezer meals all in one day makes it stress-free, saves money and time and make great deal for busy families just like us.

Since I am amazed and overwhelmed with the benefits I got from this easy and delectable freezer meal strategy, I am going to share few tips accumulated from my meal plans that might be a big help if you are a beginner.

First, Choose the type of food for freezer meal that will best benefit you.

It’s a matter of personal taste in your family and it all depends what your children love to eat. They like meals that are homemade and nutritious; eating healthy meals is unlikely for busy families like us but we want to get rid with meals typically with high calories.

Here’s a glimpse of what I did:

Breakfast – My kids are usually hungry when they wake up so I usually prepare what is practical and ready-to-go meals like muffins or pancakes, baked oatmeal or waffles and cheese biscuits

Lunch – They love my Homemade Granola Bars and Hot Pockets, you might want to try Chicken Taquitos, your way.

Dinner – Homemade Lasagna (my kids’ favorite), Hamburger Patties with whole wheat bread, Tuna Casserole, and, Creamy Cheesy Broccoli Soup, you choose.

Second, Stock up with the right supplies for freezer meal cooking.

You have to consider first right supplies or ingredients for freezer meal cooking. You have to know the kinds of vegetables or ingredient does not freeze well.

Example, bean sprout, lettuce, cucumbers and raw potatoes will turn soppy when thawed. Also, hard boiled eggs will go elastic so refrain freezing those as well. There are a lor more products, such as sour cream, yogurt, cheese sour cream and will sometimes go watery when melted.

The same thing with the containers and storage of your meal like foil baking pans, plastic containers, gallon sized freezer safe bags, casserole dishes and many more.

You may utilize a gallon or quart sized plastic or reusable freezer safe bags in storing your freezer meal. You just have to make sure to get out as much air as possible by crushing the food around and flattening the bag.

Next, you seal it as tight as possible to avoid from any spills or freezer burn as well. You can actually save much cost if you will use a reusable gallon-sized bag.

You can use aluminum foil pan when you do baking dishes and look for store that has cheaper cost where you can much save money. In the case of my family, since we are 8 in all, larger size is preferable. Well, it all depends on your preference.

Another one good for storing freezer meals are plastic Tupperware or commonly called as plastic containers. These are commonly used for meals with soup., however, this kind of container would take up bigger space in your fridge, but it can store large amount of food.

Third, Clean out the freezer before storing your freezer meals.

It is important to keep your fridge clean and organized before storing anything inside it. You have to make sure that the room in the freezer is spacious as well to be able to maximize its area. Regardless of its size or space what matter is its sanitation and capacity to store in.

The freezer at home is cleaned in regular basis whether it is full. We maintain its cleanliness since we are taking here the food that we eat.

Fourth, Begin making your freezer meal in a slow pace, no rush.

Since you are a beginner in making your own freezer meals, you must be that exhilarating. To prevent being completely overwhelmed, start slow.

In choosing the freezer meal you will prepare, make sure your kids, your whole family will like and anticipate to try the freezer meals as soon as it is done. A nice way to do this is when you are cooking for dinner. You just have to cook twice as much and one for freeze meal.

Make sure that only those meals recommended for freezing are ones that you will prepare. Keep in mind to avoid ingredients which are not good for freezing. If you are not certain about the ingredient you have whether good for freezing or not, you search it in Google and see whether others have had success with freezing that type of recipe.

Fifth, Prepare all the ingredients to avoid hassle.

Chopping, peeling, trimming, shredding and whatever else you need to prepare to the ingredients must be done beforehand cooking. This is to be more convenient and avoid hassle. Ingredients like vegetables that needed to be peeled and sliced can be done while boiling or simmering. Maximize the time you allotted to cook your recipe.

If you are establishing a kind of routine, then you will move swiftly every time you prepare a freezer meal. Set the time the moment you start prepare the dish to see variation next time you cook. have 2-3 different meals cooking at the same time.

Sixth, Freeze the ingredients individually.

Freezing is a quick and convenient way to preserve fruits and vegetables at home. It is a popular method of home food preservation throughout ages.

Whenever you have extra recipe or ingredient that you won’t be using yet before it expires, the good thing is, you can freeze it! Yes, that’s right. That’s how convenient it is, easy and quickly. Goodbye using of unused food and excess solution, just a pull away, there your freezer with lots of extra products. Then you won’t have to purchase another set of ingredient the next time you prepare a freezer meal.

For instance, if you were to brown ground beef and freeze, it can then be quickly and easily added to many recipes including tacos, pizza, soups/stews, spaghetti sauce and more. Another is, by browning a few pounds of ground beef all at once, you can freeze the meat in individual portions and then quickly add it to recipes to save a step.

Freezing ingredients also saves you money. To avoid your bananas getting brown, slice it flash size and it can be stored until you use it from smoothies to banana bread.

Below is one of my favorite beginner freezer cooking recipes

Here is the best method to freezing blueberries.

Many ways in freezing blueberries, some would say to no wash it. Others would say just lay out on cookies sheets, freeze it, then later add to bags.

They said the best way is to gently wash the berries, pat dry, add some sugar or syrup, then freeze. So that method was tested and it worked! It worked well. The sugar helps to keep them all from sticking together.  If you don’t like the idea of adding sugar, don’t worry.

Before using, give a quick rinse off with water then you will have some perfect preserved blueberries.

Step 1:  Gently wash the blueberries, getting any stems or leaves out.

Step 2: Gently pat dry the blueberries.

Step 3: Add some sugar to the blueberries for every 2 cups of blueberries use 1/3 cup of sugar.

Step 4: Mix them all up gently.

Step 5: Add your blueberries to quart sized freezer bags and freeze them.

These blueberries should last up to 6 months in your freezer, and even longer. Freezing blueberries every gives me feeling of a little bit of my sweet summer love even in the cold wet season.

Jennifer Moran

Jennifer MoranJennifer Moran is the author and the social media manager at TheBerkey.com and PreparedBee.com. She has been working and passionate with writing for over four years. When she isn’t glued to a laptop screen, she spends time playing tennis, practicing yoga, and trying very hard not to sleep in the meditation. You can reach her at jennifer (at) preparedbee (dot) com. PreparedBee.