5 Self-Defense Moves that Anyone Can Learn

5 Self-Defense Moves that Anyone Can Learn
Buy at Amazon

Though we do believe that proper martial arts training is the best way to learn an arsenal of effective self-defense moves, there are some basic moves that you can easily learn without having to spend years of training.

On this post, the team at BookMartialArts.com is sharing 5 self-defense moves that anyone can learn and use to defend themselves during a violent physical attack.

Please note that we highly recommend for you to seek the assistance of an experienced martial artist and/or a professional to demonstrate how you can safely and properly execute these self-defense moves to avoid unwanted harm or injury to yourself or others.

The Wrist Lock

BJJ No Gi Wrist Lock Variations Tutorial. Video credit: Stuart Tomlinson YouTube channel

This straight-forward yet effective technique comes from Brazilian Jiu-Jitsu (BJJ) and it is a move that anyone regardless of size, age or fitness ability can do. The wrist lock variations comes in handy when an attacker gets hold on your wrist. To execute the simplest form of this move, rather than pulling back, you will need to squat down. Once in this stance, proceed by leaning forward and bending your elbow towards the attacker’s forearm until you free yourself of his grip.

The Eye Gouge

the-eye-gouge
Image credit: Tipsforsurvivalist.com

 The thought of gouging someone’s eyes is enough to make most people shudder. However, it is definitely an effective method to free yourself when an attacker gets a hold of you.

There are different ways to execute an eye gouge, however, the simplest way is to aim both of your index and middle fingers towards the attacker’s eyes and poke them hard. You can also opt to use your thumbs for maximum impact.

With the thumb eye gouge, you would need to place your hands on the side of the attacker’s face and press your thumbs as hard as you can into the eyes.

The Stomp Kick

How to Do a Toe Stomp. Video credit: Howcast YouTube channel

Our legs are generally stronger than our arms so kicks may be one of the best ways to easily get away from an attacker. A toe stomp kick is a move that is easiest and most effective to do so.

Start by bringing your knee up and drive your heel down as hard towards your attacker’s instep as fast and as hard as you can. If you kick hard enough, you may just break some bones and severely injure his foot enabling you not only to escape from him but also prevents him from running after you. Ladies, this technique is particularly useful when you are using stilletos or high heels as the heels of your shoe can act as a ‘weapon’ and likely to help in severely injuring the assailant.

 The Palm Strike

Image credit: Howcast.com

Instead of the usual punch done with a clenched fist, this technique uses the ‘meaty’ portion of the bottom of your hand – located by your wrist.

This move will do enough harm and confuse your attacker, giving you enough time to flee from him. Plus, hitting with the heel of your palm is less painful (for you) than throwing a punch!

Though the palm strike is particularly effective when aimed straight up towards the attacker’s neck, it can be as effective when used to target the opponent’s head or shoulder.

The Groin Kick

Groin Kick Techniques for Krav Maga. Video credit: Expert Village YouTube Channel

This move is one that is taken out from Krav Maga’s playbook. Also known as the “Art of Staying Alive”, Krav Maga moves are designed with effectiveness and efficiency in mind.

The groin kick, however ‘crass’ it may seem, gets the job done quickly. To carry it out properly, you would need to aim for and kick your attacker’s groin as fast and as hard as you can.

Start by facing your attacker with the leg you’ll be kicking with behind you. Then, proceed to kick out and upwards between the attackers legs with your shin for maximum impact.

I hope these Self-Defense Moves that Anyone Can Learn help you stay safe.

If you want more I linked to a comprehensive article on different types of Martial Arts Training.

By: Lystia Putranto

Lystia is a contributing writer for BookMartialArts.com, the world’s leading martial arts theme travel website. She’s fascinated by all types of martial arts and can’t get enough of martial arts moves both on screen & off.

Cement Mixer Brass Tumbler

Cement Mixer Brass Tumbler

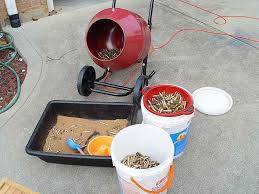
Cement Mixer Brass TumblerI got into reloading for cost savings, but I stay involved to ensure that I can still shoot in ammo shortages – it’s not necessarily enjoyable to me as a hobby, so I try to keep my reloading as cheap and efficient as I can.

Cleaning an polishing brass is one area that takes a large amount of time, yet lends itself to experimentation.

I find that I can get walnut media in bulk, cheaply at harbor freight – it is used in abrasive blasters. I cleans really good, even if it does not polish as well as corncob media.

I have several small vibratory cleaners, and they work well, but when I am cleaning range brass, or 5 gallon buckets of once fired brass from classes – I spend way too much time sorting media from brass and loading and unloading the machine.

Cement Mixer Brass Tumbler
Buy at Amazon

I recently bought an inexpensive harbor freight mixer for some cement projects and while doing internet research stumbled on the idea of using a cement mixer as a tumbler…

After thinking about it, I realized that it was a great idea.

Some forums like arfcom have full threads about this, and after lurking on several I find that many recommend installing the mixer without the internal paddles, and that many spray the inside of the barrel with a rubber coating to decrease the sound.

Many also fit a lid made out of plywood or even a pizza pan so that they reduce lead dust.

I am going to leave mine in the original configuration, because I will use it as a cement mixer more often that I will as a tumbler.

I do find it does a good job, and since I can do a bucket at a time, it saves a lot of work.

The only thing I recommend is to sort brass before you tumble, as 9mm can get stuck in 40 cases and that is big pita…

One Minute Glock Cleaning

One Minute Glock Cleaning
Buy at Amazon

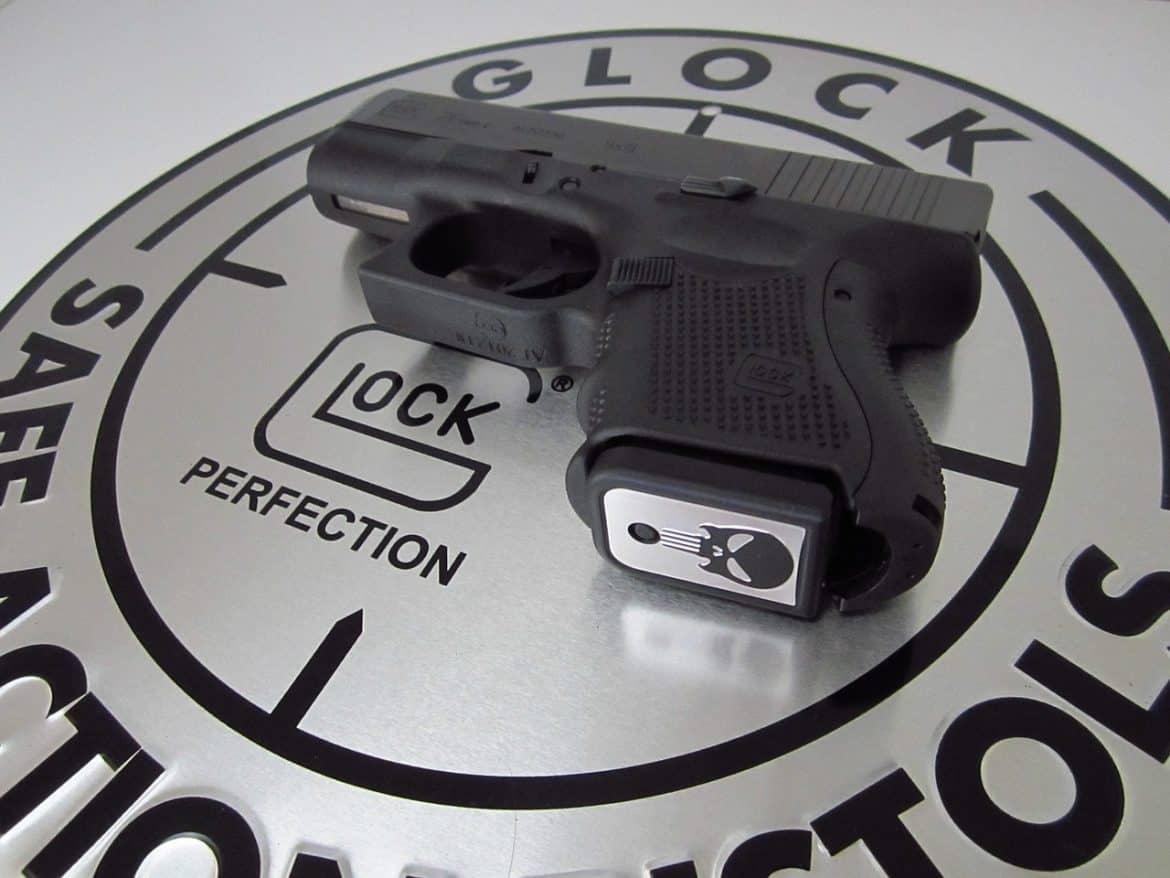
It’s not the purpose of this article to show you to how to clean your Glock in under a minute.

Rather it is to demonstrate that cleaning your pistol does not have to be a drawn out affair, and that in some cases (like lubrication) a little is better than a lot.

You will need the following materials to properly clean your gun:

  • appropriately sized cleaning patches
  • a quality cleaning rod
  • bore brush of the appropriate caliber for your gun
  • a slotted tip for threading cleaning patches onto your cleaning rod
  • a gun cleaning toothbrush
  • gun cleaner/solvent
  • gun oil
  • a lint-free cleaning rag.

Starting with an unloaded handgun in a room without ammunition…

With your pistol facing in a safe direction, remove the magazine, and then lock the slide to the rear and both visually and physically check to ensure the handgun is empty.

If it is, field strip the handgun.

Clean the barrel.

  • Thread brass bore brush on your cleaning rod, wet with solvent.
  • Insert the cleaning rod into the breech end of the barrel and swab out the chamber and bore.
  • Work the wet brush back and forth through the entire length of the barrel at least five or six times.
  • Replace the brush with the slotted tip.
  • Thread a dry patch in the tip and using full–length, rotating passes, scrub until the bore is shiny and clean when inspected under a bright light.
  • Dampen the large end of your toothbrush with some solvent and vigorously scrub carbon deposits off of the barrel hood and feed ramp.
  • Wipe the exterior of the barrel down with a solvent dampened rag or patch.
  • Dry out the bore by swabbing with clean, dry patches until the patches come out clean and dry.
  • With a dry patch, wipe down the exterior of the barrel. Put the barrel aside for now.

Clean the slide.

  • Holding the slide vertically, muzzle down, use the toothbrush to brush clean the breech face, the extractor, and the area around the extractor.
  • Keep in mind that you want to avoid getting solvent into the firing pin channel.
  • Solvent and lubricants collect dirt and grime and you don’t want to cake or grease up your firing pin and firing pin channel! This could cause your gun to fail to function.
  • Brush the slide rail cuts and the inside of the slide with the tooth brush.
  • Using a slightly solvent dampened rag or patch, clean the underside/inside of the slide. You can also use the wide end of the toothbrush to scrub the inside of the slide. Dampen the with solvent and vigorously scrub the slide rail cuts.
  • Use a clean, dry patch to wipe down the interior of the slide and slide rails.

Clean the receiver.

  • Using the toothbrush; brush off carbon deposits on the metal contact points as well as the locking block on the receiver. Use some solvent if necessary, and if so, then use dry patches or a dry rag to wipe off excess solvent.
  • Using your toothbrush; brush out any unburned gunpowder and debris from the interior of the receiver.
  • Make sure to wipe clean the locking block, the trigger bar, the connector, the cruciform, and the ejector. (See the Glock owner’s manual for a list of parts.)

Lubricate the pistol.

You just need six drops of oil. Use a quality gun lubricant/rust protective oil. More is NOT better…

Slide rails:

  • Hold the slide such that the slide rail cuts face upward and the muzzle end is canted slightly downward. Using a lubricant applicator, drag one drop of lubricant down the entire length of each slide rail cut.
  • Apply one drop of lubricant to the front inside of the slide which rubs against the upper portion of the barrel.

Barrel:

  • Wipe down your barrel’s exterior with one of the oil dampened patches or the oil dampened rag that you’ve used for cleaning.
  • With your lubricant applicator, apply one drop of oil on the rear side of the barrel lug and one drop on the outside front of the barrel.

Frame/Receiver:

  • Hold the receiver in your strong hand, left side facing down. Apply one drop of oil to the curved, upper extension of the connector, at the right rear corner of the receiver/frame where the rear end of the trigger bar touches the connector.
  • That is six drops of oil total… On the breech face, under the firing pin hole there is a weep hole to allow debris to be pushed out of the firing pin chamber – all too often people think it is a lube point. DO NOT put oil in this hole…

Reassemble the pistol and function check the reassembled gun.

  • To function test, make sure your reassembled gun is unloaded and keep it pointed in a safe direction!

Slide cycling:

  • Rack the slide several times and make sure the slide moves and cycles freely and smoothly.

Trigger function:

  • With the pistol facing in a safe direction, press the trigger rearward. Make sure the trigger works.

Trigger Reset:

  • Rack the slide again to return it into battery and reset the trigger.
  • Make sure that the trigger resets into its forward, cocked position.
  • With your pistol still pointed in a safe direction, press the trigger rearward and hold it to the rear.
  • You should hear and feel the firing pin fall.
  • Pull the slide to its most rearward position and release it.
  • After the slide has snapped into its forward, in-battery position, release the trigger.
  • The trigger should reset to its forward, cocked position. Repeat several times to be sure.

Trigger safety:

  • With your pistol pointing in a safe direction, grasp the sides of the trigger without touching or depressing the trigger safety, which is the trigger in front of and within the trigger.
  • The trigger safety should remain engaged and as such, prevent the trigger from moving rearward and releasing the firing pin.

Slide lock open test:

  • Insert an empty magazine into your in-battery pistol.
  • Firmly pull the slide all the way rearward and it should lock open.
  • That is it, this entire process is short, sweet, and keeps the gun working properly

I would suggest that when done with your cleaning/function checking/dry firing procedures you verbally state “I am now done cleaning my gun” this will set up a small mental block to keep you from being one of those “Moron shot himself cleaning his gun” guys that went from function checking, to reloading a carry gun, got distracted, and then went back to function checking and fired a gun they forgot they loaded.

It sounds stupid, but it happens, and every little bit you do to prevent accidents is more better….

How to Make a Stump Remover Smoke Bomb

Homemade Smoke Bomb
Buy at Amazon

It is pretty easy to make a homemade smoke bomb using potassium nitrate and sugar.  The thing is, that this mix can be used to make black powder, smoke, or rocket fuel so be careful and mind your mix.

Potassium nitrate can be ordered through online firework supply houses, and pure chemicals are always best, but I find that if you check the label, some stump remover is 99% potassium nitrate.

Once you have the nitrate, the next thing is to get some common sane sugar.

The potassium nitrate is the oxidizer and the sugar provides the fuel.

The proper smoke mix using these two chemicals is 60 grams of the oxidizer and 40 grams of the fuel.

Mix in a non stick pot that you will NEVER use for food again.  Mix with a wooden spoon and keep it on low heat.  You do not want this to catch fire on your stove. (You are warned).

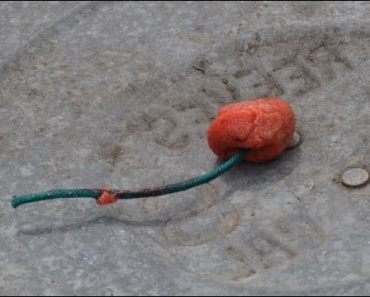
Mix constantly and do not walk away.  When it melts and turns to a light brown peanut butter consistency and look then take it off the heat and pack into your form.

This is hot so be careful – cardboard toilet tissue rolls are easiest, but I used something smaller with the idea to embed in a soda can mortar round later.

I also took some and just rolled them into balls and stuck in a fuse.

How to Make Rounds for a Beer Can Mortar

How to Make Rounds for a Beer Can Mortar


How to Make Rounds for a Beer Can Mortar
Buy at Amazon

I am showing how I make my beer can mortar rounds because in searching the net I found that no one else had, sure the cool feral cat hunting post shows how to make a mortar, and I did see an image of a tub of projectiles, but no where could I find good instructions.

Its pretty simple, cut the top off an aluminum beer can, and fill with a cement mix.  I have read that some use sand and then top it with a cement cap, but I have also heard that the can comes off like a sabot and lands in a flat plate a few feet from the muzzle of the mortar.

I heard that readymix turns to gravel, and that plaster of paris is best.

I decided to use type n mortar because it was cheap and I had a bag sitting around.

I tried shoveling some mortar in wet, and did a few with dry mortar and adding water.

The second was was easiest and fastest.  I won’t know which is best till I get some field time.

Update:

For general shooting both ways works well.  I think that the wet mortar way is best, but not enough to make a difference.