How to Build a 0% Polymer AR Lower Using a Kit: Is it Worth It?


Plastic Fantastic AR-15 IV Lower Build
Buy at Amazon

I got back into building AR pattern rifles last year and made a couple to meet my personal desires. As always I like pushing the envelop and thought of manufacturing my own lowers for my personal use.

Research into this lead me to cast epoxy lower receivers. I have heard good things about them.  The cost is reasonale.  However,  I do have some reservations to having a plastic rifle.

In the spirit of exploration and trying new things I want to build a plastic fantastic AR-15 and see just how useful a home cast AR lower can be.

Legal Caveat:

I don’t know your state and local laws and I am not a lawyer.

I do know that this is federally legal as long as you don’t build them for commercial purposes or transfer the guns to someone without having serial numbers and proper federal paperwork.

Since this is my gun to never leave my state or my possession it is my right per the Tennessee Firearm Freedom Act to be able to make a legal semi-automatic rifle.  However, there are regulatory restraints within that law as well.

So please watch the Plastic Fantastic AR-15 I Introduction as the first of a 5 part series.


https://www.youtube.com/watch?v=LG7NRMyLtXw


In this video above I show how I went about molding the lower receiver  using the freedom-15 mold kit. This kit is not hard to put together, and it is a pretty ingenious idea.

It is pretty well documented on their website and the kit comes with instructions.

The only thing I found difficult in the molding process is bending the buffer tube support to fit inside the mold.

It was, without a doubt, the most difficult portion of the process. It is also something that caused blemishes in the final product.

I had places where the metal support touched the side of the mold so that it showed through the epoxy on the side of the finished receiver.

This did not impact the final product in terms of usability, it did hurt the lower cosmetically.

Once again I have my doubts about a plastic AR-15 Lower receiver, but if it works it would be awesome to be able to make my own 100% lowers whenever I want. The price of that is not bad. However, it you are looking at straight cost, there are cheaper ways of getting AR-15 stripped lowers.


In part III I focused on Heat Treating the Polymer AR-15. This is am additional step in making the freedom15 lower stronger and is recommended by the manufacturer.

I also compare the finished lowers side by side to show the various shades of black and grey and tell the corresponding numbers of drops of black pigment per lower.

Additionally, I talk about how I broke one of the lowers in the de-molding process and how that happened so you can avoid wasting one of your lowers.

Making these were pretty easy. You can allot about 2 hours per lower, and the company says and one hour and forty five minutes per lower is average.

I took somewhere between the two, but I was closer to 1:45 than 2.

Heat Treating the Polymer AR-15

  • The manufacturer recommends a 12 hour air cure at 70F+ air temps before heat treating the Feedom15 lower receiver.
  • Set a small toaster oven at 135F
  • Insert the lower into the oven so that it sits upright on the mag well
  • Bake for 2 hours.

Heat Treating the Polymer AR-15 is not required…..however the manufacturer states it will make the lower stronger.

https://www.youtube.com/watch?v=NKL9y7VIJzw


This video is a 10 minute instruction on building and AR-15 Lower Receiver. This lower build happens to be on a Freedom15 Polymer lower, so it is a little different.

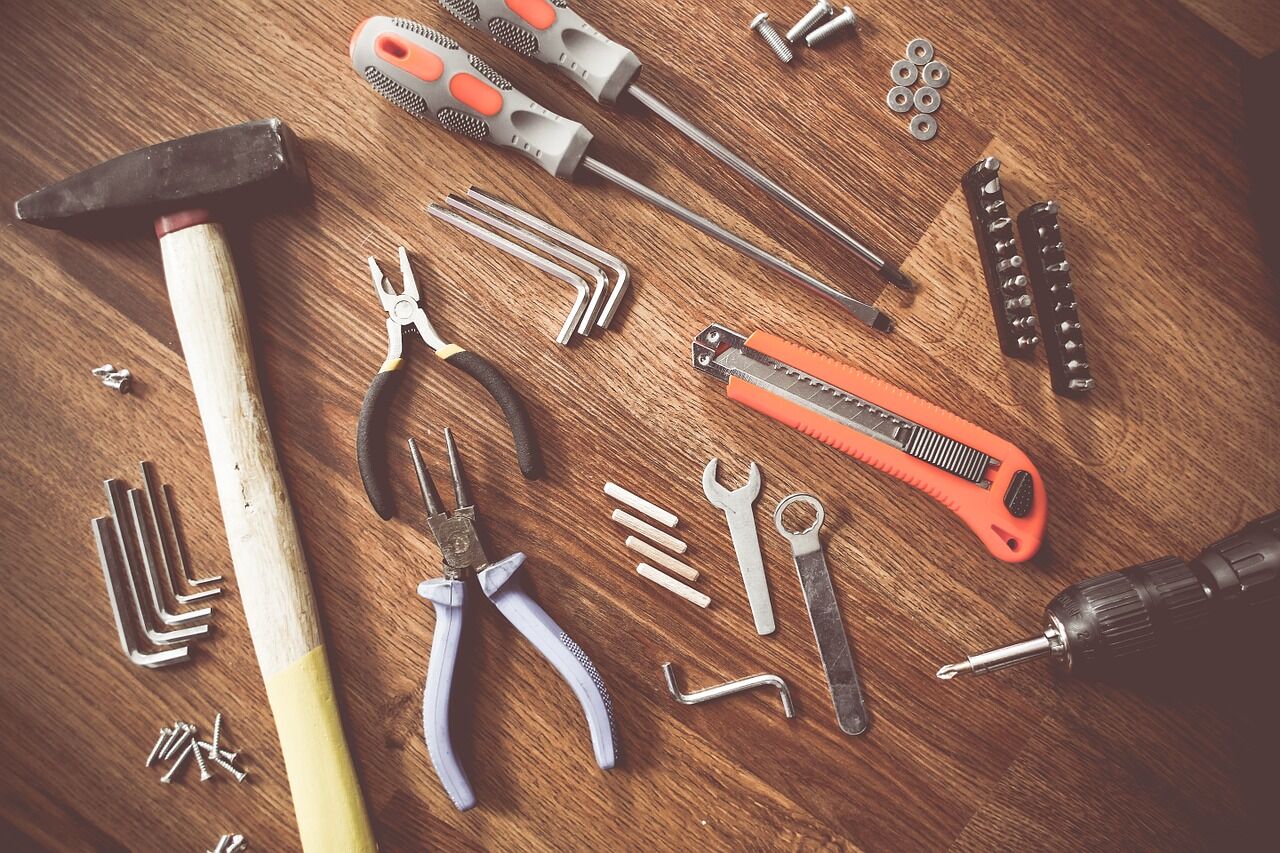
Building an AR-15 lower is not hard, and can be done with common hand tools in less than 30 minutes, even by a first time builder.

However, building an AR is pretty simple, but sometimes things go wrong and may take a little more to get functioning.


I took the plastic fantastic to Royal Range for the Polymer AR-15 Test Fire. You may remember I went to Royal Range and did a construction video before they opened.

I did like the range setup a lot, but the rifle did not meet my expectations.

It fired, but would not pick up a second round. At this point I am willing to assume that it is my 1990’s era GI magazines, as they are pretty old and banged up.

My plan is to go get me some new p-mags and try again after working on the gun a little.

Hopefully my next Polymer AR-15 Test Fire will live up to my expectations and I can test the gun until I burn it up.

If I can get 100 rounds out of the gun in a row I will feel like it was a positive test, as some who want an off the books lower would only need it to get a better gun in the event of a total confiscation of weapons. At least that is a thought process of a potential reason to make your own 100% lower.


Okay I bought new magazines, I cleaned up the gun, and I have brand new ammunition.

As you can see from the video it did not go well. After taking the gun back to the shop I found that the pins walked and elongated the hammer pin hole.

Elongated Pin holes can cause the gun will fire more than one round when the trigger is pulled.  As you can imagine that is dangerous if not anticipated.  Additionally, the BATFE has gotten convictions for the possession of an unregistered machine gun.  They have pursued this on occasion knowing that it was the result of an undesired firearm malfunction.

To keep this from happening again I built up one of the other lowers and too my surprise the upper did not fit.

4 out of 5 of my freedom 15 lowers my upper did not bolt on. I could not find an upper to fit them.

The freedom15 company gave me the story that they have loose and tight US Mil-Spec and they make the lower to the tight spec and I needed to find an upper that was made to loose spec.

That sounded like BS, but I asked them if they knew a “loose specification upper” manufacturer. They could not tell me and I could not find any company that advertised such.

The gunsmiths I talked to thought I was an idiot for asking.

Anyway, to try to salvage it I got some anti-walk pins, but even that did not solve the problem on the original lower.

I rule this entire thing a bust. I know that some have had good results with these lowers, but their customer service showed that they are plastic guys not gun guys and they could not answer specific questions about the AR.

How to Make and Test Improvised Pyrotechnic Ignitors

How to Make and Test Improvised Pyrotechnic Igniters

How to Make and Test Improvised Pyrotechnic Igniters
Buy at Amazon

Improvised pyrotechnic igniters are awesome. Heck, any kind of legal pyrotechnics is awesome. The only thing that comes close is eating bacon wrapped jalapenos while your hot wife rubs your feet while you watch a John Wayne movie.

Since few things are better than shooting fireworks, especially fireworks you made I want to share with you how I make improvised different improvised pyrotechnic igniters for fireworks and campfires.

The first time I saw electrically initiated fire I was at a Boy Scout program at the state park my father worked as a ranger.  The Scoutmaster set up a couple of igniters in some accelerant and made the campfire ignite remotely.

It was magical to see someone wire a bunch of tiny little wires to a radio receiver and later press a button and cause a huge fire to “whoosh” into existence. From that point I was hooked.

The adults were smart enough to keep me from knowing too many details at the time.  However as I grew up I came to understand I had a fascination with the “whoosh” of making things burn.

These are Not Blasting Caps

This is a pretty cool think to know, its not likely to be missused because this is not a blasting cap.  Consequently, it is not going to help a terrorist make a bomb.  It will, however, make a boy scout at a jamboree happy as the campfire magically lights.

The DIY igniter videos below show several types of electric matches.  I use different systems like Nichrome wire, steel wool, and bits of thin copper wire.  Additionally I use matches and homemade nitrocellulose lacquer (that I extracted from ping pong balls).  Since they are improvised they don’t work quite as well as commercial squibs, but they do work.

Now as a prepper, what I can do with pyro and stay legal is limited. Most homemade fireworks are for entertainment only if you want to stay on the right side of the law, but some skills are transferable, and I am sure that with a little thought a smart person could find a use for these DIY igniters.

Personally I think they would work good with black powder mortars, but I am still fighting with the wife for a cannon for Christmas.

I include videos on testing some of the setups.  You need to be certain they work well before you attach them, because a hooked up igniter that does not ignite on command is dangerous.

If it has a delayed activation that occurs while you are around the pyrotechnics then you can die.  It is not the dying that is bad, its the fact that it will HURT the entire time you are dying.

TEST a few of the igniters in every batch before you use them.

How to Make and Test Improvised Pyrotechnic Igniters
Buy at Amazon

Especially if the igniters are improvised.  As you can see in the videos, I had a batch batch had a bit of a delay. That was because I used copper wire as an electrical bridge rather than the more effective Nichrome wire.

This means it took longer for the wire to heat and ignite the compound.

Knowing that the igniter has a delay is important,  However, because of it, I would not use this in any type of public display.   An ignitor like this would work better for lighting a fire like I mentioned in the original post.

There are many ways to make these igniters, and any search of a rocketry club will show you how.

Without any more talk here are three videos showing the construction and testing of various styles of improvised pyrotechnic igniters


Guide: 5 Ways to Hold a Handgun like A Pro

5 Ways to Hold a Handgun like A Pro

Guide: 5 Ways to Hold a Handgun like A Pro
Buy at Amazon

There are so many reasons why you might need to have a gun. Knowing how to hold a handgun effectively is important for your safety. All in all, simply because you know how to hold a gun doesn’t mean that you know the right time to use it. For instance, you should not use your gun to threaten or injure anyone. You need to take safety courses and regular training to improve your performance when it comes to handling firearms.

Having a proper grip is crucial. A gun acts as an extension so it replaces your arms. The way you hold your gun will affect aiming, balance, ability to pull the trigger, absorbing recoil and much more.

For self-defense, having a double grip is always recommended. However, you need to have a comfortable gripping and then shoot using one hand. When two hands are involved, the support hand makes the handgun stable and this leads to accurate shots. You need to have a solid and firm grip if you want to get maximum accuracy and control when using your gun. This guide will help you understand in details how you can hold you’re your handgun like a pro.

#1: Assume the gun is loaded and make sure it is clear

This is the first rule in handling guns. Always assume the gun is loaded and point it in a safe direction. Even if there is no magazine in the gun, treat is as if it is loaded. The gun should be pointed away from people including you.

Remove the magazine to ensure that the gun is clear. Point the gun down range, and then slide several times to ensure that there is no round inside the chamber. Next, lock the slide back to keep the ejection port open such that you can see some light through. This is an indication that the magazine is empty. Then move the slide forward and your handgun is now ready for dry firing.

#2: Dominant and non-dominant hand grip

The most recommended way to shoot is when you are using two hands. Holding your handgun with two hands provides stability and more accurate shots. You need to hold the gun with your dominant hand and keep it on the grip. Wrap your middle, ring and the pinky fingers on the base of the grip below the trigger guard. Ensure that the fingers are close together but they should not overlap. Hold firmly and keep the index finger (of your dominant hand) extended against the gun frame. Never put the shooting finger on the trigger unless you have aimed and you are ready to fire.

The next thing is to place the non-dominant hand in the part of the grip that is exposed. Your hand should fill that space totally. The thumb of your non-dominant hand should be placed right under and a little forward of the thumb of the dominant hand against the frame. Wrap your index, middle, ring and pinky fingers firmly on the grip base just below the trigger guard. This should be around the dominant hand on the other grip side and then hold firmly.

If you are holding the gun for the first time, the two positions might feel unnatural but you will get used with time. The most important thing is to fill all the open spaces on the grip because of the gun recoil.

#3: Dangerous grip styles

When holding your handgun, you need to avoid some dangerous grip types. One of the grip types you should avoid is the tea cupping. This is a two-handed grip style which is unstable. In this style, the non-dominant hand doesn’t offer the dominant hand with enough support. This makes your aims skewed and the gun can fly back during recoil.

Another bad grip you should avoid is crossing your thumbs. This is a common mistake among many beginner shooters. Crossing your thumbs when you are using your handgun puts them at a risk of injury. As you know, the pistol’s slide moves back once you fire. If you hold the gun crossing your thumbs, you place them in the slide’s path and at full force, this can crash your thumbs.

#4: Proper shooting position

To make accurate shots, you need to have the right shooting position. Your feet should be shoulder width apart while your knees slightly bent. You should not lock out your knees or flex the leg muscles. Keep your shoulders square and bend forward a little with your torso. With your dominant hand, draw your handgun from the holster and grip the gun keeping the shooting finger away from the trigger. Keep the finger in a ready position and your body should be in front of your abdomen pointing towards the target.

#5: Extend your arms, aim and pull the trigger

Extend your arms and do not lock them such that they are in front of you and aim at your target with the dominant eye. Your shoulders should be square to the target while elbows slightly bent. Aim at your target then pull the trigger.

Other things you need to keep in mind

Always keep your grip tight

If you want to shoot better, have a tight grip. You should have more strength while maintaining your ability to control the trigger.

Set your wrist

The heel of the non-dominant hand should be high and flat on the handgun. This gives you better support and control.

Apply isometric tension

When you are firing, it is important to apply isometric tension. When your dominant hand is applying pressure forward, your non-dominant hand should pull the rear pressure.

Final Words

Knowing how to hold a handgun is crucial if you want to get stability and accuracy when shooting. Many beginners hold handguns the wrong way and this might compromise their safety when using guns. If you know how to hold your handgun the right way, then you can be sure of a safety. I believe after going through the guide, it will be easy for you to hold your handgun the right way.

Note from Dave:  I have written extensively about this topic, and I realize that the author of this post was talking about the weaver stance and not my preferred isosceles stance.  While I don;t teach the techniques as they are described here, I realize that perfect range form is not the same as stance on a two way firing line….

Tools

Idea List for Everyday Carry Tools

EDC Tools
Buy at Amazon

This post on EDC Tools is a list of items that did not fit in other areas.  Some of these are gadgets, some are smaller tools that don’t contain knives.

This list is not all inclusive, I am sure there are useful EDC tools that I skipped or are unaware of, also this is not a buy everything and be safe list.  Some of the items below are redundant and are left to your own taste and judgement.

I like to have a small screwdriver/multi-tool on my key ring. so that I can always have the ability to unscrew things.  However, about the only thing on this list I can take to work is the P-38 can opener down at the bottom of the page – BUT you would be surprised at just how much you can do with one of those old military openers if you have the desire to force something open.

I encourage you to look down this list and see if any of the items would be useful to you on a daily or weekly basis – if they look cool, but you never use them, after a while they will end up off your key-chain and stuck in a drawer.  Besides my list you can find some great tool ideas at ToolsSpecialist Blog

Like all my other posts, you can click the picture to view this item on Amazon.  I do make a small commission if you purchase from this link, but it does not cost you any more money and the commissions pay for the hosting of this site and a small amount of the time it takes to find the information I share here.

Nite-Ize DoohicKey Multi-Tool

$3.98


Hexflex Multi-tool STANDARD/METRIC BLUE

$17.86


TOTOONE Compact Multi-Tool Keychain

$11.99


Keychain Multi-Tool EDC Mini-Tool 10-in-1 Key Tool

$6.99


Maxcraft EDC Portable Screwdriver Set Tool

$5.99


Keychain Multi-Tool

$24.95


Tactica Multitool M100 – TSA compliant

$39.95


Dkka Outdoor EDC Stainless Steel Tactical Multi-functional Pocket tool

$12.99


Waterproof EDC Keychain Capsule Tube

$8.99

(I used to keep a capsule like this on my key-chain = it held OOOO steel wool and a small DIY Keychain ferrocerium rod)


Mini Pocket Monocular Binocular

$12.50


Heavy Duty Pocket Wrench

$7.99


Uncle Bill’s Sliver Gripper Keychain Tweezers

$9.78


Stanley 39-130 3 x 1/4-Inch PowerLock Key Tape

$5.92


Mini Pocket Slide Switch 20x 21mm Magnifier Loupe

$2.89


Geekercity EDC Wrench

$8.99


Multi function signal mirror

$5.99

(This is my true EDC – I use it at the prison when searching to ensure I don’t get stuck by a homemade drug needle or a razor)


Commando Wire Saw

$2.09


P-38 Can Opener and P-51 Can Opener

$4.45

(I’ve had a John Wayne Can Opener on my key-chain since the early 1990’s, its a military thing – but these sure are handy)

EDC for Corrections

EDC for Corrections

EDC Items at Amazon
Click to View EDC Items at Amazon

I have been thinking about everyday carry for a few weeks now, normally its just something that I do – but as my life changes and jobs evolve so does what I can carry.  When I was in college working at a liquor store in a rougher part of Jackson TN, my EDC included a Beretta 92 and lots of magazines, at TEMA it included a CRKT neck knife, but in corrections my everyday carry is much more restricted.  In an environment where multi-tools, lighters, knives, and even click pens are forbidden, I had to be more creative.

This is my EDC for corrections, and due to my specialized job, this list is not the exact list of a correctional officer working security.  They can’t have cell phones or flash drives, and the radio holder is too small for their issued duty belt.  However, for investigators or others that can have these things this is (in my humble opinion) are pretty darn useful.

For your convenience, I will link to the items in the video below.  However, if you work in a more permissive environment, you can check out my Amazon Influencer EDC page to see lots of small knives, lighters, multi-tools and gadgets that I think are great EDC options.


Seeshine Multifunctional 3 in 1 USB Cable Keychain

$8.99

Cell Phone Card Wallet (5-Pack)

Cell Phone Card Wallet

$6.99

Swivel Belt Clip Two-Way Radio

Swivel Belt Clip Two-Way Radio

$24.95

Micro USB Rechargeable Tiny Flashlight

Micro USB Rechargeable Tiny Flashlight

$15.99

Tactical Gear Belt Clip

Tactical Gear Belt Clip

$6.90

EDC Survival Mirror

EDC Survival Mirror

$6.98

Kingston Digital DataTraveler

Kingston Digital DataTraveler

$15.99

GI P-38 Can Opener (5-pack)

P-38 Can Opener

$5.50

Zak Tool Zak Tactical Key Ring Holder (2-Pack)

Zak Tool Zak Tactical Key Ring Holder - ZAK-54 - 2 Pack

$12.10