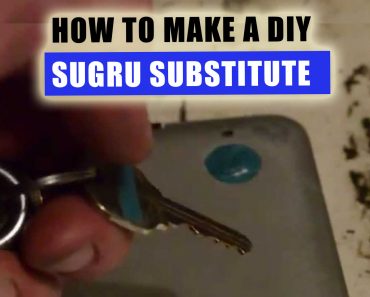
As I get older and the room gets darker I find it harder and harder to read the sizes on things. This is worse on things like wrenches, sockets, drill bits, and taps. I find that tool marking with paint makes it much easier to see. I have always wanted to know how to make tool markings stand out.
This post is a quick and simple method to mark stampings
Paint your tool with a can of spray paint (black is nice, but white or other bright paint will work better on darker metal)
Once the paint dries, you can then rub it off – depending on the finish, a dry rag, a rag with a SMALL amount of acetone, or (if you are not picky about scratches) steel wool can all be used.
Just like scrimshaw (or the AR-15 marking post) you are putting paint in recessed areas. This allows a level of distinction between the colored areas and the out metal.
There really isn’t much more to say about how to make tool markings stand out with ink. Once you get the idea on tool marking you can easily adapt the process using different materials – I have even seen people fill the markings in with colored sugru.
Speaking about tools, I found toolsinsider that has a lot of other good tool information. I particularly like their article on sharpening drill bits..
This can turn into a crazy passion. When researching this I saw many websites where people started making tire planters, and now own websites that sell tire art. I saw people making tire swings, recliners, rope horses, dragons, alligators, flowers, “Mexican clay pots” and even houses… After I built my first 4 planters I went back and got every tire the garage had and made about 9 more…
The basics are pretty simple.
Find a used tire (I have found the larger the tire store the less likely they are to let you have any).
Cut out the sidewalls
Flip it inside out
Paint it if desired
Cutting is pretty simple. I used a large hunting knife. Online I have read about using jigsaws. I have been told that a wood blade with 10 or 11 teeth per inch is best. Also, I have also been told that you should grind the teeth like you are making a knife. This makes the cutting end is very thin. Additionally, when cutting with a jigsaw you should lubricate the tire with water as you cut it. Supposedly this make it like cutting warm butter.
A Jigsaw Did Not Work
Either I was doing it wrong or that guy’s butter was actually steel, because the jig saw did NOT work for me. A large sharp knife did the job pretty easy. This is one area that it did not pay to get complicated to make it easier…
You don’t have to flip the tire inside out, but it makes it look less like a tire and takes a lot less paint (due to the tread). It’s pretty simple – some tires flipped inside out so easy that I thought I was an expert – others took several minutes and more than one 4 letter word. The video of show’s me doing it, but I did not really explain how. Press down on one side and lift up on the other and try to flip the side of the tire that is away from you over and side near you and then down.
Basically this is one of those things you have to do to understand.
I then found the nice sunny areas I wanted planters and lined everything up because you’re not moving it once you fill it. I found it took one wheelbarrow of dirt to fill each tire – but that depends on size of tire and how compacted it is.
Tires Absorb Heat
A couple nice things about tire planters are that because of the black rubber they absorb heat well so you can start your plants early. You get al the benefits of raised beds. They are easy to mow around as the mower bounces off of the tire. You are up-cycling by taking something that takes a lot of room in landfills and turning it into something better. I have seen people selling tire planters for up to $30.00. If you are willing to pay $30 for a used tire slapped with paint call me. I will make you as many as you want.
Some people are concerned with toxins leaching into the dirt. I did a little research and found that the main thing that leeches off of WASHED tires is zinc. Zinc is bad for some plants, but at reasonable levels is something humans need. Additionally, I also learned that the zinc is released as the tire breaks down. This happens over about 30 years. So FOR ME I am not concerned. If YOU are, then don’t plant edibles in your tires.
Tires disposal is a first world problem – we generate tons of used tires annually. One way many ecologically minded folks deal with reducing the amount of tires that end up in landfills is to build rammed earth tire houses. I am all for that, but ramming a couple hundred pounds of dirt into a steel belted tire is hard work – and I am lazy….
I was overjoyed to find that if you remove one sidewall of a tire you can still build with it (its not as strong, but still stronger than traditional 2×4 construction).
Since I planned on building tire buildings on Dual Homestead, I set about finding an easy way to remove the sidewalls from tires.
Best Method to Cut Tires is With a Hook Knife
It did not take much research to find this easy tire sidewall removal tip. Simply use a hook bladed utility knife.
Hook blades are pretty cheap, and they install in a utility knife the same was as a normal blade.
I find that once you get the hook into the sidewall it zips along easily cutting the tire. Since the hook blade keeps the blade in the tire, I feel it is safer and I tend to pull a little harder than I would with a straight utility blade.
I will give you a tip to keep tire sidewall removal easy – stay out of the steel belts – don’t cut too close to the treads. Remember that this is a technique that can be used for more than just building buildings with tires – I remove the tire sidewall for building planters, tree protectors, tire sandals, and tire swings.
When I paint, I tend to paint everything – hair, clothes, ceilings, walls, and an extremely irritated house cat. I’m not saying I am messy, but I do drip paint everywhere.
I found this no drip paint tip to help me stay clean and paint free so I thought I would share.
You can wrap a rubber band around the handles of a paint container so that the top of the bands cross the center of the open can of paint.
Then as you dip your brush in paint, you can rub the excess paint off on the rubber band rather than the side of the container. The paint will end up back in the can instead of the sides and top of the can itself.
Try it, it works.
I should have done this when I was painting my new fence, but I did not take the time to dig out a rubber band. This caused me to get paint all over myself as I climbed around the hillside. This an the aluminum foil tip makes for easy clean up after painting jobs, which is nice because I hate painting. I wish I could find a better way of painting my beehives because it means I have to paint a lot.
I have been doing a lot of painting lately, and I found a tip that cuts down on cleaning of my roller pan.
I have started to line it with heavy-duty aluminum foil before using it.
This trick is especially helpful if you’re painting with different colors — for each new color, throw away the old foil (after pouring excess paint back into the can) and put in a fresh sheet, molding it to the pan.
This aluminum foil painting tip saves an enormous amount of cleanup, and makes painting much easier. I don’t enjoy painting, but I hate cleanup, so knowing this simple painting trick makes me much more likely to perform seasonal preventative maintenance.
For those that think this is a waste of aluminum, you may be right, but depending on your recycler, and the amount of paint you have on the foil – you still may be able to wad it up and send it in for recycling. If you are really big into recycling – why don’t you build an aluminum foundry and use the paint filled aluminum foil to cast things?
Use this with the no drip tip and you are on your way to an easy cleanup after your job.