How to Make DIY Mosquito Repellent Holders

How to Make DIY Mosquito Repellent Holders

How to Make DIY Mosquito Repellent Holders
Buy at Amazon

My boy loves being outside, but kids are especially sensitive to mosquito bites, due to the bees we cannot use traditional pesticides, but I did see this idea on an Alaska bush craft site and decided to try it out while camping.

It worked very well for us last summer, and I finally got around to documenting it.
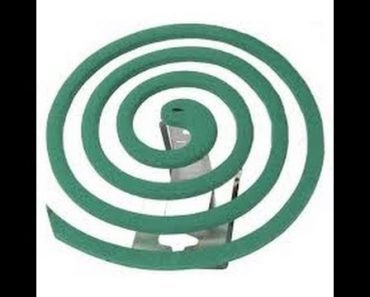
One of the most popular bug repellent to cover large areas such are patios, decks, and yards is the mosquito coil.

These coils use an incense style delivery system where you light one end and it burns as an ember producing smoke containing the repellant. As the air currents spread the smoke around the bugs high tail it out of the area. This is handy when you are working in an area and need wide coverage.

The problem is the small metal coil holders aren’t always appropriate for putting the coils around your work or recreation area. The ones that are able to hang can cost up to $7 to $11 a piece.

Here is a method to make as many as you want for less than a dollar each.

I happen to have some left over rabbit cage wire I used, but if you don’t have scrap, purchase a one foot by three (or four) foot piece of metal screen at your local hardware store.

How to Make Mosquito Repellent Holders

  • Cut the pieces of screen into units that are 5 inches wide and 12 inches long.
  • Fold the piece in half.
  • On either edge adjoining the folded edge, bend the screen over itself, thereby creating a holder with two sides open.
  • Insert a wooden pencil or dowel between the two halves of screen and gently reshape the metal fold to create a bit of a space or gap between the two sides so that it won’t pinch the mosquito coil. (The coil may extinguish itself if the screen is pressed tightly against the coil.)
  • Add a loop of cord or an “S” shaped piece of wire for hanging on whatever objects are handy around the area you want to protect.

Hang several in large areas or where changing air currents require positioning coils in many locations.

How to Make a Vacuum Former Box


DIY Vacuum Former
Buy at Amazon

Vacuum forming is something I have wanted to play with for some time.

The storm trooper uniforms from star wars are vacuum formed. Many molds – especially for candy- are vacuum formed. What I want to be able to do is form holsters and project boxes to custom specifications. Because of this I had to make a DIY Vacuum Former.

The way vacuum forming works, is that you have a box (called a platen) that has a top full of holes – this box is built to draw a vacuum (hobby platens normally use a shop vac). The second piece is a frame to hold a sheet of thermoplastic.

Whatever you want to mold is set in the center of the platen, the plastic and its frame is heated until the plastic is pliable, and then the hot plastic is set over the platen. A vacuum then pulls the plastic down and over your part, very cleanly and clearly reproducing it in the plastic.

Once cooled, the plastic part is trimmed from the sheet and is ready to be used.

Constructing the Vacuum Forming Box

I used a piece of pegboard to form the top of my platen, and just built a frame out of scrap 2×4. Next, I used a piece of plywood for the base, and used calk to seal everything.

I drilled a hole in the center of the front of the 2×4 frame so I could insert the hose from a large shop vacuum.

For the frame, I bought two sheets of 1/8 board, and drew increasingly small square about 2 inches wide. I cut out each square out of each of the two boards, making several sets of frames.

To use, I put the plastic over one frame, and then bolt the second over the first board.

My idea is that when molding something small, I can set the biggest frame along the outside, and then use each smaller frame inside the larger one until I get to the size I need. The intent is to reduce the amount of exposed holes to maximize vacuum. In practice, I just cover the unused space with duct tape.

I think that in vacuum forming, making the platen a size you will use is more efficient, than making a monster frame for small projects.

As we get time I want to use this to make several other projects, most notably a bedside holster.

How to Build a Coffee Can Toilet Paper Dispenser


Coffee Can Toilet Paper Hanger for Camping
Buy at Amazon

I don’t drink coffee, so this took me a while to get a plastic coffee container, but once I did I made a very quick Coffee Can Toilet Paper Hanger to take when we go visit the property.

This is a pretty simple little DIY camping hack that makes life so much easier.

Being a prepper, and working on a piece of land that is an hour away from my home means I like to keep a roll of Toilet paper in the car, in the truck, in the job box on the property, in my Bug out bag, and anywhere else I can think of.

The problem is that if just thrown in the back of a car the paper gets ripped, or wet, or nasty.

This simple coffee can toilet paper hanger for camping makes life much easier as well as more hygienic.

  1. First cut a slit long enough for toilet paper. (If you put the slit opposite of the handles so you can hold and pull)
  2. Then thread the TP in the slit and put roll of TP in container.
  3. Put the lid back on and once again.
  4. Now you have a TP holder for camping!

Blacksmithing Color Chart of Steel

Blacksmithing Color Chart of Steel
Buy at Amazon

This post is another article I made specifically to help me out more than to share information with you. I have a hard time remembering what colors of hot metal means, so I did some research and found several charts to explain. This one was the best for my purposes and came from stormthecastle.com, this is a very cool website and they have a lot of good information.

Blacksmithing Color Chart of Steel

The problem with Blacksmithing Color Chart of Steel like this is that they are slightly different for the different types of irons and iron alloys. Additionally (and more problematically) the colors are subjective and will be seen by the same person differently depending on conditions at the worksite (more or less light, overcast or clear conditions)

Additionally different types of metal act differently at the same heat color. Some have a short working temperature, which means that they only should be worked at medium to bright yellow. If it gets to orange yellow quit and take another heat. This is something you will have to either learn on your own or seek the advice of others that have worked this type steel.

Your eyes see colors differently then how others see and label the same color due to age, glasses, and life experiences. You are building YOUR heat standard for YOUR forge under YOUR smithy conditions.

If you really want/need to know what temperature a specific color represents, or what temperature the steel has been heated to, purchase a temperature measuring device called a pyrometer.

I would also suggest that you buy special wax pencils that can be applied to the steel that will melt at a specific temperature. (the wax is also useful when annealing brass for reloading purposes).

So realizing that this chart is just a guide and it does not supplant personal experience at your forge, under your conditions it is quite useful beginners like me.

How to Test Soil Test For Clay Content

How to Test Soil Test For Clay Content


How to Test Soil Test For Clay Content
Buy at Amazon

This post came from several places; Christina Ott and I talked about this on the podcast and I read about it in the Hand Sculpted House.

I think Cob construction has some great benefits to preppers and homesteaders, but before you decide that cob is the material you will build with you really ought to test your soil to see if it is appropriate for your land.

Cob should be a mixture of sand, clay, and fiber – It is my understanding that the best mix is 30-50% clay. Sand gives it form and the fiber gives it tensile strength, but it is the clay sticks it all together.  This post shows an easy soil test for cob.

Cob Building Clay Test

  • First scrape away the top organic layer.
  • Next take a cup or two of soil from various potential house sites and from various depths. (Soil samples can vary a lot even a few feet from each other.)
  • Take out any stones or pebbles.
  • Put each sample in a quart jar, you should have about 1/3 of the jar full of broken up soil.
  • Label each jar
  • Next fill the jar 2/3 full with water and either some salt or a couple drops of dish soap.
  • Shake well. Very well – make your arms tired, switch off with someone, and then switch back and tire yourself out again.
  • Then let it settle. If your soil has sand, silt and clay in it, you’ll get three distinct layers.
  • The sand is the heaviest and will sink to the bottom as you watch.
  • The silt will settle next, and the clay will stay suspended in the water for a couple days then settle on top of the silt.

Finally, the best soil with have little silt and a lot of clay.  As you can always add sand to get the proper consistency.