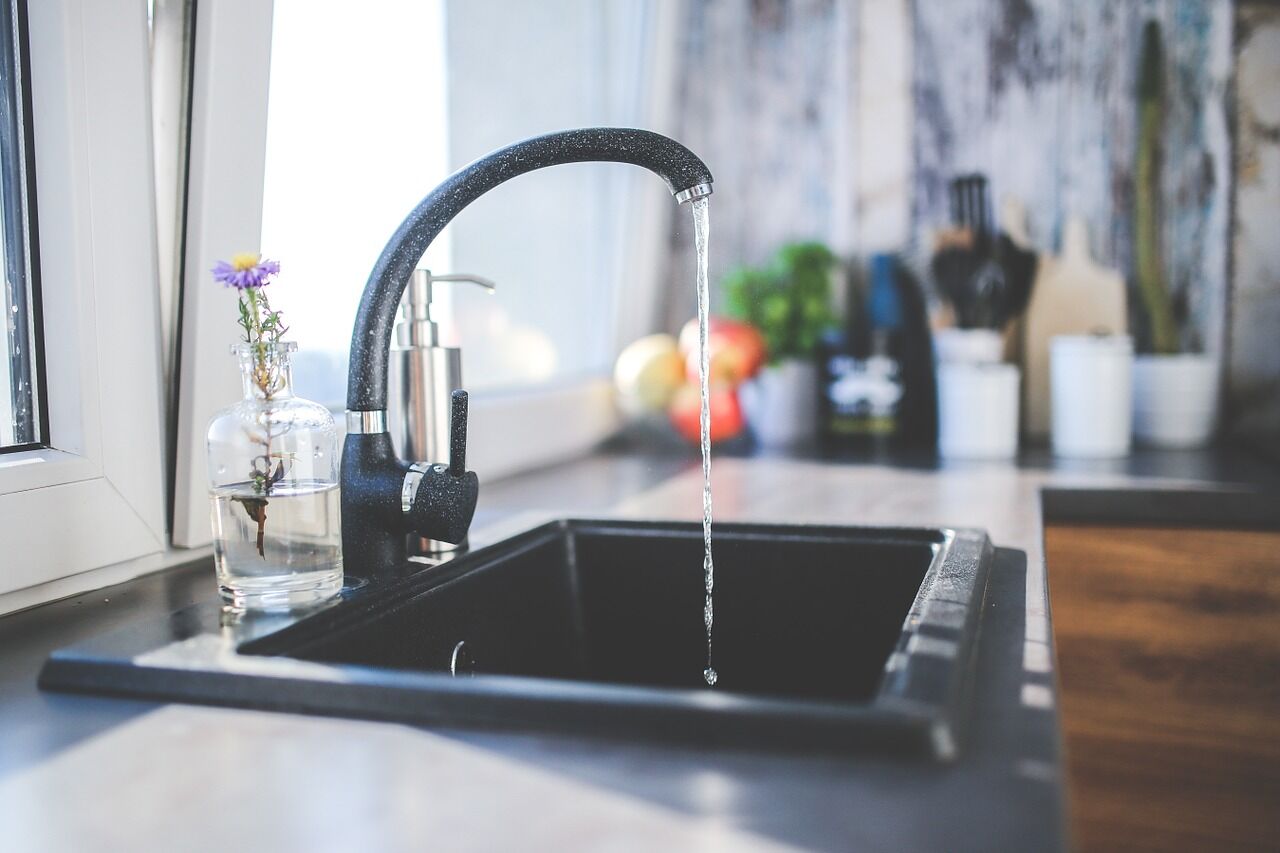
Category: How To (How I Did)

You could call this a How To – but people often tell me I did it wrong – now to be fair you can’t really tell me I can’t do it that way, when the video shows I actually DID do it that way – so to cool down the hateraide – lets just call this HOW I DID

  • How To Protect Your Livestock From the Heat

    How To Protect Your Livestock From the Heat

    Many believe that livestock animals can withstand uncomfortable temperatures because they’ve evolved to live outdoors. However, this idea is only partially true. Just like people, animals can become very ill and even die from heat exposure caused by extreme temperatures. Whether cattle, pigs, goats, horses, or other animals, your animals will need adequate protection in order to survive and thrive. Learn how to protect your livestock from heat stress to keep them comfortable, happy, and, most importantly, healthy.

    Provide Adequate Shelter

    Unfortunately, giving your animals a singular shaded area isn’t enough to keep them cool. Often, the danger arises when animals start to bunch up, as this increases body heat and defeats the shaded area’s purpose. A good shelter should have fans, adequate ventilation, plenty of floor space, and be high enough to allow air movement.

    Consider building earth mounds to keep animals apart. If you’re struggling to find a solution that ticks the boxes, you can convert fabric storage buildings into livestock shelters. If you’re looking to save a little extra cash, one of the environmental benefits of fabric buildings is their ability to utilize natural airflow to cut down on energy costs.

    Adjust Their Diet Accordingly

    Naturally, livestock animals will drink more water the hotter it gets, and they’ll need a bit of a diet and schedule change to maintain their body temperature. They’ll need about double the amount of water, so extra tanks may be necessary. Additionally, tanks and waterlines should remain in the shade and shouldn’t go above 80°F. There should also be enough trough space for each animal. As an estimate, cattle need about 2-3 inches of trough space per head.

    In terms of diet, keep in mind that the digestion process increases body heat. Feeding a small portion in the morning and a bigger portion in the evening helps animals stay cooler when night comes around. Ultimately, you should avoid moving and handling animals as much as possible during the hottest times of the day, which is typically from about 12:00 p.m. to 3:00 p.m. Consider adding more fat and fiber to their diet to decrease the heat created in ruminant animals during the fermentation process.

    Offer Various Cooling Options

    The best way to protect your livestock from heat is to provide them with various cooling options. While having enough ventilated shelter space is important, animals can’t stay in one place all day and will want to move when their body heat makes the space too warm. Sunshades, portable shade structures, sheds, and canopy trees are all excellent options that give animals a choice in case their current spot becomes uncomfortable.

    Consider running water along the roofs of shaded housing to cool down the area or run water on the ground to keep hooves cool. You may also want to think about spraying down some of the animals with water during the hottest hours of the day. Alternatively, if you want to cool down the ambient temperature, running mist sprinklers in and around the shaded housing will do the trick.

    Remember, livestock animals can become just as uncomfortable and sick as humans if exposed to the heat for too long. Give them plenty of shade and water, and look for signs of heat stress throughout the day.

  • Maintenance Tips To Keep Your Tractor Running Like New

    Maintenance Tips To Keep Your Tractor Running Like New

    The word “tractor” comes from the Latin word “trahere,” which quite literally translates to pull or drag, and that’s exactly what tractors do. They provide the machine power necessary to drag, pull, and push and are the driving force behind the agricultural industry. With all those expectations to live up to, tractors need proper care and upkeep to get the job done. For it to help you keep your farm running, you need to keep that motor humming. Let’s take a look at a few maintenance tips to keep your tractor running like new.

    Check Your Fluids

    There are quite a few different fluids that keep your tractor running. You need to check transmission, hydraulic, engine, and brake oils. If any of your fluids are low, or you notice sludge buildup from old oil, now is the time to clean and top off your fluids.

    It’s critical for you to review your OEM’s instructions, as it will tell you what kind of fluids and oils you need to use for your make and model. For example, two of the most common tractor engine oils are 15w50 and 10w30. While these lubricants look and act very similar, there are many differences between 15w50 and 10w30 oil, and they’re not often interchangeable. Use the wrong fluid, and you put your tractor’s engine health at risk.

    Inspect Your Battery

    The longer your tractor has been idle, the more important it is for you to check your battery. The battery will likely discharge on its own, and the parts surrounding it can erode. If you don’t take the time to charge your battery, trying to start up your tractor can put a serious strain on your alternator. Once you’ve charged it, check the connection points for damage, corrosion, and buildup. If you tend to leave your tractor idle for extended periods, consider removing the battery leads so that it won’t discharge while not in use.

    Monitor Tire Pressure

    The lower your tire pressure, the more energy your engine uses. And the more energy your engine needs, the more fuel it burns. Low tire pressure is a fast way to lose fuel efficiency, and with fuel prices increasing, this is a quick way to spend a lot. You should check tire pressure at least once a week, but ideally, you’ll check it after every use. While tractors certainly aren’t fragile, driving over crops or rough terrain can puncture tires and cause slow leaks that you won’t notice until you spend more money on fuel.

    Clean the Air Filters

    Tractor engines, among virtually all automotive engines, rely on a complex combustion process to run, and what does a spark need to light? Oxygen. The slower or less consistent the combustion process is, the more unused fuel sits in the combustion chamber. In this way, your tractor’s engine needs to breathe if you want to maintain your engine’s efficiency. To avoid this, check your air filters after every 50 hours of use. If your filter is clogged or dirty, replace it as soon as possible.

    Following these maintenance tips is a guaranteed way to keep your tractor running like new. Remember always to check your OEM’s instructions. From there, you’ll be on your way to having a tractor that’ll last you for years to come.

  • What To Include in Your Bug-Out Bag Checklist

    What To Include in Your Bug-Out Bag Checklist

    No one ever plans for an emergency that requires them to pack up and depart immediately. Yet, with today’s rising worries, many choose to go equipped. While most people are not too paranoid, it is still a good idea to take an honest look at the world and learn how to take some precautions, such as knowing what to include in your bug-out bag checklist.

    What Makes a Good Bug-Out Bag?

    If you don’t want to spend time carefully curating your emergency kit, you may choose from a variety of premade bug-out bags available online. Yet, since they are for the masses and market to the vast majority, they seldom include customized choices tailored to you and your area.

    For instance, if you settle in a desert instead of a heavily wooded area, you won’t have access to the same resources.  If you are carrying materials for more than yourself, the contents in a premade bug-out bag may not be sufficient. However, if you want a proper customized bag for yourself, you should take advantage of what a small tactical backpack offers.

    Tips for Curating the Bug-Out Bag

    Despite many unknowns, you should follow a few basic guidelines while packing your bug-out bag. First, there’s no reason to overcomplicate things, considering you’re not constructing a portable dwelling. Adding unnecessary materials takes up valuable space and adds more weight to an already loaded pack. While having the essentials is paramount, you don’t want to feel like you’re carrying around cinder blocks. Long-distance hiking and a heavy pack don’t mix well, so keep it light.

    Ideally, if things go awry, you want enough supplies to last three days. Hopefully, you never encounter a scenario where you’re in the wild for more than 72 hours, but at least your bug-out bag can aid you.

    Another great tip to follow is to bring items that have multiple purposes—a backpack full of goods is akin to a Swiss Army knife. After all, the goal is to survive; thus, packing for comfort isn’t the best solution.

    Essentials for the Bag

    Now that you know what makes a good bug-out bag and some tips on packing one, here’s a general list of things you should have:

    • A map and a compass to ensure your whereabouts.
    • Water and high-calorie snacks and MREs.
    • Extra socks for those cold nights, which could be a lifesaver in the winter.
    • Fire starting tools to avoid rubbing two sticks together.
    • Emergency radio to keep abreast of the news.
    • Tarp for a makeshift tent.
    • Multi-purpose tools to handle your basic tasks.

    Learning what to include in your bug-out bag checklist is crucial for the avid outdoors person. Things could get bad in a hurry without the appropriate materials; however, tailoring your bug-out bag to your needs helps minimize a potentially catastrophic event.

  • What To Know Before Starting Your First Greenhouse

    What To Know Before Starting Your First Greenhouse

    The natural world is nothing short of beautiful and nourishing for the soul, so it’s no wonder that many people are so enthusiastic about cultivating their own plants. Building or investing in a greenhouse is a huge and exciting step for anyone with a green thumb, but you should first arm yourself with a solid foundation of knowledge. Explore a few key things to know before starting your first greenhouse so that you can focus on the more delicate aspects of garden maintenance later.

    Choosing a Greenhouse

    There are more greenhouse designs and styles than you might think. For example, you’ll need to decide if you want to attach a greenhouse to your home or opt for a freestanding version on your property. Freestanding greenhouses have the advantage of being bigger and more flexible in their shape and style. Attached greenhouses are smaller, but they’re often more convenient for hobbyists and make a wonderful addition to your home.

    Take your time when considering your options, as there are all sorts of styles, materials, and designs for you to consider.

    Start With Easy-To-Grow Seeds

    If you’re new to growing plants, consider starting with easy-to-grow seeds rather than buying seedlings or cuttings. Starting fresh with new seeds prevents many problems from the get-go. Unfortunately, moving existing plants between containers or gardens can lead to issues in their development or bring diseases and pests to your greenhouse. Choosing to start with easy-to-grow plants will also help you learn the ropes of managing a greenhouse while allowing for errors—look for plant species that are more forgiving.

    Dealing With Pests and Diseases

    Pests and diseases can be a huge problem for greenhouses if you fail to prepare for them. As mentioned, using seedlings or cuttings from separate locations can introduce pests and diseases into a greenhouse. These pests will quickly infest the rest of your greenhouse. Before starting your first greenhouse, you should learn how to prevent insects and diseases from getting in and how to protect your plants should pests and diseases that do occur.

  • How To Keep Warm on Construction Sites in Winter

    How To Keep Warm on Construction Sites in Winter

    Construction is a worthwhile job with many benefits. However, when winter rolls around, the job can become harder with the cold air surrounding you and snow on the ground. The frosty season can make construction uncomfortable, so it helps to know how to keep warm on construction sites in the winter.

    Dress in Layers

    One of the most important things when it comes to staying warm is dressing in layers. Layers allow you to bundle up when it’s colder in the morning and remove articles as you warm up by working. Essentially, you want to be able to regulate your temperature with layers throughout the day.

    A thinner coat over a thicker outer shirt may be better than a single heavier coat. Also, always keep your fingers and head warm. We recommend gloves, beanies, and earmuffs.

    Stay Active

    One of the best ways to keep warm on construction sites in winter is to stay active and moving. Movement helps keep your blood moving and raises your natural body temperature. If you use a lot of heavy equipment, you should focus on improving the performance of your engines. Machines that run smoothly and efficiently allow you to perform your duties more efficiently and move more frequently from task to task.

    Fuel Yourself With Warmth

    Working in the cold can be exhausting, and it’s easy to become dehydrated. Staying active and dressing in layers are important, but it’s also important to give yourself a break, get out of the cold, and drink something warm.

    Coffee, tea, hot cocoa, and cider are all great ways to get some warmth into your system, and you’ll be amazed at how much better you feel. And of course, don’t forget to drink plenty of water. Stay hydrated and take necessary breaks to get off your feet—your day will go much more smoothly.