

How to Build a Generator Using a Stationary Bike | DIY Bike Generator | Burn Fat Not Gas!

Regardless on what I wrote below, I think it is a right of passage for every DIY prepper to figure out how to build a generator using a bike. I kind of cheated because I built mine from a stationary bike.
My desire to become as self sufficient as the modern world allows is well known to anyone that knows anything about me. I have a collection of lists of skills, equipment, and capabilities that I plan on acquiring that over time will decrease my reliance on others.
However, I will never become totally self-reliant. Some doctors have performed appendectomies on themselves. I would prefer to pay my co-pay and be rendered unconscious during surgical procedures.
I also do not possess the skill, will, or desire to produce everything I need. Zoning ordinances prohibit my ownership of live pigs. Federal law prohibits me distilling my own whiskey. My wife won’t let me buy a trained guard monkey or arm it with a pistol.
However, the time and resources I do have are spent in a reasonable attempt at reducing dependence and increasing my own abilities. I do this incrementally. I don’t spend all my resources in one area at the expense of all the others. You should not have all gun and no food, OR all food and no gun. While I am “okay” in both of those areas, commo and electricity have not had as much emphasis. I do have a radio and a license, and a small 45 watt solar kit and DIY generator.
Do You Really Need A Generator?
People have lived thousands of years without electricity. Therefore it is on the bottom of each tiers list. Since I am about to move to the next step of preparedness, I thought it was time to finally get “a round toit” and make a DIY Bike Generator.
For any engineers that may look at this post I want to post a caveat. This is not the best method of producing electricity. Additionally, it is a rather inefficient use of manpower. However, it demonstrates Heinlein’s Law, which is “Their ain’t no such thing as a free lunch”. Making electricity is WORK. Either you have to do it (like with the bike) or something else has to do it. This burns fuel, wind, running water, solar. However, If manpower is cheap, and electricity isn’t then this isn’t a bad deal.
AC or DC
If you have a DC motor and spin it opposite its normal rotation, it will produce a current. However, while this current is DC current it is “noisy” and may cause radio interference. If you use an Alternator, it will produce AC current, which is cleaner, but will require a rectifier diode to create DC current. A good explanation of this is http://www.animations.physics.unsw.edu.au/jw/electricmotors.html.
I choose a DC motor, as I found a website that supplied parts to electrify bikes and sold DC motors that came with a sprocket geared to a bike chain.
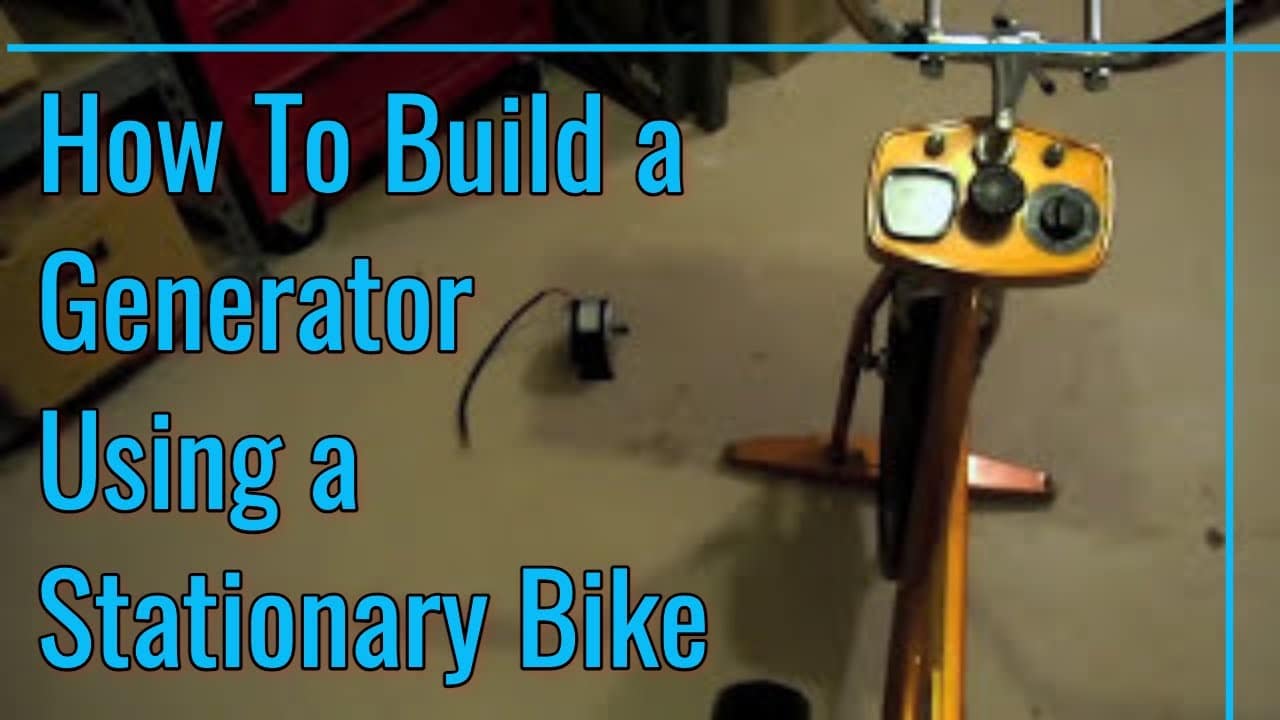
My goal was to build a bike stand , remove the rear tire, and bolt by motor to the frame. Luckily I found a guy selling an old Schwinn exercise bike that had a chain drive. I paid the guy $25 dollars. With the bike and the motor I was under $60.00.
I took the bike back home and planned on cutting into it and removing the back wheel. After doing some figuring, I decided that I liked having the wheel as it acted like a flywheel. By having a big wheel turn a little one, the generator will spin with a higher RPM. The higher the RPM the more current produced.
A DC motor turned generator needs to spin faster than its rated speed to make the rated current. A good explanation of why is here: http://www.mdpub.com/Wind_Turbine/index.html
So what I wanted to do was build a roller and put it against the wheel and have the rear wheel spin the roller.
Here is What I Did
- First thing I did was connect the leads and mark which way the motor spun, and permanently mark it on the motor with little arrows.
- At the hardware store I bought the smallest size pulley I could find, but it had a ½ shaft. I bought a collar that would fit inside the pulley shaft, and would almost thread on the motor (it was metric).
- I then bought a metric tap, and carefully threaded the collar to allow me to thread it on the motor shaft.
- Next I wrapped some weather stripping tightly inside the pulley groove to increase the surface area. I wrapped against the rotation of the motor so that it would rotate with the rear wheel of the bike and not unwrap.
- Using a scrap of 2×4 I held the motor against the bike, so that the pulley would ride against the rear wheel snugly. I did not make it so tight that it would put stress on the motor bearings.
- Next, I also placed the motor so that when the rear bike wheel was under power, it rotated the pulley in such a way that it turned the motor shaft opposite of the directional markings I made earlier.
- Once I did that I marked where the motor needed to be on the board, and where the board needed to be on the bike.
- I drilled some holes in the bike frame, carved out a channel and otherwise shaped the board to fit firmly on the stand without rubbing on any moving parts.
- After that, I bolted the board to the frame, and bolted the motor to the board.
- Lastly, I zip tied the cables out of the way, and wired some leads to the motor so that I could measure the output.
You Will Need a Charge Controller
Luckily, I bought a charge controller when I bought the motor, but it had no markings or schematic, so I cannot figure out what leads go to what terminal, so for now, I am using the very cheap charge control that came with my Harbor Freight 45 watt panel kit. I see these on ebay for $30 dollars on a regular basis, so I will probably buy a couple so I can use one for the bike and have spare.
You would not want to run anything directly off the bike generator, as power fluctuates with your peddling speed, but you could hook this up to a battery (with a charge controller or diode so you don’t power the motor) to store a charge for later use. As I say in the video, my intent is to use this as a demonstrator in classes to prove the concept, help teach adaptability, and to show TANSTAFL, especially with power generation. A few minutes sweating and swearing for a few seconds of radio usage will impress someone with the need for a good solar setup…