
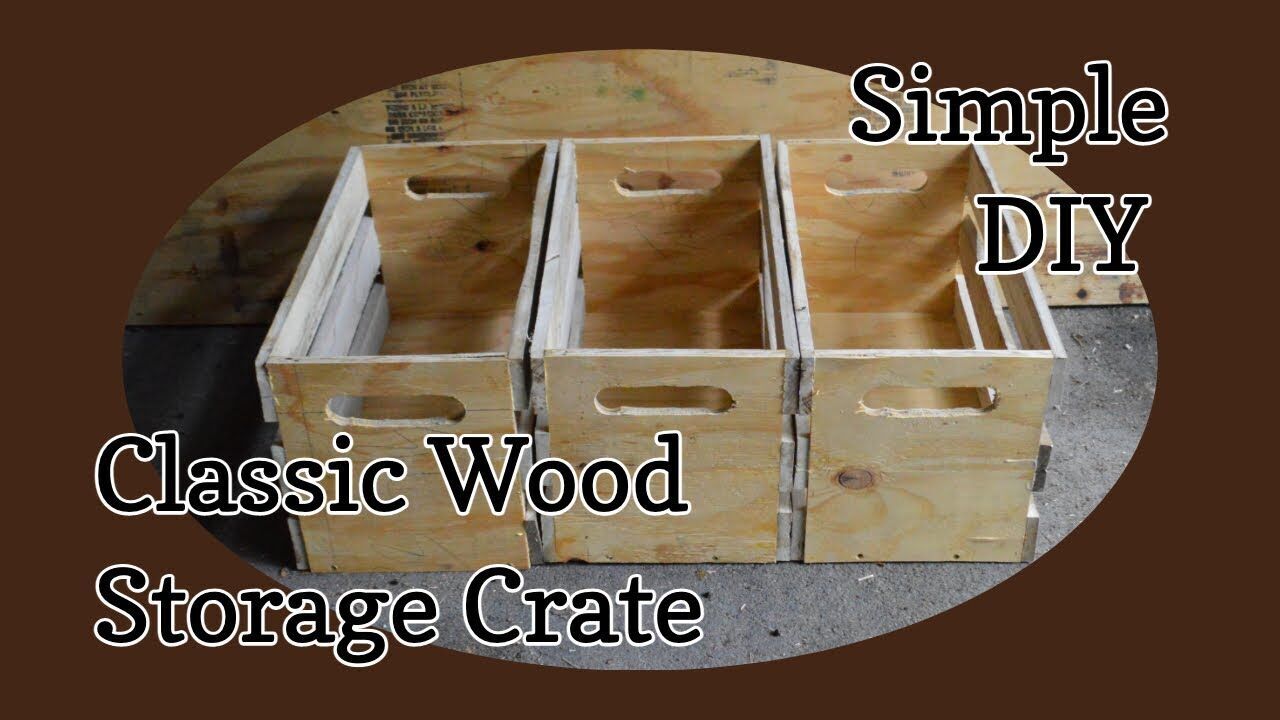

How to Build a Wood Crate – Classic Storage

This a quick article showing how to build a simple wood crate. I built these crates to fit on industrial shelving so I could sturdily organize all the materials I keep around for projects. These DIY wood storage crates have survived a couple moves and lots of abuse.
The side slats can from boards cut on my lumber smith sawmill, but you could use cut down dimensional lumber. Actually one of my thoughts for an upcoming project is to make mason jar storage crates from slats cut from 2×6 boards. However I need to get some fencing and water lines installed on the farm before I get into nice to have projects.
Anyway, back to the wood storage boxes.
Mu shelves are 2 ft deep and 4 feet wide. The idea was to build boxes with outside dimensions of 1×2 so they could slide neatly 4 to a shelf. Unfortunately, I forgot about the angles of the shelve brackets cutting into the 4 foot width, so when I was done I could only fit 3 boxes per shelf without having to slide and finagle the boxes into place.
Besides the slats from lumber I cut, I also used 9/32 inch plywood. I wanted a very sturdy box, so i even splurged for the higher grade wood.
Making the Wood Crate
To make cutting simple mark and cut one foot strips out of the plywood. This will yield 8 1×4 foot slices.
If you want to make a true 1×1 foot front you will to make the slices less than a full foot wide. to account for the width of the slats.. My side slats were 5/8 thick so I needed to cut my boards 1 1/4 inches short.
You want to take the first 4 of those 4 feet x 10 3/4 inch boards and cut them into fourths. Thereby making 16, 1 foot tall by 10/34 wide end pieces.
Next take the last four of your 4 feet x 10 3/4 inch boards 4 feet x 10 3/4 inch boards and cut them half making 8, 1×2 foot boards. Once again, if you want true 1×1 faces you will need to allow for the width of the plywood and cut the bases 1 foot by 23 & 9/16 inches long.
After making my cuts, I took the ends and made handholds. Decide how big you want to make them and use a hole saw to cut two holes parallel to each other at the width you want your handholds. Connect the two hole by cutting the wood between the holes with a jigsaw. This makes a rectangular shape with rounded ends.
Finally, finish construction of your wood crate by glueing and screwing the fonts and backs to the bases.
I screwed the fronts and backs to the ends of the base so I had a screw to help keep the bottoms from falling out.
Once I have 4 boxes with bases and ends I went back and glued and screwed the side slats.
Marking, Use and End Thoughts on my Wood Crates

To finish I stenciled identification letters and numbers to the fronts. They are colored by the proper shelving unit, numbered 1-4 by you actual shelf and then lettered in order. My plan was to keep a log of what was in the particular wood storage crate referenced by the code, but in the end I bought some bar code stickers on Amazon that link to a phone ap that allows me to search what is inside the boxes as well as show pictures. At the bottom of this article I will add a video on my Conex box workshop that shows the the tote scan stickers.
One of my other ideas was to pain a block of chalkboard paint under my stenciled code. This allows me to temporarily write what was in the box. Unfortunately the fronts were too rough to properly work with the chalkboard paint. So what I learned to do was to write on a strip of blue painters tape that removes easily without residue.
As you can see in my shipping container video, it makes it easy when sorting large amounts of stuff into categories. I have boxes labeled things like “plumbing”,”beekeeping”,”Gun Reloading”. This makes it easy for the boy and I to quickly run through random boxes sorting items.
I ended up not keeping the wooden storage crates in the shipping container. Instead I moved the shelving units and the wood crates under my carport and I use them to keep outdoor items in. Inside the air conditioned conex I use plastic crates for items that are more fragile.
I love my crates, they work well, but if I ever needed to build more I would not use slats. Instead of slats, I would use solid sides. This is because smaller items can roll out between the slats, and I would probably make them slightly shorter.