You might not have the ability to drive to the local market to get the things you want.
This is when the survival hacks come into play. Yes, the things which you have with you can be utilized effectively.
We are creating the list of amazing survival hacks to let you know.
Here are 5 Outdoor Survival Hacks Using Everyday Items
Crayons To Candles
 What You Will Need To Make
If you have old, broken crayons, then making candles using it can be a good option for you. Since there are some differences between crayon wax and candle wax; you would have to use usual wax in the mixture.
This will make the candles burn brightly as well as for a long time. Hence, the things you need to make candles are:
- Old, broken crayons
- Candle wax
- Wicks.
Step-by-Step Instructions:
Step 1
 After selecting the crayons, you would have to remove the wraps of crayons. For this, you would need a bowl having water and ice in it. After that, the crayons have to be put in the cold water and leave it for five minutes. Likewise, the wrapper can be removed.
Step 2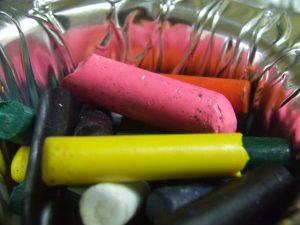
After taking off the wrappers from the crayons, it is the time to start the melting process. The desired colored crayons would have to be kept in a container and then leave it in the microwave for 2 minutes till it becomes smooth.
Step 3
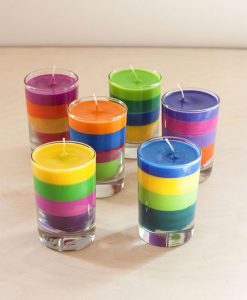
 It is the time to mold the melted crayon for preparing your candles. You can pour this mixture into a metal cutter of cookie, a mini cup of baking or any container according to your wish and leave it for 5 minutes.
However, it is important to note that you would need to spray non-sticky spray on the bottle prior to pouring.
Step 4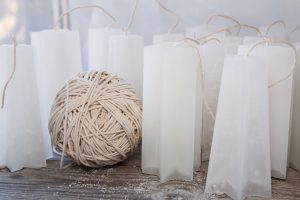
Selecting the size of wick forms a significant part in candle making. There is probably no particular formula for it, but there are guidelines. The size of the wick must match with the size of the candle.
It might otherwise create particular problems like shorter wicks will leave unburned wax while longer wicks will produce much smoke and make the wax to overflow from the container.
Wick size might be a difficult part of the process, but by applying general knowledge, things can become easier.
Step 5
 After you complete selecting the ideal wick, you would now have to insert it in the candle. A toothpick or pointed end of a crayon can be a good option if you want to make a hole in the half made candle.
You would now have to put the wick inside and compress the wax with fingers. After inserting the required amount, the extra wick that remains would have to be cut off. And your candle finally gets ready after it is taken out from the mold.
Turn a Can into a Lamp
What You Will Need To Make
Soda can eventually turn into a valuable thing after it has been used. If you want to make a lamp quickly and easily, soda cans could be a good option for it. There might be many soda cans in your house that are empty.
Hence, you just need to utilize them instead of throwing away. It’s just a matter of skill and creativity that would help you to make out everything. However, for turning a can into a lamp, you would need
- A knife
- A soda can to shape it out.
Step-by-Step Instructions:
Step 1
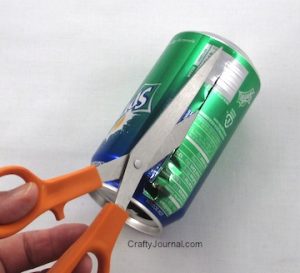 The first thing that you would have to do is hold the can and cut a small ‘window’ on it with the help of the knife. However, you should be very careful while using the knife as lack of attention might result in injury.
Step 2
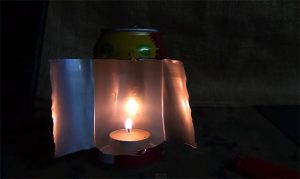 After cutting the window in the can, you would have to open up the section and clean inside. Now, you just have to put the tea candle inside the can through the window. And this makes your can ready as the lighted lamp.
Make Fish Hooks Out of Can Tabs
What Will You Need To Make
Soda can will be a good material if you want to make fish hooks in the simplest ways. It could be a good way to reuse the cans rather than throwing them away. Things that you would probably need to make fish hooks are
- A soda can tab
- Pocket blade
- Scissors
- Paracord
- Multipurpose tool
- Lighter
- Diagonal cut pliers.
Step-by-Step Instructions:
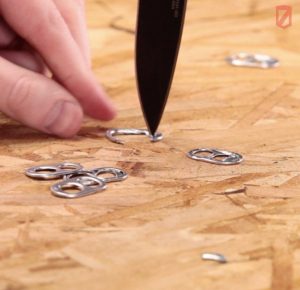
Step 1
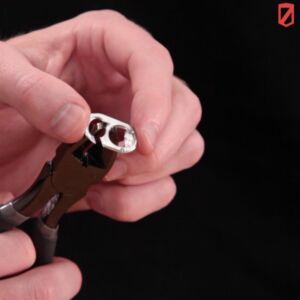 The first thing you would do is cutting the tab of the soda can. To start with, cut an aperture in the tab’s bottom hole. You need to make sure that you are cutting in a slanted way and after that begin to cut away the metal around the hook as much as possible. Now you need to turn the hook into a keen point by filing it.
Step 2
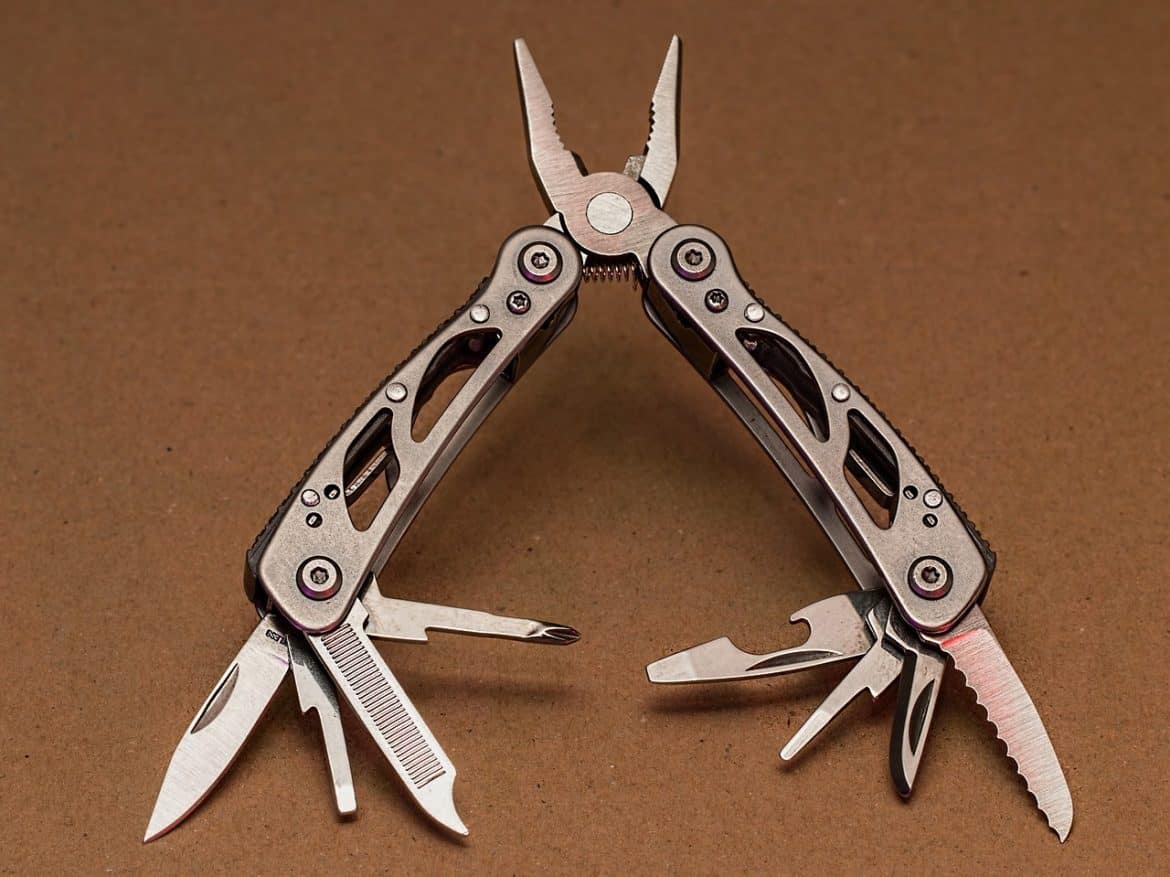
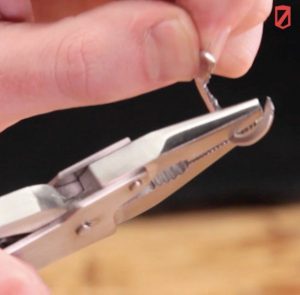 The next step in making fish hook is filing the hook. If you have to file the keen edges of the hook, the multipurpose tool would be a good option to use. A multipurpose tool can be said as a versatile utensil that can be used for various purposes.
It can be kept anywhere in the house like in kitchen drawers, shelves and can also be carried in a purse, pocket or tool box.
Step 3
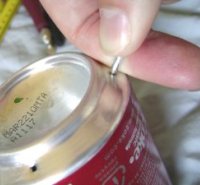
 It is the time to make an aperture for fishing lines. To make this small hole, the pocket blade could be a good one to employ.
Using the pocket blade, you would have to enlarge the small aperture at the hook’s top. This would be the place where you will be tying the line of fishing.
Step 4
After making the hole for tying fishing line, you would now have to cut the paracord.
You would have to take a paracord that is 4 to 6 inches approximately in length and then cut a piece out of it.
Step 5
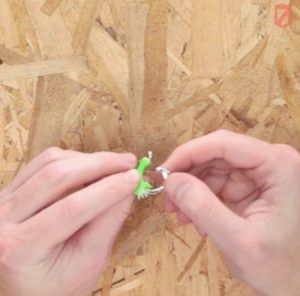 Now you have to insert the hook in the paracord piece.
The end of the hook has to be sufficiently sharp to make the insertion easy.
If any extra part of the cord remains after insertion, you would have to cut it off.
Step 6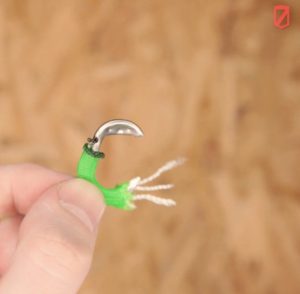
Your fish hook is almost ready now.
You would just have to light the paracord’s top end while leaving the bottom part unraveled.
You are now ready to keep the hook in your tackle box and go out for a lovely fishing day.
Make A Mini Stove Out of Soda Cans
What Will You Need To Make
The things which you need to make a mini stove are already there in your house.
- Two soda cans minimum
- Measuring tape
- Scratch awl or any sharp thing
- Knife
- Scissors
- Sharpie
- High-temperature tape-like metal tape, foil tape, aluminum tape or those which will not burn.
Step-by-Step Instructions:
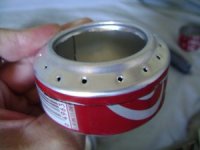
Step 1
The first step involves creating of burner holes.
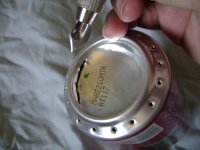
 Using a scratch awl, you would have to make holes on a can’s bottom edge. It is said that small holes are fuel coherent while big holes can burn fast and hot. You can do whichever you like.
However, numbers of the hole aren’t so important. You can make holes in the can as much as it is possible.
Step 2
 Now it is the time to make the main opening. For making it, you would have to cut the bottom from where the holes were made in the can. You would need a strong instrument to cut it as the can is thicker here.
An x-acto knife with a sturdy blade might be a good option if you want to do this. If in case the edges turned to be a jagged bit, you would have to file it then.
Step 3
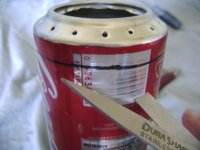 The third phase involves cutting down the top of the stove. By measuring 20mm from the can’s bottom, you would have to cut it to make the top part of the stove. Keeping a regular Sharpie on the table, you have to turn around the can against it.
If you want to get a clear cut, you would have to do a rough cut at first to separate the end and then a final cut through the mark directly.
Step 4
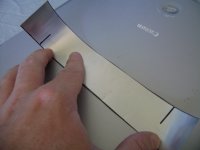
 To make tabs, you would have to cut the stove top’s edges for many times. The resulted small tabs will ensure that the top will fit in the bottom of the stove correctly. You can make the number of spaced cut around evenly according to your wish or requirement.
Step 5
 Now, you would have to take another can to cut its bottom. By measuring 25mm from the can’s bottom, you have to cut it. You can make the stove tall or short by adjusting the given measurement.
However, it would be better to make 25 mm standard for the first stove.
Step 6
 It is the time to make the inner walls. The leftover remains of the earlier cans would be utilized for making it. However, if these remains are not in the usable state, then you might require a third can.
For making the inner wall, you would have to cut a strip of 35 mm wide. This measurement will vary according to your stove height.
Step 7
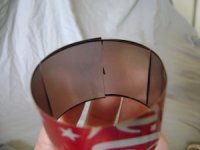 To fix the inner wall in the bottom of the stove, you would have to cut a halfway along the strip on both the ends to make them fasten together. The strip ends would have to be inside while locking.
Now you have to crop the inner wall by cutting small notches three in a number, of equal distance on the strip’s one side. It will make the fuel flow from inner wall to outer.
Step 8
 All the three parts now have to be put together. You can begin with setting the inner wall with the down notched ends, then fitting the stove top and inserting the preceding cut tabs at the bottom. All these things will eventually get fixed as a puzzle.
Make A Paracord Survival Bracelet
What Will You Need To Make
For making a paracord survival bracelet, you would need:
- Paracord of about 10 feet,
- Lighter
- Measuring tape or ruler,
- Scissors
- Side release buckle.
Step-by-Step Instructions:
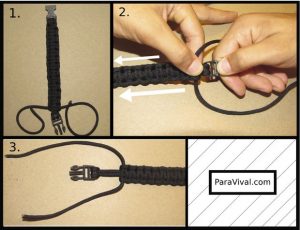
Step 1
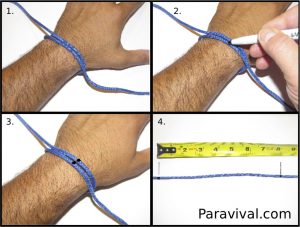 You would have first to measure your wrist by wrapping a nice rope or string around it. Using a marker, create a line of the string. Next, you would have to cut and melt the ends. With the help of a lighter, you have to burn the cord evenly.
Step 2
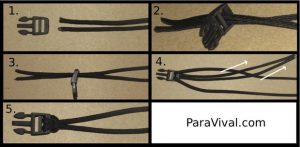 You would have to now fold the paracord of 10ft to work together on both ends. The cord threads have to be inserted through the lower opening of the side release buckle. Now you have to pull the cord’s loose ends along the loop that has been formed on the other side till it forms a tight knot.
Step 3
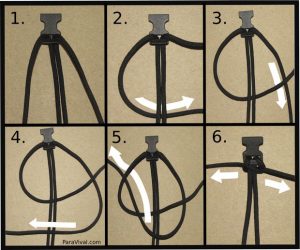 In this step, you would have to take the left cord to thread it beneath the cord of the bracelet and then take the right one to thread under the left one.
Then it comes to the turn of the right cord to thread under the bracelet cord, and this will continue along the loop formed with the left cord. The second braid will also continue to be built in the just the same way starting with the right one.
Step 4
 The above process will continue till it reaches the bottom of the buckle. Now, the male buckle has to be pulled towards the female buckle for more limp.
After that, taking the loose cords, you would have to insert them in the male buckle’s slit. Likewise, when the final diagonal buckle is reached, you would have to pull the loose cords from the loop that was formed after loosening the braid.
Step 5
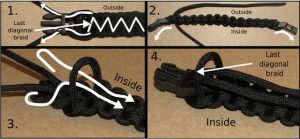 After tightening up the end, the cords’ ends have to be melted to prevent from wearing away. You need to squeeze the melted ends to make them flat. And with this, your paracord survival bracelet will finally form.
Conclusion
Survival hacks can help you to deal every instance of your life comfortably and happily. It’s all about how much creative you can be while utilizing the household or discarded materials in an innovative way. I hope these survival hacks will help you a lot in managing your life more easily and quickly.