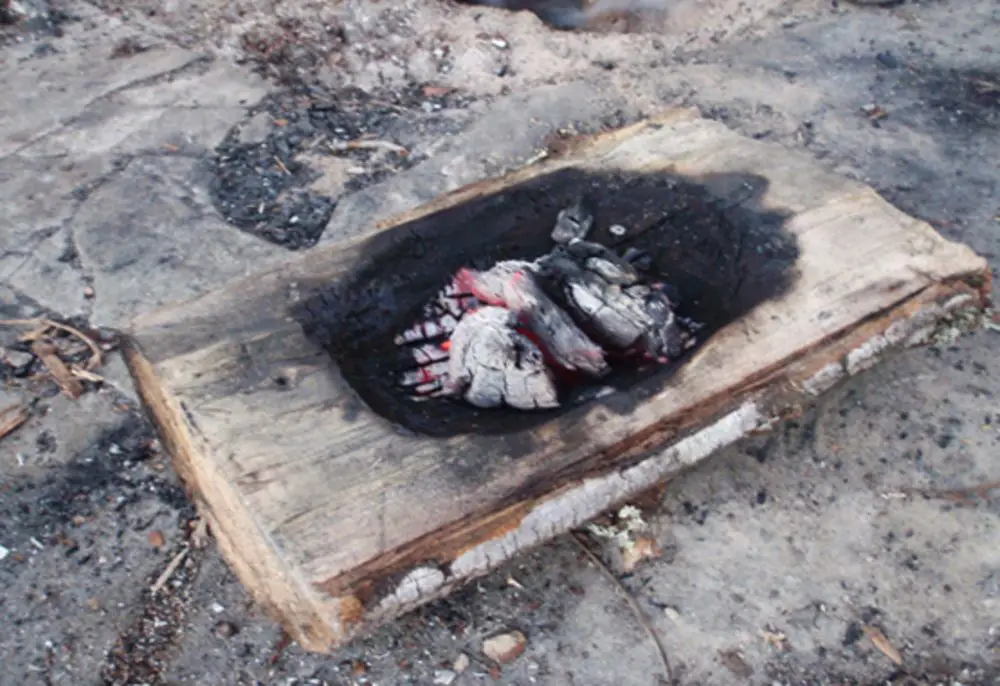
One of my more vivid childhood memories is sitting around a campfire with my dad as I made a burned bowl using coals.
This a fun way to make a useful item. Additionally, this technique has been used by natives to build much larger items. Things as large a log canoes were built this way.
I mention in my spoon carving post, that you can also use this to make the bowl of a spoon.
It is very simple to do, and doesn’t take much time. However, as with any fire project, you need to take care not get burned. You should ensure you have some means to extinguish fire close at hand.
Material:
- Small or medium sized piece of solid wood.
- Campfire
- Boiled linseed oil or vegetable oil
Tools:
- Metal tongs, or a green limb trimmed in the middle and bent into tongs
- Metal spoon, sharp rock or other scraper
- Fire extinguisher, water hose, or bucket of sand.
- Knife
- Straw (Optional)
- Sandpaper
- Rag
Procedure:
- Light a campfire and let it burn to coals.
- If you don’t have a set of metal tongs, make one, Find a straight length of green branch about 2 feet long and as big a round as an adult thumb. Make sure this is from a non-poisonous hardwood tree like oak.
- Next, trim off any small side branches. Carefully scrap down a few inches of the branch in the center of the limb. Scraping down a little past halfway through the green branch. You should be able to bend it without breaking.
- Finally, trim the ends to make a semi flat end to enable you to use the bent branch as tongs to pick up small rocks. Don’t cut too much or the hot coals may burn through.
- Once the fire is burned to hot coals, use tongs to pick up a couple coals and place them on the center of the wood.
- Then. blow gently on the coal where it meets the wood. A straw may help direct the air. The idea is to carefully burn small areas of the wood in a controlled area.
- Once the wood chars a little, dump out the coal and scrape out the charred area.
- By strategic use of the coals, air, and scraping, a depression can be burned out of the log.
- Once the log is burned deep enough to make a bowl that satisfies, scrape it out completely.
- Next, sand it until you are happy with both the inner bowl and outer wood.
- Once sanded, pour oil onto the bowl and rub it in with the rag*. It may take several coats and a couple days. Eventually the oil will soak in and harden and make a very pretty and useful bowl.
*Oils and natural rag fibers can become hazardous. As the oil oxidizes in the rag it will make heat. Many shops have burned when the heat ignites the rag. I always burn my rags after using them with oil.
Lessons Learned:
This project teaches the confidence of mastering fire. It shows that with knowledge and care dangerous things can be mastered and turned into tools.
It is also a primal outlet for creativity and artistry. These bowls are useful, but they can be beautiful and valuable works of art.
It also can be used to grow appreciation for modern items like plastic bowls.
