


This is a fun “camping” recipe that kids of vast range of ages can make themselves with little adult supervision.
While being a easy favorite for kids, cooking with a pie iron is infinitely adaptable you can use it with eggs and sausage to make a breakfast meal, eat it for lunch or dinner, use pizza dough, biscuit dough, or sliced bread – or even use apples and sugar to make it a dessert.
As with many of my projects, once you learn the technique you can take it and make it your own special recipe.
Material:
- 2 pieces of bread per pizza
- Butter
- Pizza Sauce
- Shredded Cheese
- Dried Italian Seasoning (Oregano)
- Garlic Salt
- Topping
- pepperoni, pre-cooked sausage, hamburger, whatever you want – or just make a cheese pizza
Tools:
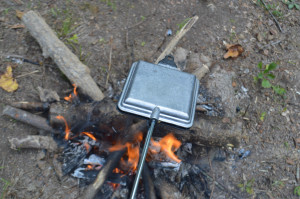
- Pie iron
- Unless it’s just for one or two people, one pie iron is never enough.
- Campfire gloves
- Knife
- Spatula
Procedure:
- Heavily butter one side of each piece of bread
- For biscuit dough and pizza crust dough – heavily butter the pie iron instead.
- Pull biscuit dough until it is flattened out to fit the inside of the pie iron – use 1 biscuit for each side
- For pizza crust: butter the pie iron, lay the dough inside one half of the pie iron, with an equal portion hanging over, then fold the back over the toppings before closing pie iron
- Generously spread pizza sauce on one side of bread/biscuit/dough – to suit your taste.
- Add shredded cheese, and toppings if used.
- Spread pizza sauce on the other piece of bread/biscuit, or flap of pizza crust.
- Season with oregano and garlic salt, then close pie iron.
- For pizza crust – fold flap in, over cheese and toppings first.
- Trim off any excess ingredients sticking out of the closed iron.
- Cook over medium coals, or low campfire flame.
- For bread pizza: after three minutes, rotate pie iron and cook for four more minutes.
- For biscuit and pizza dough: rotate after four minutes, and cook for five more minutes
- These are only approximate times. Use your own judgment and keep in mind that pie irons can be closed and re-cooked if you want more them more well-done, but you cannot “un burn” pizza.
- Open pie irons and use a spatula to remove pizza.
CAUTION! Pie irons will be very hot. AND, the insides of the just-cooked pizza will be very hot! Do not let young kids try to handle them until they have time to cool – which should only be a few minutes.


