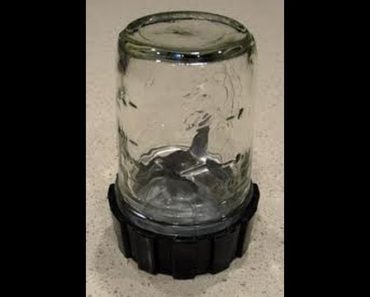
This Mason Jar Blender Tip is a simple trick that can make your kitchen life easier. It seems like many/most blender manufacturers designed the threads of their blender jars to match the threads of canning jars.
This means that in many cases (especially with older blenders) you can make a Mason Jar Blender.
Simply can screw the blade into your mason jar and blend your items in the jar. This makes it easy to measure things since many mason jars have cup markings molded into the glass.
If is also great to blend small amounts of things without having to clean the large blender jar.
Personally, I use it to make rubs and spice mixes. Just take your dehydrated vegetables/spices/herbs and blend together to make all sorts of seasoned salt mixes.
It is also a easy way to make single serve smoothies if your into that sort of thing. I use this all the time to make butter and creams. It works great. It also is much easier to clean than a full size blender.
This is one of my favorite tips so far. I how this mason jar blender tip is as useful to you as it is to me.
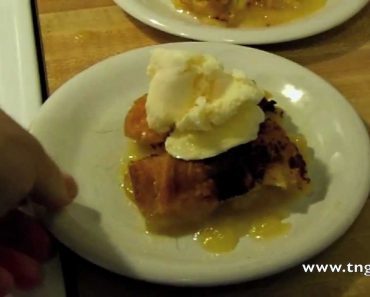
Today I have another recipe that I think is a cool way to use common ingredients. Once again this is not a “prepper” recipe (and it’s probably the last of such for a while), but when I was shown it, I just had to share it. It is just that good… This Mountain Dew Apple Dumplings recipe is exceeding simple, and tasty, and I think it is a great beginner recipe for teaching kids how to cook.
Ingredients:
2 cans crescent rolls
3 -4 tart apples
1 ½ cups sugar
½ cup butter
1 teaspoon cinnamon
1 (12 ounce) can Mountain Dew soda (or generic)
Procedure:
Grease, oil or spray a 13×9 baking dish or pan.
Preheat oven to 350
Peel and slice apples. I use one of those round cutters that core and slice in one shot. You will need at least one slice per crescent roll (I sometimes use two apple slices if they are particularly small)
Roll each apple slice in a section of crescent roll.
Place rolled slices in pan, put extras alongside. You want them all to fit nicely together without cramming them together, but still close enough for them to rise into one tasty mass.
Melt butter, add sugar and cinnamon, stir until the sugar is liquefied, and pour over apples.
Pour can of Mountain Dew over all.
Bake at 350 degrees for 45 minutes.
Enjoy with vanilla ice cream – tastes just like apple pie…
*These are now award winning apple dumplings, as I cooked them on my grill and entered them into the 2017 inaugural TDOC BBQ contest and won third place in the cook’s choice category – a cheese stuffed tenderloin and a strawberry cobbler beat me.
I did have to be very careful about temperature control and I wrapped the foil pan very tightly in foil as to not get it too smokey – but I was awesome after eating a bunch of savory BBQ.
All prep and no play makes Dave a dull boy, this is not a prep article really, but every once in a while I like a neat new recipe – because if I ever have to live off of my stored food without the ability to augment with a whopper or stuffed crust pizza I am going to want several extra options of cooking beans, rice, and potatoes so I don’t get “food boredom”
This recipe for Bacon wrapped twice baked potatoes is normally made for company, its really easy, pretty cheap, and tastes awesome. Unfortunately, I normally make an entire tray full at a time because at my house we don’t leave the range with a half shot box of ammo, nor do we only cook a half package of bacon. Since it tastes so good, and I make so much of it when I do make it, I reserve it for times when I have a lot of folks to eat it.
Ingredients:
Potatoes
Bacon
Cheese
Anything else you put in mashed taters – sour cream, mayo, salt whatever…
Round toothpicks soaked in water for at least and hour
Procedure
Preheat oven to 375
Wash and peel half as many medium to large potatoes as you have bacon slices.
Cut a slice off of the top and bottom of each potato so that it can stand up. Reserve ends for mashed potatoes.
Cut each potato in half.
Wrap each potato half in bacon – use wet toothpicks to hold bacon to potato. (Using 4 toothpicks per potato holds the bacon really well).
Lightly oil cookie sheet and place small end of potato down (this makes it easier to scoop later).
Bake 30-45 minutes or until tender.
While baking wrapped potatoes, boil potato ends until soft.
Open oven and remove tray.
Gently scoop potato centers out to make a bowl.
Mix baked centers with boiled potato ends and make mashed potatoes. I like to add some cheese to the mix, but however you make mashed potatoes is fine.
Scoop (or pipe if you’re a gourmand) mix into potato bowl.
Top with shredded cheese.
Place back in oven and bake 10-15 minutes or until cheese is melted to desired doneness.
As I said in the video, this is not a “prepper” recipe per se, but I imagine if you ever had to live off your food storage you would want to change up every now and then. I found this idea in an email and it took me a lot of trial and error to get it to work, but in the end it was a nice change of pace.
The idea is to take cookie dough and place it on an upside down muffin tin so that as the dough spreads it will cover the tin and harden to make Cookie Bowls. This is great for stuffing with fruit ice cream or pudding. Sounds simple right?
In reality, it took me several tries. Do not put dough on every spot as the dough on the ends will slide off (which if you don’t have a cookie sheet underneath will catch your oven on fire). Keep the cookie dough separated by at least one muffin “hole” or it will spread out and mix into one large bumpy cookie.
Smaller is better, and you need to grease the tin as well as flatten the cookie dough on the tin to start the drooping process in a more controlled manner.
In the end, the few that turned out “right” looked really good, and tasted great with a little ice cream and chocolate sauce, but this is a project I probably will never attempt again because (to me) it was not worth the effort for the result.
At the best of times, survival situations are highly daunting and require a level of mental and physical alertness that is destroyed by alcohol. But what if your situation is not so dire? Your supplies are well stocked for months and you are not going to be in any danger for the foreseeable future, then it might be time for a bit of a drink.
If the local stores have ran out of stock, you are just going to have to rely on yourself to make your own alcoholic beverages. A good supply of alcohol is not just good for personal consumption. You could also be used to barter for items that you don’t have.
Did you know that you can make wine out of almost any plant? It requires no special ingredients and the only thing that you might need is some sugar, yeast, acid and whatever you are going to make your wine out of.
The most common garden item that most wine makers choose to use, is the humble dandelion. You could make your brew out of any thing else that you have lying around like tomatoes or other vegetables. However, dandelions are abundant and don’t really have any other great uses. Except for the leaves which are edible.
All the equipment that you need, is a sealed container to ferment your wine , an airlock to let air out of the sealed container but not let air in, and some bottles or jars to store and age the finished product in.
Making wine is an easy process and anyone can do it if they have the slightest bit of knowledge on the subject.
How to make dandelion wine
Ingredients:
Quart of yellow dandelion flowers. Rinse them thoroughly
8 cups of sugar
Gallon of boiling water
Lemon slice
Orange, sliced
Packet of yeast. If you do not have yeast, then you are not going to want to completely seal the container that the wine is fermenting in so airborne yeast can get in.
Procedure:
You are going to want to place your well rinsed dandelion flowers into boiling water and boil them for 5 minutes. Then remove the blossoms, discard them and let the water cool to about 90 degrees F.
Make sure that your sealed container is sterile before you add any thing to it. You can easily sterilize your fermenting container with boiling water but make sure that you are thorough about it because any bacteria left in there is going to destroy your wine.
Put the dandelion juice that you have created into your seal-able fermenting container. Then add the rest of the ingredients and stir them in thoroughly.
Attach the air lock, which can be made out of tubes and pill cases, similar to a water bong. Then let your wine ferment for about 13 days. The best way to tell when fermentation has stopped is when bubbles stop forming inside the airlock.
Siphon your dandelion wine off of the sediment in the fermentation container and seal it in preserving jars and let it age for about a week.
Wait a week and enjoy your dandelion survival wine.
That is how easy it is to make your own wine out of whatever you can find lying about. If your wine does not taste right or tastes like vinegar it is probably because there was too much bacteria in the wine which killed the yeast, ate the sugars and excreted acetic acid. This is easily solved but not everyone has packets of yeast in their bug out bag.