It is estimated that your water heater accounts 18 percent of your energy bill. You can save money on your energy bill by making your water heater more energy efficient. There are many things that you can do to make your water heater more efficient.
Lower the Temperature
Most water heaters are pre-set to 120 degrees Fahrenheit. You will be able to save 3 to 5 percent on your energy bill by reducing the temperature on your water heater by 10 degrees. You can also reduce the risk of scalding by lowering the water temperature.
Insulate Your Water Heater
If your water heater is not insulated, then it could be using a lot of heat. You can reduce heat loss by 25 to 45 percent if you insulate your water heater. This can also lower the cost of your heating by 4 to 9 percent.
Drain the Sediment from the Tank
Sediment has a tendency to build up in your water heater over time. Most water heater manufacturers recommend that you drain your water heater once every six months. Sediment forces your water heater to work harder. This will not only increase your electric bill, but it will also shorten the lifespan of your water heater.
It only takes 15 minutes to drain your water heater. Even though manufacturers recommend that you do this every six months, you may have to do this every three months.
Insulate Your Pipes
Insulating your pipes will make your water heater more energy efficient. The insulation can increase the temperature of your water heater by 2 to 4 degrees Fahrenheit. If you insulate your pipes, then you can reduce the temperature of your water heater.
Update Your Water Heater
It may be time for you to get a new water heater. Replacing your water heater can be costly. However, you will be able to save a lot of money in the long run. Not only do new water heaters use less energy, but they also last longer. Work with a plumber like Moon Valley Plumbing or someone similar to help you get an updated water heater installed.
Making your water heater more efficient can help you reduce your energy bill. You can lower the temperature on the water heater, insulate the water and drain the sediment. You will also need to insulate your pipes. Additionally, if your water heater is inefficient, then it may be time for you to replace it with a new one.
Plumbing emergencies are among the most expensive sources of headaches that homeowners have to deal with. Too many homeowners have discovered, first hand, what it’s like to fork out thousands of dollars to repair the damages caused by these disasters. And in many cases, prevention could have played a huge role. Here are a few helpful tips to avoid and address the most common plumbing issues.
1. Sewer System Backup
A backed-up sewer system is one of the most regular plumbing issues to deal with and is never pleasant to be around. Sewage backups are almost always related to the ejector pump or sump pump, thus making the correct diagnosis for ejector pumps is key.
Some are lucky enough to learn of a malfunctioning pump early on when alarms are sounded for a variety of issues. This is the most desired method of finding out, as issues are easier to fix when you catch them in their early stages. Not to mention the fact that you don’t have to deal with the intrusive scent of sewage lingering in your home.
The Fix
• Test for a bad “float” switch. Switches can easily be replaced for about $20.
• If an alarm stops after halting water usage, you may be using more water than your pump can manage. Try cutting back on the amount of water you use.
• Sewage odors in the bathroom may be a result of a clogged dry trap in the shower drain. Try pouring a few gallons of water down the drain to easily resolve the issue.
2. Burst Pipes
Issues with burst pipes can range from tiny pinhole leaks to completely broken pipes that cause severe water damage and flooding. The latter will have to be addressed by a plumber, but if you have a minor issue you may be able to resolve or temporarily fix the issue yourself.
The Fix
• For a temporary fix to a small leak, use duct tape.
• Another temporary fix for minor leaks is to use a C-Clamp.
• Use a sleeve clamp for a longer lasting fix that can be used for larger leaks.
3. Frozen Pipes
Frozen pipes can easily turn into costly burst pipes if you don’t catch them early enough and handle them appropriately. However, this is an emergency that can be avoided by following the proper steps to ensure that those frozen pipes don’t burst.
Better yet, there are a few recommendations on what you can do to cut back on the likelihood that you will ever have to deal with your pipes freezing over in the first place.
Preventing Frozen Pipes
• Insulate any pipes that are easily accessible.
• Keep cold winter air out by filling any cracks or holes with either caulk and/or insulation.
• Place insulating covers over all of the hose bibs. Be sure to disconnect the hose bibs first.
• Leave all faucets dripping during the time your area experiences freezing temperatures.
• If you will be traveling out of town, turn off the water supply.
The Fix
To check for frozen pipes, you should turn on the cold water, then hot water, at each water source. You want to ensure that the water flow has not been reduced. If the water flow is minimal, or absent altogether, here’s how you can remedy the situation:
• Leave the faucet turned on.
• Find out where the blockage is coming from. This is typically found in the area of most exposure.
• Heat the supply line with a blow dryer until the flow of water has returned to normal.
4. Washing Machine Failures
Washing machine issues are a common reason for extensive water damage and flooding. In fact, this type of an issue regularly results in damages exceeding $5,000. Most of these disastrous situations can be linked back to supply hose failure.
Preventing Washer Mishaps
• Be sure to avoid pinching the supply hose during moves or installation.
• Replace the hose after five years of use.
• Ensure that the drainage pipe is lined up right and free of clogs.
• Avoid overloading the washing machine as it causes shaking that can make parts come loose.
• If you do notice trouble, shut off the intake valve immediately.
Another protective measure that can be taken is to be choosy when purchasing a new washing machine. It is recommended investing in brand new, top-load washers in order to prevent any such unfortunate incidents from happening.
5. Water Heater Issues
Water heater leaks and issues frequently cause thousands of dollars in damage because they go unnoticed for too long. In July of 2015 the Union County, Pa., Government Center experienced over $100,000 in damage due to a slow leak in their water heater. Avoid falling victim to this type of disaster by following these tips:
The Fix
• Know the life expectancy of your water heater. Don’t wait long after reaching this point to invest in a new water heater.
• Have the water heater inspected every one to two years.
• Attach a garden hose to the base valve to flush the tank out every six months.
Conclusion
Remember that when facing plumbing issues such as the ones caused by cold temperatures and unexpected technical failures, it’s best to take a step back and determine whether you can deal with these on your own or not. Sometimes it’s an absolute necessity to request professional assistance if the job that needs to be done involves more than a few resources that maybe you don’t have at that time (such as tools, for example).
Fixing these problems as soon as they appear might save you hundreds of dollars in the long run, along with the headache of having to replace your possessions
Homesteading puts us in a constant state of learning new skills, especially in the early years. One thing you’ll want to become comfortable with as soon as possible is working with concrete, because there plenty of ways we can use concrete in homesteading.
Concrete Is the Ultimate Building Material
Composed of Portland cement, crushed rock and water, concrete is both simple and highly functional. If you want a home that will:
Stand the test of time
Be easy to heat in winter and cool in the summer
Resist strong winds, even those from tornadoes or hurricanes
Be unappealing to insects, rodents and other pests
Offer a quiet retreat from noise
Be fireproof
Be recyclable in the future and can be made from recycled materials today
Allow you to have full artistic reign
… then concrete is the material for you. Concrete homes, otherwise known as ICF or insulated concrete form homes, offer all of the advantages above and more.
And the last bullet point is one we simply can’t gloss over. If you think of a concrete home and imagine a dull grey monolith to call “home,” you couldn’t be more wrong. Concrete can be colored and stamped to appear like other building materials altogether, giving the appearance of, for example, a brick or stone home. You can also embed materials like tiles and glass to give your home an eclectic look.
Aside from building your home out of this material, there are plenty of other ways to use concrete around the homestead.
Keep Burrowing Critters on the Right Side of Your Fences
Does any of this sound familiar?
A fenced garden that burrowing pests still feast on
A dog who digs his way out of the kennel on a routine basis
We build fences for a variety of reasons, and animals, domestic or otherwise, always test those barriers. Fortunately, there is a simple and permanent solution to prevent digging.
Dig a trench about 1 foot deep and just a couple inches wide as close to your current fence line as possible. Fill it with concrete, and while the mixture is still wet, place simple metal stakes in it every few feet to help you tie the fence to it, preventing any gaps between the concrete and the fence that might invite a digger to still weasel in or out.
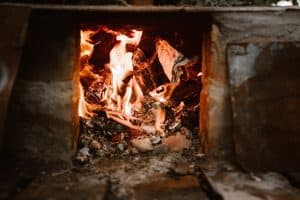
Take Advantage of Concrete’s Fireproof Properties
Virtually all homesteaders use fire to cook, heat their homes or burn debris. It’s essential to have a safe place to control a fire so that it does not get out of hand and destroy your property. Concrete is fire resistant, and thanks to its malleability, also completely customizable.
You can build:
An outdoor “pizza” oven
A firepit, either raised, flat or sunken
A rocket mass heater
A fireplace and chimney
Safe storage for flammable materials
Every Building Needs a Concrete Slab
If you need just one good reason to become a concrete pro, it’s the simple fact that virtually every building needs a durable foundation. Barns, sheds, garages … you name it, it needs a concrete slab foundation to provide a solid basis of support.
And best of all, concrete prices remain affordable, even more so if you use recycled concrete, which uses chopped concrete as the aggregate for new concrete rather than gravel. It’s easy to use, strong and cheap … the trifecta of a perfect building material.
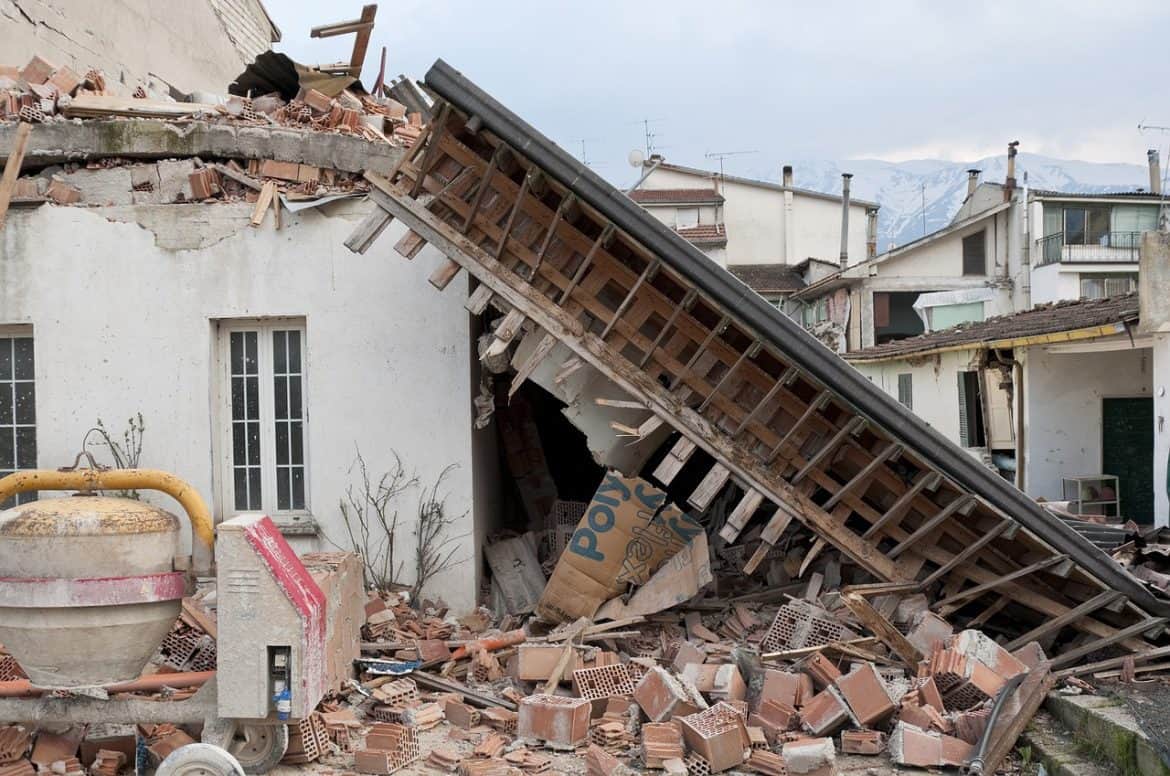
Compared to other natural disasters like hurricanes and fires, earthquakes strike without warning anywhere in the world.
There’s no telling when they’ll happen and most of the time, they bring extensive damage.
During an earthquake, your own home itself can become a danger to you and your family. How can you prepare your own home for an earthquake?
Preventing Structural Damage
The first step in quake-proofing your home is to prevent the damage where it is most likely to occur. Providing structural support to areas that are weak such as the front porch, glass doors, wooden decks, and the garage. Consulting a professional engineer is the best option in order to evaluate the structure of your home and make the necessary improvements in order to strengthen these areas. Making use of the best materials is essential in protecting your home as well. Concrete dries fast and is one of the sturdiest materials that are earthquake-resistant.
Securing Furniture
It’s common for furniture to get thrown around when a quake starts, especially if it’s a strong one. The danger of cabinets, light fixtures, and other furniture to fall down and injure you or your family is high when these things are unsecured. What you need to do here is bolting or fastening them safely in place. This ensures that they won’t fall down easily and pose any danger for people inside your home during an earthquake. Use the best available framing hammer to fasten nails on the feet of cabinets and fasten dressers to the walls to prevent them from toppling over and hurting anyone.
Placing Objects Safely
Head injury is quite an expected injury during earthquakes. This is because of heavy objects falling on people’s heads during all the shaking and this can even be serious at times. If you don’t want this to happen, be smart in storing objects in your home. To make sure safety is a priority, pack heavier things such as tin cans, bottles, and glass on the lower cabinets and cupboards as they won’t be falling from a great height. Store the lighter objects on the upper bins to prevent potential hazards. In addition, always lock your cupboards since they may jar open during a quake.
Check Your Electronics
Power outlets can also be damaged during an earthquake. Knowing how to apply and repair switch wiring can help prevent electrical hazards at home. Due to the intensity of the shaking, some wires and panels can be dislodged or worse, completely broken and exposed. This would then lead to electrical hazard or even a potential for fire, so securing your homes electronics is a priority for earthquake preparedness. Consult an electrician to secure the electrical wires in and around your house, making sure there are no live or exposed wires before a quake. Repositioning outlets that are near potential hazards like the sink or the gas would also make it a lot safer.
Having a Safe Roof
A roof made from strong materials can easily survive an earthquake. If a roof does get damaged, not only does it make repairs hard, it also poses a danger of taking the whole house with it. Using lighter materials such as aluminum or metal is a great way to reduce weight on the roof and prevent extensive damage. Applying asphalt shingles is also a good alternative because they’re lighter and more flexible than other roofing materials. If you’ve bought an already-built house, asking a contractor to replace the roof with lightweight materials can be done beforehand.
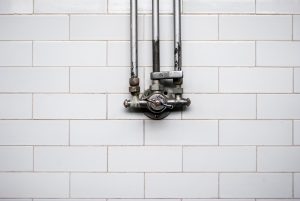
Water Heater and Gas Appliances
Getting clean water after an earthquake can be difficult if some services end up unavailable. Your water heater can easily be damaged during an earthquake if it’s not secured properly. Faster the water heater against the wall, making sure that it stands upright. Replacing the metal pipes with more a flexible material will also prevent damage during the quake. Gas-powered appliances also benefit with more elastic connections and prevent possible gas leaks.
Additional Earthquake Proofing
Taking the pre-emptive measures for earthquake-proofing your home is important. A house can become a dangerous place during a quake and ensuring the safety of your family is a must. Securing doors and packing up supplies beforehand will also help save you time when disaster does strike. Knowing what materials to use for your home will decide whether your house can survive or not.
Conclusion
We can’t really predict when and where an earthquake might hit. If you know the right things to do, then setting your home right, you can save a lot of money and time in repairs
With all the micro USB items that need charging at my house, my wife and I are always fighting over power cords. To solve this problem I found a neat outlet that contains two 115v outlets with 2 USB outlets.
It installed easily and looks great. More importantly, the outlet is behind my chair so I have dibs on the cords….
Seriously though, this is a great USB wall outlet and when I get around to building our house and a workshop, I will install many of these for the convenience.
This USB Wall Outlet was easy to install, but I needed to buy a new outlet cover.
Now that it is installed, I want to buy more, as this makes things a lot easier. I put this one by the sofa so I can charge my phones in the evening and still have them available.
I need one in the bedroom, and another by the computer. Additionally I think I need a couple in the conex box at the land.
These devices are not expensive, the one shown in the picture costs about $16.00. They are easy to install by any DIY’er. Best of all it impressed my wife as she thought it was amazing.


 Plumbing emergencies are among the most expensive sources of headaches that homeowners have to deal with. Too many homeowners have discovered, first hand, what it’s like to fork out thousands of dollars to repair the damages caused by these disasters. And in many cases, prevention could have played a huge role. Here are a few helpful tips to avoid and address the most common plumbing issues.

 Does any of this sound familiar?