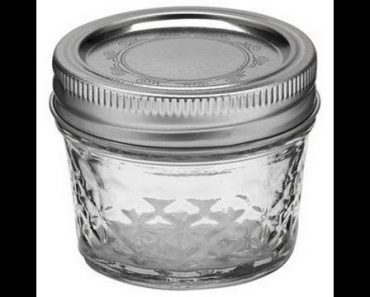
DIY Chalkboard Mason Jar Lids: Great for Storage

How to Make DIY Chalkboard Mason Jar Lids

DIY Chalkboard Mason Jar Lids: Great for Storage
Buy at Amazon

These DIY chalkboard mason jar lids are great for storage.  While it was designed for spices, it can work in the garage for nuts and bolts, or the reloading bench for small parts like shell holders.

Simply take a baby food jar (or any other size you want), and paint the lid with chalkboard paint. You can then write whatever is in the jar on the lid.

If used with spices, you can then easily store in a drawer beside the stove, rather than above the stove.

However, the heat from the stove will cause a reduced lifespan of the spices.

Like the other mason jar lid tips, your mileage may vary on how useful this is.  I used this idea for spices for about 6 months and then went back to my old ways.  It works, no doubt about it.  Unfortunately my handwriting is horrible.

Besides on the counter I did not need a lot of labeling, as I could see through the jars.  However, if you used smaller jars and put them in a drawer so you could only see the top, then this would be an awesome tip for organization.

Try it, you may find a use for it.

How to Make a Chip Clip Using a Clothes Hanger

How to Make a Chip Clip Using a Clothes Hanger


How to Make a Chip Clip Using a Clothes Hanger
Buy at Amazon

If you ever needed to know how to make a chip clip using a clothes hanger I got you.  This tip is stupidly simple.  So simple in fact that it does not need any explanation other than a quick video or a clear picture.

I added it this website because I like to constantly search for new ways to solve problems, even if the problem is a first world non-prepper problem.

The ability to break a problem down into its components and see things for what they could be and not just what they were designed to be is an essential life skill.

Skills need practice to develop.  As I have built this website and turned it into a mission my ability to MacGyver solutions has grown exponentially.  While stupid little tip videos are not the sole reason for this, they do help.  And remember if it looks stupid but it works it is not stupid.

The simple solutions from looking at things from new perspectives is the main way I solve problems.  I bought into the Einstein idea that you can’t solve problems with the same thinking that caused them.  I have learned to break things down into component parts and uses.

Besides, nobody likes soggy chips.  This DIY Chip Clip solves the soggy chip problem for ever.  Or until you stop using it.

How to Make Beeswax Cotton Food Wraps

How to Make Beeswax Cotton Food Wraps


52 Unique Techniques for Stocking Food for Prepper
Buy at Amazon

I take a lot of leftovers to work.  Normally I use plastic containers or plastic bags to carry them.  However, the convenience this gives me comes with the cost of buying the containers.  Additionally, I have concerns over BPA and other chemicals in the plastic.

While neither of these concerns alone are great enough (to me) to necessitate a change.  I am interested in learning what to do in the event I would not be able to easily buy plastic sandwich bags or cling wrap.

It did not take me very long on the internet to find beeswax cotton food wraps.  There are several commercial sites that sell the wraps.  I also found numerous websites that also showed how they made the wraps.

One is My Healthy Green Family  and alternative method (which I discuss on the video) can be found at DIY Natural.

Since I did not want to dig out the ironing board or my iron (I have an iron for projects and the wife has a clothes iron.  Having two saves on divorce lawyer expenses) I choose to use the oven method.

Equipment

  • 100% cotton cloth (about the thickness of sheets) – I imagine muslin would work but I used a quilting square cut up.
  • Beeswax -I used some from my own beehive, but you can easily find either beeswax ingots or the easier to use beeswax beads in craft stores in the candle making supplies
  • Cookie Sheet – Once you get hot wax on the sheet it will forever be useless for baking cookies on – once again I have project cooking utensils and food cooking utensils because I do NOT like being hit about the head and neck with a rolling pin…
  • Grater (if using solid beeswax ingots)

Procedure

  • Preheat oven to 170-190 – Beeswax is highly flammable and melts between 143 and 151 deg. F so don’t try to overheat it to speed up the process (unless you want to call the insurance adjuster)
  • Cut your cloth to the desired size – this is up to you – you can hem the edges or use pinking shears to make a nice edge, but I just wacked at it with an old pair of scissors and was done.
  • If using ingots, grate them using your cheese grater. If using beads you can skip this step
    Set your cloth in the cookie sheet and lightly dust with the bits of wax – you want an even coat. In the video you see both how much I used, and how stiff the finished product was. In my opinion the amount I used was perfect for wrapping food (sandwiches, vegetables, and the like) – if you plan on using it to replace cling wrap, then you may want to use more wax.
  • Less wax will let more moisture pass though, more wax make a stiffer cloth.
    Put the cookie sheet with the cotton and wax into the oven. 5 minutes will do just fine. Longer may cause problems, so if it is not all melted at 5 minutes keep a very watchful eye.  (In the video not all of my “wax” melted – some of it was junk left over from the hives – you should not have this problem using store-bought wax)
  • After you take the cloth out of the oven – immediately remove from the cookie sheet and hang to cool. It should appear darker – any light spots did not receive as much wax so be on the lookout for this.
  • Once cool you can use immediately.

If your wrap gets dirty, you can easily clean it with cold water – don’t use soap or hot water as this will impact your wax.

I hope this helps…

How to Lash a Tripod


Basic Lashing - Making a Tripod
Buy at Amazon

Today I want to talk about how to lash a tripod.

I needed something to hold up some homemade mosquito repellent trays, and all I had was trees and string so…

Lashing is a great skill to have, with some rope and a little knowledge you can make all sorts of useful things.

This is pretty simple and by making a tripod you can easily make other things.

A homesteader, bushcrafter, or prepper should really take time to learn basic lashing.

Remember, a bridge is two large tripods connected by rope.  One tripod inverted over another makes a tower.  You can make a smaller tripods to hold meat over a fire or make a small stand.

How to Lash a Tripod:

  • Start with a Clove Hitch around one pole.
  • Wrap about six racking turns (Racking is the when the rope passes between the poles over one and under the next).
    • This increases the contact between rope and wood and reduces slipping.
  • Next make two or three tight frapping turns in the two gaps.  (Frapping is wrapping around the rope between the sticks – it is 90 degrees to the racking turns).
  • Finish with a Clove Hitch.
  • Cross the two outside poles to form the tripod.


How to Modify a TDI Knife with Tek Lok


Modifying A TDI Knife with Tek Lok
Buy at Amazon

I love my Ka-Bar TDI, it is very ergonomic and designed to be used weak-handed to help defend against gun grab situations.  I modified it to make it easy to carry.  Additionally, if you need a smaller EDC knife, I have a post on how to conceal the Ka Bar LDK.

The problem with the TDI is not the knife.  It is an extremely well designed knife, with a nice Kydex sheath.  In order to keep it inexpensive something had to give.

What “gave” was the belt clip.

I am not the only person to hate the mounting system on this knife.  Ka-Bar even sells replacement mounting hardware to replace the belt clip when it invariably bends.

This post shows how I went about modifying a TDI knife with Tek Lok

The belt clip is just a thin piece of tempered steel.  If the knife ever catches on something the loop will open up.  Unfortunately, it will never bend back to hold the knife tightly again.

This problem with an otherwise fantastic knife has created a small cottage industry of custom sheathes for this knife.

However, I like the sheath that came with it so I decided to see if I could engineer a solution.

Introducing Tek Lok

Modifying A TDI Knife with Tek Lok
Buy at Amazon

I happened to have some Tek-Lok belt clips in the shop from an earlier project. It seemed like a perfect fit.  A good knife mounted to a well thought out belt clip.

Its such a good idea that I was not the only person to think of if, however, most people used the large Tek-Loks, and drilled holes through their sheaths to mount the two together.

Looking at the sheath, the mount, and the two sizes of Tek-Loks, I saw that a small one fits flush against the old belt clip.

I cut off the belt clip from the mounting bracket and used my grinder to smooth everything out.

I then used a punch to mark out the 4 mounting holes.

After drilling out the 4 holes, I mounted the tek-lok to the mounting bracket made from the old belt clip, and then mounted the bracket to the sheath.

It does stick out a little more (about 1/8 inch) than the old system, but it is MUCH more secure.

One thing I need to mention is that the small tek-lok was not designed for use on wide belts like my 5.11 rigger belt so it does not “slide on”, I have to force the belt into the tek-lok, and then clamp it shut.

While this is not that difficult, it is an extra step when getting dressed. On the other hand, this makes the knife fixed and it does not move on your belt.

I am very pleased with this project, and it is one that I use quite a bit.