Step by Step on How to Make Tenkara Fishing Rod

How to Make Tenkara Fishing Rod

How to Make Tenkara Fishing Rod
Buy at Amazon

With the tenkara being the latest trend in fly fishing, I have found many anglers longing to get to know every single detail about it.

I am lucky to have learnt about it earlier and perfected my skill, thanks to my father.

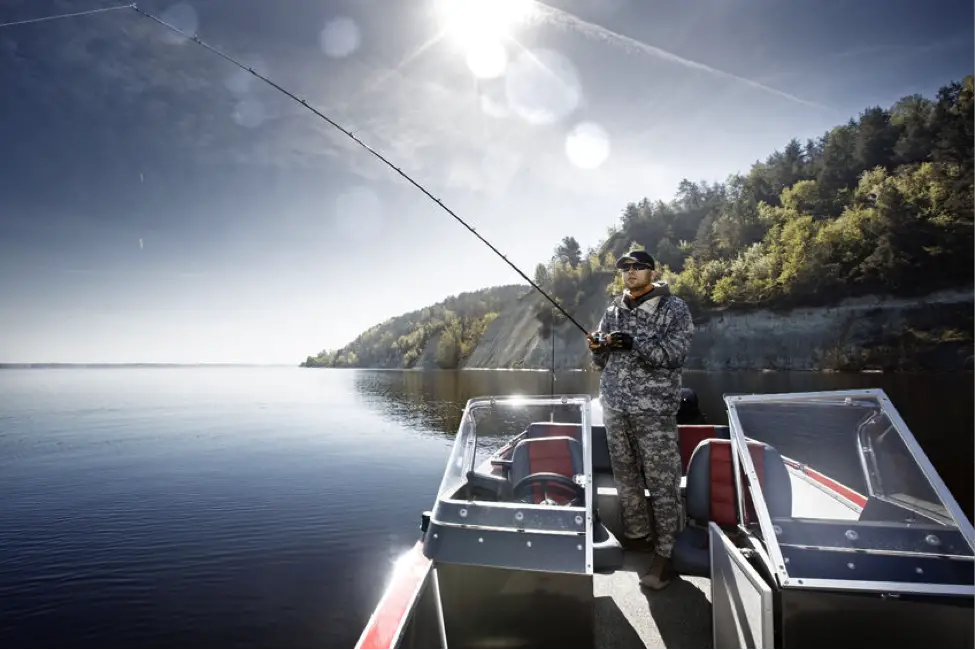
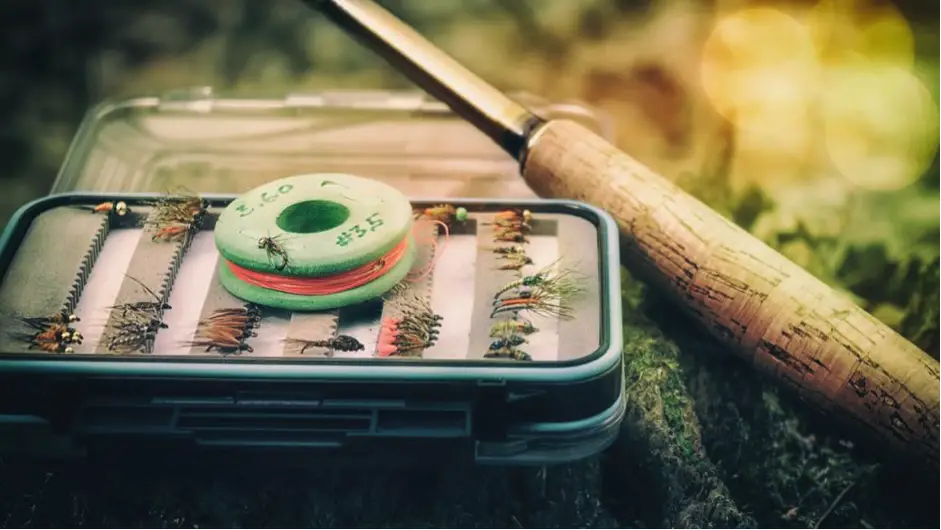
Before I proceed, I will let you know what a tenkara is. Tenkara is a trend in fly fishing, used in fresh water fishing, quite common in Japan. It involves fishing using a telescopic reel which has no reel.

The tenkara method boasts a more simplistic approach, where only a rod, a fishing line and fly, are used.

Believe me it is very easy. The biggest challenge you will encounter is that you will have to really spend a lot of money to get started, but the good news is that I have quite an appealing secret that I am willing to share with many anglers freely.

Just read on, and you will get to learn and love my secret.

How to Make a Cheaper Tenkara

Careful anglers, here is my secret. I realized that to shop for the right equipment for tenkara, I needed quite some dollars, which I truly didn’t have. My budget for fishing was way too low to give me the luxury of acquiring a tenkara. I desperately needed to find a way out, and that was when I decided to purchase a telescoping rod which could perform as a tenkara. Research came up with simpler and cheaper methods which would give me maximum results at quite a cheap price. I modified a telescoping rod which became a perfect substitute for the tenkara rod which costs about $30.

Step by step procedure on how to make a tenkara fishing rod

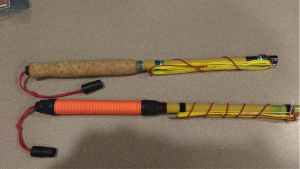
Make a wine cork grip

Materials

  • Wine corks
  • Something to make a winding check, brass grommet is preferable
  • A piece of thread used to make a winding at the front part of the grip

Procedure

  1. Determine the length of your grip by measuring the diameter of the rod at the top and bottom area where your grip will be. This will help you to determine the size of the hole you should make in the corks.
  2. You can now bore holes in the corks. To find out if you got the diameter right, fit the first bored cork on the rod before making holes on the rest.
  3. Remove the beveled ends of the corks. You can choose to sand the ends off.
  4. Stick the corks and the blanks together
  5. You can choose whether to make a winding check or not, having it decorated is also optional.

Extra steps on decorating winding’s grip with a paracord. You can follow this video:
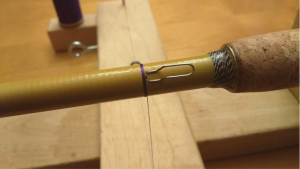
 

Add a line keeper

Step by Step on How to Make Tenkara Fishing RodMaterials

  • Stainless steel wire
  • Polyester embroidery thread. Should be of high quality
  • Epoxy
  • Pair of pliers

Procedure

  • Shape your line keepers. You can use pliers to bend the wire to the shape of your liking. Just ensure that the ends will be tapered.
  • Fix the keepers to the rod, temporarily though.
  • Wrap your keepers onto the rod. At this point, you use the high-quality embroidery thread.
  • With epoxy, cover the keepers and the rod so that they can remain permanent. This process requires a lot of practice.

At this point, you are done. You will have done quite some meaningful work at a fair price.

Butt Cap Keeper Loop or Rod Plug for Looping the Connector.

Step by Step on How to Make Tenkara Fishing Rod
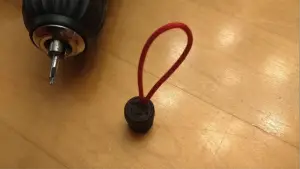
In making the keeper, simply enlarge the pre-existing hole in the butt cap and then add a hole at the center of the rod plug.

You should make sure that you drill the holes as large as required for accommodating the paracord loops having a smaller diameter.

After installing the loops, go ahead and attach the butt cap loop to the rod plug loop by simply using a loop to loop connection.


Making the Handy Carrying Case.

Procedure

  1. Use the Tenkara Rod to measure and mark the PVC before cutting it to the required length.
  2. Find a way of pressing the end cap onto the PVC by simply gluing it or pushing it hard into the PVC
  3. Gently slid the tenkara rod into the PVC before adding the top. It is advisable to mark the top so that it can be opened from the same end whenever you want to do so.

End product, the tenkara fishing rod is now ready

Via: Instructables.

Having done all this, you will have your tenkara fishing rod at a very cheap price.

It could be termed as free since you might end up not buying any of the materials.

You will also have made it suit your specifications, which means that it will eventually be quite attractive.
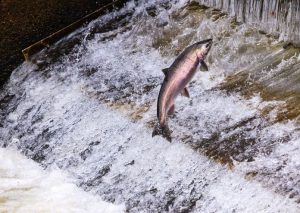
GO FISHING!!!

I hope that this article has been both enjoyable and educative. You can now make your own $10 tenkara fishing rod rather than buying the expensive one which costs approximately $30.

You will have had fun from the activity of assembling the requirements to create one quite useful fishing equipment. Enjoy your fly fishing spree.

Make any comments which you may find to be important and let me know of anything that I could have left out.

Seek clarification on anything that could be an issue to you. I will be glad to assist where I can.


6 Tips for Choosing the Best Binoculars for Outdoor Activities

6 Tips for Choosing the Best Binoculars for Outdoor Activities

6 Tips for Choosing the Best Binoculars for Outdoor Activities
Buy at Amazon


Simple as they may look, binoculars are very useful for any outdoor adventure. They are especially a must-have for hunters and bird-watchers who need to be able to see clearer and farther in the wild. Picking the perfect binoculars is not as easy as finding the shirt that fits, though. Several things have to be carefully considered to ensure that your chosen binoculars fit your needs.

If you’re on the hunt for a new pair of binoculars for your outdoor recreational activities, here are six tips to help you decide on the best binoculars to buy:

1. Select Binoculars Made Specifically for Your Usual Activities

While all binoculars may look the same, some have features that others do not. There are those that are made specifically for bird watching, hunting in the forest, spectator sports, astronomy, marine activities, or general outdoor activities. As you check your options, your main consideration must be the kind of activities you will be using the binoculars for.

2. Choose the Right Magnification

Binoculars come in different magnification ranges. The greater the magnification is, the more powerful the binoculars are—though this does not mean they are always better.

The magnification affects the field of view and stability when you are using binoculars. Low magnification of 8 or lower offers better stability and wider field of view (meaning, you can see more objects on the frame). On the other hand, with a magnification of 10 or higher, you will get a closer view, a narrow field of view, and jarring motion on the image. In most cases, it is more practical to go with low-magnification binoculars because they are easier to hold steady. But if a higher magnification type suits your needs better, you will have to use a tripod to keep yours steady while using them.

3. Examine Image Quality

You will be investing in an extremely important tool for your outdoor adventures, so you better check the image quality of the binoculars to make sure you get value for your money. Pay attention to the crispness and clarity of the image that you see as you peek through the optics.

4. Consider Your Eye Relief

A lot of binoculars have eyecups that can aid people with eyeglasses and ensure their comfort while using them. If you are wearing specs, look for binoculars that offer eye relief of 11mm or higher. Get binoculars with durable and multi-adjusted eyecups so that you can see through clearly, without any parts blocking your sight.

5. Assess the Binoculars’ Weight

Choosing the best binocularsBinoculars can be quite heavy, and the really heavy ones can wear your neck or shoulder down. The best binoculars are those you can easily carry along during those long walks, hikes, and camping adventures. Most people find it bearable to carry a 35-ounce binocular. But then again, try on your binocular choices to check they are easy and comfortable to lug around with.

6. Review Other Features and Warranties

The field of view and focus should be on your list of considerations as well. Check every single detail that makes up your prospective binoculars. Check its durability, waterproofing, and even the warranty. A lot of companies offer a great package of warranty. It is great that you know how to take care of your binoculars, but sometimes, you might need their services, too.

Conclusion

Binoculars are an important investment for any outdoor enthusiast. They make for a better hunting and bird-watching experience (or whatever activities you like) while you are on the field. Take the time to thoroughly check the choices available before you decide on the best binoculars for your needs.


Survival Fishing: How to Catch a Fish with Your Hand


Survival Fishing: How to Catch a Fish with Your Hand
Buy at Amazon

What will happen when you are near a water body and would like to catch some fish without having packed any gear? Well, there are many ways to catch fish without having any gear with you.  This article will chow how to catch a fish with your hand

If you have no gear and are not in a position to fashion an improvised fishing rod, hook, line or even a trap, then you can resort to hand fishing.

Hand fishing or otherwise referred to as noodling has been in practice for a long time now. It is not recommended, but if push comes to shove, you may have to resort to it.

In this tutorial, I will cover the steps on how to catch fish using your hands:

Pro Steps on How to Catch Fish using Your Hands

Step 1: To Wade in The Water or Not?

You can choose to wade in the water, but you will be susceptible to catching hypothermia. More so, if you opt to practice this craft at night, you will be at risk. During the day the water temperatures are warmer than at night.

If you do not want to get wet, then, you can find a spot where the water is flowing slower than the whole stream and place yourself there. Position yourself at the banks and lie in wait for the fish. Look for areas with a lot of stones lined along the coastline.

Step 2: Patience Pays

In hand fishing, you have to master patience as you lay in wait for the fish to come to you. Your hand will be radiating more heat than the surrounding of the fish. It will spook the fish as it will be a foreign object to it.

Wait for about 10 to 15 minutes for your hand to cool down and be at the same temperature as the surrounding. Once it cools down, the fish will have troubles differentiating your hand from other objects in its habitat.

Step 3: Tricking the Fish

When you resort to hand fishing, you are likely not to have any bait with you. You can either look for worms form below rocks or even use dead insects as bait. If not you can use your hand as bait.

Yes, you got that right. To use your hand as bait, you have to wiggle it like a worm and draw the fish that is likely to be hidden towards you. The motion of your finger will look like that of a worm that is struggling. The fish will move forward and take a bite on your hand.

We all know how fish relish a wounded bait. If the fish lies hidden in a cave, or rocks, you could lull the fish. Let it relax before you strike.

Step 4: Act Fast

Once the fish is within reach, act fast by holding it by the gills or the mouth. By putting your hands under its gills, you get an easier grip from the hard cartilage that makes up the gills of the fish. Otherwise, position your hands under the fish and quickly throw it on the bank.

If you used your hand as bait and the fish has gripped at it. Your first reaction may be to pull out your finger, but you have let your hand stay put in the mouth of the fish and pull it towards you.

Tips on How to Ensure Your Success in Hand fishing

Just like any other fishing technique, hand fishing requires precision and making calculated moves. How do you go about this?

➔ Approach the fish from behind. In this manner, your strike will be unexpected to it.
➔ As you place your hand in the water, be slow but steady so as not to startle the fish
➔ Look for holes and rocks along the shoreline. The fish are probably hidden here

Conclusion

Hand fishing is recommended for survival only. However, it is a sporting activity in some other parts of the world. You may step on something sharp as you wade in the water or cut you hand by sticking it almost everywhere.

It is advisable to put on shoes, have long pants on and even put on gloves as a precautionary measure. When catching fish with your bare hands, you are at risk of losing your hand or fingers if you get an infection.

If you have to resort to noodling, then let it be your last best option. You can build traps, improvised fishing rods, etc. These methods may not be as exhilarating, but they sure are safer.  Personally I like using a rod and reel, but even then you have to perform reel maintenance so their are drawbacks to that also.

Don’t risk getting hypothermia or frostbite but it will come in handy in survival mode. Have you ever practiced hand fishing? Let us know what your experience was like in the comments section below….

8 Items for Your Boat Emergency Kit

Summer is right around the corner and many are in the midst of planning deep sea fishing trips or casual fishing excursions with their buddies.

Have you considered updating your boat emergency kit? You never know when an emergency situation can come calling!

Be Prepared for Anything

While the odds of a mishap are certainly small, the risk of your vessel going down always exists. A car offers the luxury of simply stepping out on to the road and walking to the nearest gas station.  With a boat, the inconvenience of a  malfunction is magnified. Stranded in open water, your chance of returning to dry land is often decided by what is in your onboard kit.

Here is a look at 8 essentials to consider for your boat emergency kit:

Empty Milk Jug

How can a milk jug act as a savior, you may ask?  It can, provided you have a knife or other cutting instrument.  Simply , slice the empty jug horizontally and it immediately becomes a lightweight bailing device. Although much smaller, empty plastic water bottles can also do the trick,  This allows for multiple small hand bailers to scoop out unwanted water.

First-Aid Supplies

First-aid supplies are commonly included in all emergency kits. A mini safety kit certainly adds an extra layer of insurance when you are out on the water. Make sure you are carrying a variety of tape, gauze, wipes, anti-bacterial creams, and Band-Aids.

Also consider equipping your first-aid kit with motion sickness medicine, antibiotic ointment, sunscreen, and Neosporin. Last but not least, an epinephrine auto-injector can useful in case a member of the boating party encounters an unwanted reaction or sting.

Personal Locator Beacons

A Personal Locator Beacon is very handy to have on a boating trip.  They are particularly helpful when your mobile network is spotty or non-existent. A PLB such as the ACR ResQLink is capable of broadcasting a 406MHz satellite distress signal to the Coast Guard.  Additionally it sends a separate homing signal is sent out to local Search and Rescue units.

It’s small size allows several to fit easily into any emergency bag.  Additionally, the design of the ResQLink means it can even be clipped onto lifejackets. Consider carrying one for each boat member.  Because, this improves your chances of being rescued quickly.  Especially if you become separated in the water.

Emergency Mylar Thermal Blanket

Mylar Thermal Blankets are excellent for all emergency marine situations.  They can be packed easily and provide much-needed warmth if you find yourself stranded in cold weather. Air temperature on the water is significantly cooler than land temperatures.  So having one of these around while you are out fishing in the middle of the sea can prove to be a lifesaver. These blankets are often called ‘space blankets’ for their futuristic appearance.

If you don’t need to stay warm, there are other ways you can put this thermal blanket to good use. As a waterproof object, it can serve as storage for electronic gadgets that can become damaged by saline water. It also possesses a shiny appearance which can be used as a signaling object during distress situations.

If you don’t like mylar blankets, I know of a small camping blanket that is almost as lightweight and much neater.

Duct Tape

There are few inventions in the world that can are handier than duct tape.

This little roll can quickly be added to your emergency bag, and is capable of fixing almost anything and everything under the sun.

While on a boat, you can use it to patch up leaking areas or mend broken or loose equipment on board.

Duct tape is one item whose usage need not be explained in great detail for it is universal knowledge.

Day and Night Distress Signals

Distress signal flares, or night distress signals, are a common choice for mariners to indicate an emergency situation. Bright lights used in these flares help to alert search personnel of an emergency situation. White, red and orange are acknowledged as the international colors of distress.

Day distress signals are of two types.

  • Orange smoke handheld flares
  • Orange distress flag. An orange flag is recognized as an international distress symbol and can be seen over many miles. Ideally you should place it somewhere high up on your vessel so that it is visible from both air and water.

Hand-held orange smoke flares draw attention by emitting a large cloud of orange smoke. Keep in mind that these flares do not last long.  They burn for about a minute.  Deploy them carefully when the possibility of being spotted by a rescue party is at its highest.

Red flares are the most common with regards to visual distress signals and can be used both during the day and at night. They can be seen from a great distance and even when visibility is not at its best.

Oars and Paddles

You may already be aware that the U.S. Coast Guard has a recommendation in place for all boats to be fitted with oars and paddles.

This is because engine failures can leave you stranded on the water with no way to return to shore.

Regardless of your vessel size, oars can create a current and provide just enough momentum to safely drift back to shore.

For faster flowing bodies of water, always keep a compass handy so that you know you are rowing in the right direction.

Drybag – Survival Equipment Bag

The Drybag from Watershed is a piece of engineering marvel that can keep items dry even underwater. When river guides voiced their concern over the quality of storage bags used during the 1980s, their problems were solved when the ZipDry technology came into existence.

Similar to a freezer bag, it offers excellent closure once sealed shut. The bag material is comprised of polyurethane-coated fabrics that are extremely durable, flexible, and resistant towards abrasion. Consider packing all of your emergency and safety equipment in this bag.

Conclusion

Any boating trip can turn dangerous and the right emergency kit could be the difference between life and death.

As goes the old adage “better safe than sorry”.  It is important to be prepared and safeguard yourself against all eventualities rather than waiting for the moment when trouble finally befalls you.

If you are going boating in someplace else other than your home state, also keep in mind some of the rules and regulations that they may have in place.

Finally, know that adding these eight safety items to your emergency kit will help you remain safe under all circumstances.  Giving you the peace of mind so that you can enjoy a relaxing, comfortable, and memorable trip.

Fishing For Survival: Top 5 Tips Revealed

Fishing For Survival: Top 5 Tips Revealed
Buy at Amazon

Ever found yourself in a survival scenario within the wilderness with little or no fishing gear at your disposal? Such a situation might be not only stressful but also dire. You’re bound to be hungry and frustrated. Luckily, one way of fending for yourself or your crew is by hitting the local waterway and hauling out some fish. By employing some survival techniques, you should be able to find some fish to eat.

The following are the top 5 fishing tips for survival:

Find Bait That’s Native to The Area

You should find a rotting or old log and then turn it over. The chances are high that you’ll be presented with insects, worms, and grubs that fish love. You should also keep an eye on the shoreline. Most probably, you’ll discover minnows as well as other creatures swimming around. They make excellent bait.

Where you see minnows, grab a stick, and whack the water. By doing that, you’re most likely to kill or stun a few which you can utilize for bait. Since your actions will create noise, ensure you collect as much as you can. Before fishing, you should wait for some time.

The Best Time to Fish Is at Night

Plenty of fish, especially the bottom feeders, normally feed at night. Consequently, find a great chunk of bait, perhaps some smaller fish that you caught earlier and then keep the line out through the night. It’ll surprise you the amount of fish you’ll catch. As you leave your fish gear unattended, ensure you tie the line tightly to something. Even a tiny 1 – 2 lb fish can be able to pull your fishing gear into the water.

Fish On Flowing Water

An effective fishing tip many people don’t know is that fishing on flowing water is better compared to stagnant water. However, if you’re fishing in a pond or lake, it doesn’t apply. The tip applies to tidal areas and rivers where you should find some little water flow but not a raging current.

Some little flow is great because it’s effective at attracting fish. Feeding fish tends to hang out behind logs or rocks so that they don’t fight the current. When your bait fish swims by, the fish can then ambush it. Therefore, the best places to fish are docks, logs, rocks, etc.

Consider Natural Poisons

While you shouldn’t practice poisoning outside survival scenarios, there’s no harm in utilizing natural poisons in shallow water pools. So what is meant by ‘natural’ poisons? Here are some things that are readily available to poison fish but are harmless to humans:

  • Lime – You can make it by burning and crushing seashells. They’re great at poisoning fish in the shallow pools.
  • When used in large adequate quantities, young nut husks from walnuts are effective at poisoning fish.
  • Plenty of plants can accomplish this goal. However, you’ll have to do extensive research before heading out.

By using this strategy, you’ll be able to gather a substantial fish amount.

Hand Fishing And Grill Net

Hand fishing is as primitive as your fishing can get. In this kind of fishing, you can use your bear hands to pull fish from its watery lair. Based on your geography, various names are used to describe this activity. Some of the names include:

  • Stumping
  • Fishing tickling
  • Grabbling
  • Gurgling
  • Catch fisting
  • Hogging
  • Graveling
  • Noodling

All you need to do is put on gloves and step into the murky waters to grab some catfish.

When it comes to gill net, you can utilize the nets to grab fish as they swim through your net’s opening. As they do that, the fish will end up getting entangled. Gill nets are highly effective at different times in different places. Nonetheless, they yield incredible results when fish are on their migratory run.

Tips to cook fish for survival

After looking at some fishing tips for survival, it’s paramount to know how to not only prepare but also cook and store your fish in a survival situation. Improper cooking fish, cleaning or storing it can result in your fish becoming inedible.

You should never consume fish that appears spoilt. It’s important to note that cooking doesn’t transform spoiled fish into edible one. The following are some signs of spoilage:

  • Peppery or sharp taste
  • Peculiar odor
  • Sunken eyes
  • Suspicious color
  • Slimy rather than wet or moist body

You should also use the right equipment to prepare and cook your fish. Since fish spoils very fast, after catching, you should prepare and cook immediately. Because in the wild you don’t have tools such as the top electric fillet knives, a pocket knife would be handy to cut out the large blood vessels and gills. While you can cook it over an open fire, the best way to do it is to boil. Doing so will ensure you obtain the most food value.

Conclusion

So tragedy has come your way. You’re on the run and have run out of something to eat … As you ponder about depleting your food supply, you just recall you have an emergency fishing kit. If you find yourself in such a situation, the above are the fishing tips you should employ to help you grab some fish.

We are FOOD Adviser. We always give you in-depth reviews and helpful advice about preserving your food. Our mission is to help you choose the best products with the most affordable prices that match your needs.