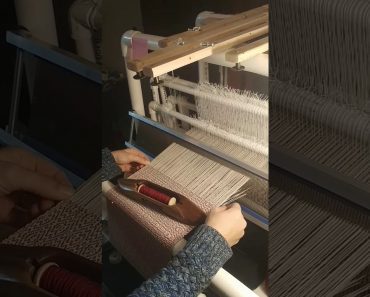
Building a 4-Shaft PVC Weaving Loom

Book Review: Building a 4-Shaft PVC Weaving Loom
Buy at Amazon

I was looking for a cheap way to try out weaving but the majority of looms are outrageous in price.  This caused me to start looking for DIY plans which led me to find this really cool book on building DIY PVC Weaving Loom.

I contacted to author and he was kind enough to write the following post for me.  I am not receiving anything for posting this, I just believe this is a great idea.  When I get some time I plan on doing a full review of his book and actually making the loom.

I hope this is useful for you, and see the usefulness of a loom costing under $200 versus the $500 to multiple thousands for a pretty loom.

Now for the article from David Holly of PVCLoom.com.

Why modern folks should look into weaving

Thinking of weaving as a way to “remember the past”, sounds to me like a great way to irritate High School history students. But thankfully, there are a lot of important reasons to keep this craft alive.

For example, the iPhone in your pocket owes its existence to weaving. Joseph Marie Jacquard invented the Jacquard Loom in the early 1800s. It used punched cards to control the patterns and designs in the woven fabric. These punched cards, and how they were used by Jacquard, formed the foundation for virtually all modern computers.

The Wikipedia page on Jacquard states, “Jacquard’s invention had a deep influence on Charles Babbage. In that respect, he is viewed by some authors as a precursor of modern computing science.” Pretty cool!

But other than the historic aspects of Looms and Weaving, us modern folk can enjoy weaving as a craft like any other. The types of cloth and design patterns possible with available modern Looms is endless. Plus it gives us an appreciation for modern weaving technology.

Before the invention of the Power Looms that sparked the Industrial Revolution, all cloth was woven or knitted by hand. That meant every piece of clothing, socks, underwear, curtains, bedspreads, sheets, towels, rugs, etc., etc., were all handmade items. Even Jacquard’s invention, which let weavers accomplish in a day what normally took a week, still required nine hand spinners to keep a single loom in operation on a daily basis. In the mid-1800s Jacquard-woven coverlets (bedspreads) were so valuable that men often bought them as engagement gifts for their Fiancés. (As a comparison, a Jacquard coverlet might cost $600. But back then, you could also purchase 10 acres of farm land for $600.)

We touch and use fabrics every day of our lives. Knowing how they are made, and learning how to make them ourselves, can be valuable information in troubling times. I’m not what you would call a “survivalist”, but I do know that knowing how to weave would be a valuable skill if (heaven forbid) society ever collapsed.

Is it easy to weave?

Yes and no. I find the process of weaving to be easy. Open a shed, push the shuttle through, close the shed, and beat the weft into place. Weaving is the fastest method of creating fabric; much faster than knitting or crocheting. You can probably weave an inch of fabric or more in the time it takes to knit just one row of the same width.

What is not so easy about weaving is setting up the loom. This is also called warping the loom. You must measure out the warp threads, and tie them to the loom on the back roller. To do this, a warping board is often used, which is a square frame with pegs.
Once you measure out the warp threads on the warping board, you must remove the warp and move it to the loom. To summarize the next steps, you first tie the warp to the back beam. Next, you thread the warp ends through the heddles in the harness frames. Then you insert the warp ends through the reed. And finally, you tie the warp ends to the front beam.

Many weavers attach long warps to their loom to reduce the number of times they have to warp the loom. But this has a downside. You must weave all of the projects before you can take them off the loom.

As I said above, understanding the workings of weaving gives one a deep appreciation for modern textile mills.
But this warping process can easily be mastered. Some weavers even say they enjoy the process. One thing is for sure – the warping process is very important because it forms the foundation for your fabric. If the warp is uneven, then the finished fabric will not be even.

Does it cost a lot?

It can! And this is one of the primary reasons I created the PVC Loom. Years ago I decided that I wanted to weave. But when I looked at the price of even the smallest table loom I was shocked. Today, a new table loom with a 22” weaving width will cost anywhere from $300 to over $900 depending on the accessories and manufacturer. At the other end of the price spectrum are the large floor looms for weaving wider width fabrics and rugs. These looms can cost anywhere from $1,200 to over $6,000 new. Even loom accessories are outrageously priced. A “kit” to add 4 extra harnesses to one popular floor loom cost over $900 alone. All that money for something a little more refined than logs and sticks! I always thought that there was something not quite right about this pricing structure, and I finally figured it out.

Long ago, exactly when I’m not sure, loom manufacturers transformed the handloom into a piece of fine furniture. (My theory is that this happened shortly after the time when hand weaving ceased to be a vocation and emerged as a craft.) While there is nothing functionality wrong with furniture quality looms, they have created a true paradigm resulting in very high prices. Most all handlooms today are made of hardwood and are constructed like fine furniture. Fine hardwood furniture requires a lot of time. People with the skills of a cabinetmaker are needed to dimension, join, shape, sand, stain, and finish the wood. The looms produced are very usable and most are quite beautiful. Unfortunately, for us, they are also quite expensive. There is absolutely nothing wrong with such looms. It is not my intent to bash any of the loom manufacturers out there, especially since they have helped to keep the craft of weaving alive all these years. People working within a true paradigm, such as this, never even think of questioning the paradigm itself. Just as no one would expect a bird to think of questioning the air in which it flies. I just happen to come from outside this paradigm, so I started asking questions.

I think that many people would love to start weaving but can’t afford a loom plus all of the required accessories. So, I determined that the real question is, “DO I HAVE TO BUY A PIECE OF FURNITURE IF I WANT TO WEAVE?”
I think that the loom is a tool, not something to be put on display. Pride of ownership can be nice, but in my opinion, it is out of place in a craft such as weaving. After all, the focus of any craft is not the tools, but the work produced using the tools.

For me personally, the high cost and fancy hardwoods had yet another drawback. I considered purchasing one popular rug loom a few years ago. It is made from mahogany and maple and costs over $5,000 brand new. It’s a beautiful, fully functional weaving machine. But, I think I would actually worry too much about dents and scratches to use it properly. Maybe it’s just me, but I hate getting scratches and dents in a beautiful piece of wood, whether it happens to be part of a dining room table, or a baby grand-sized floor loom. I’d probably end up just polishing it once a week and showing it off to friends and relatives. I think that looms should be used, not admired.

How hard (or easy) it is too make? And how much does it cost?

I work as a programmer in the pharmaceutical industry. And a big part of my job is documenting my software. I used my documentation skills to write the PVC Loom book. There are over 100 photos showing each operation, plus detailed instructions laid out one step at a time. I also provide more than one way to accomplish certain parts of the loom. For example, there are instructions for hanging the harness frames using Texolv Cord (from Sweden created specifically for hand weavers), or using ordinary nylon rope from the hardware store. And there are two ways to finish the slider bars to hold them in place. You can use Velcro tabs, or you can cut notches to “hook” the bars in place while weaving.

Many people have told me they like the way the book is written. It is easy to understand, the instructions are very clear, and I use a big of humor now and then. I had the book proof read by a hand weaver, and she and her Son built a PVC Loom using my pre-publication draft copy. They found several mistakes and omissions that I fixed before it went to print. I have a special “thank you” for them in the beginning of the book.

All the parts for a PVC Loom, including reed and heddles, will probably cost you around $200; much less if you plan to scrounge around at garage and yard sales, or browse equipment on eBay.

Weaving on the PVC Loom

I use a folding table I found at Staples that is four feet long. I stand when I weave and use my tummy against the front of the loom as I pull the slider bars forward. Compared with other table-style looms, I think the PVC Loom is much quicker. The action is very smooth and light, and that makes for quicker weaving.

I have a very expensive wooden table loom I purchased about 14 years ago. It has a 22” weaving width and has 8 shafts. It cost $550 back then. Today, the same loom costs over $900! And when I compared the action on the professionally made table loom to my hardware-store PVC Loom, I was amazed! The wooden table loom has many eye screws that force the harness frame ropes through some tight turns. These ropes make their way up to a slanted action board that has wooden levers. When you pull a lever down, it pulls one of the harness frames up. Due to the tight turns, the action is very stiff, which makes the weaving process a lot slower.

In contrast, the PVC Loom has a flat action board. And there is a slider bar directly over each harness frame. The ropes only bend 90 degrees and pull in a straight line. This makes for a very fast action with very low drag because the ropes don’t have to make any tight turns. I didn’t really worry about the looks of the final PVC Loom – I was more interested in function over form.

Some examples of things you can make on the PVC Loom

The PVC Weaving Loom is a “Jack Loom”. Jack Looms are lightweight looms that are intended for smaller textiles and accessories like scarves and shawls. They are perfect for kitchen towels, table runners, napkins, place mats, and even washcloths. A lot of weavers like to make scarves and kitchen towels as Christmas gifts. You can even weave fabric for men’s ties.
Even though these may seem like every day ordinary items, the possibilities for color and pattern variations are very exciting. Probably the best thing a weaver can do is to turn an ordinary object, like a kitchen towel, into an appealing work of art that becomes part of a kitchen’s décor.

If you look at patterns and color combinations on websites like Pinterest.com, you can get a great idea of what is possible with this little loom.

What you can’t make on the PVC Loom are big, heavy weavings like rugs and bath towels. And that’s really beyond the scope of a Jack Loom. All of the principles of weaving can be learned, including the warping process. So, making and using a PVC Loom can provide valuable weaving experience that you can use on any other loom.

The quality of the cloth produced on the PVC Weaving Loom will improve as you gain experience weaving. In most cases (like with me, for example), a weaver will have great success with the majority of the weaving in the middle of the cloth. But the more difficult parts to master are the edges. This is called the “selvedge” in weaving terminology. Getting the weft threads (the threads that go left to right through the warp threads) even, and with the proper tension, is the skill all weavers need to master. But uneven selvedges are nothing to be ashamed of, and they improve as you gain experience. These are, after all, handmade items.

Where to get the PVC Loom book

The website, http://www.PVCLoom.com, has a link to the book’s page on lulu.com. Lulu is the publisher, and they have an ingenious Print-On-Demand system that only prints a copy when you place your order. Books arrive in about 4 to 5 days on average. I used Lulu.com because they were able to print using a spiral-bound cover. This lets the book lay flat for easy reference when you are building your PVC Loom.

Happy Weaving!

Contour Camera Review

Gear Review: Contour Camera
Buy at Amazon


I recently purchased a contour +2 action camera to use in my video production.  I bought it because it was small, durable, had an external mic jack, streamed wireless to my phone, was water proof, and had a built in GPS.  So it only figures that I would do a post on a Contour Camera Review

When I got it, I found that it was oversold just a little bit – it has an HDMI out port – which they say allows it to be used as a webcam to apple computers – but the laptop I have is HDMI out only, so it will not work to tape my classes.

The video is a little jump as it has a low frame rate, and the lens makes everything look a little walleyed.

However, it comes with a waterproof case for scuba and snorkeling activities, and a bunch of different mounts – if I was using this solely as a gun cam, I would be very happy, as it is smaller and has more features than the go-pro.

Because I wanted a good quality camera with an external mic jack and I wanted to stay under $1000.00 I allowed myself to be taken by all the hoopla around this camera.  I guess sionce I have a waterproof case I can finannyl start working on shooting the Glock underwater…

Hard Shoot Target Review

Gear Review: Hard Shoot Target
Buy at Amazon

The kind folks at Clarksville Guns and Archery have kindly donated this Hard Shoot Target for demonstration purposes.  This is a unique target as it is a photo, with dye packs instead of scoring lines.  You can hit this target over and over, but you are not successful until you hit the dye.

I think this is a really good idea, and quite useful on a training range, however, the dye is very thick, and if you are not careful it can make a mess.

Because of this some ranges do not allow the use of hard shot targets, which is a shame, because I feel that when used properly, they make wonderful training tools – as they teach to shoot until you get a stop – watch the background for innocents (their are several innocent bystanders printed on the various targets), and to make situationally appropriate shots.

It was pretty fun shooting this target, and the realism is pretty good for a static target.  I am sure the argument could be made that the dye packs and the photographic targets without obvious scoring rings, and bystanders in the background make this a very effective training target.

Course Review: Selco “One Year in Hell”

52 Unique Techniques for Stocking Food for Prepper
Buy at Amazon

I don’t prep for any particular hazard, but try to build skills and equipment to deal with many/most/all problems. One way of doing this is to look at what has worked in the past. I look at what has happened, why it happened, how it could have been prevented, and how people survived and incorporate that into how I operate.

That being said looking back at historical situations I believe economic collapse is something that has a high likelihood of occurring and if/when it does occur, it would have a pretty catastrophic effect on my life. Therefore, I devote some of my research time to looking at situations that occurred in the Weimar Republic (1919-1933), the Great Depression (1929-WWII including the 1937 Great Recession), and the 3 Year Argentine economic crisis (1999–2002).

Anything that documents how the general public survived in these SHTF situations interests me – especially firsthand information like the YouTube Cooking with Clara videos. Of particular interest to me are books like Fernando “Ferfal” Aguirre’s The Modern Survival Manual: Surviving the Economic Collapse Which documents how he survived the 1999 Argentine crisis.

So when I opened my email to see an email from SHTFSchool.com inviting me to review Selco’s One Year in Hell Course, I jumped on the opportunity. Selco is the online identity of an individual that claims to have survived a year in a Balkan City during the Yugoslav Wars of the early 1990’s. It only took a few minutes to get a login, but it took me several days to work through the material.

The course has several aspects – It is primarily a series of 17 audio interviews. These interviews cover the months and days preceding the conflict and how “preppers” were seen to be crazy, and how the media and government kept reassuring the populace. They move through the actual crisis periods and talks about group dynamics during the crisis and what tools and supplies are needed. He talks about foraging, trading, hygiene and the dubious value of gold. I learned a lot from the interviews, however, his accent is pretty thick, and on occasion it was hard for me to follow.

There are a few video’s in the course that explain certain concepts like home defense in greater detail.

The course contains a couple PDF downloads – some are lists of what is needed and why, as well as a short text that backs up the other material.

Lastly, the course contains access to forums for students to share information.

I think this is a pretty good deal if you approach it with an open mind. Selco talks about what worked for him, including certain moral ideals and mental health issues and how people coped with the stress. He butchers a few sacred cows.

I cannot say I enjoyed the course, it was pretty raw – like sitting down in your living room and having a frank discussion with a war survivor, but I can say it gave me more than a few things to process and think about in my personal survival strategy.

In particular, I like how he elevates skills over stuff.  Discusses how he foraged at night, and the steps he took to keep as safe as possible while doing so.  Selco was a nurse at the time of the collapse, and had no experience with firearms, and he describes how that changed and how his group operated.  He has some frank discussions about morals during times of collapse that any prepper needs to hear and think about.

His first couple of recordings talk about the time leading up to the collapse and the signs that some saw but most discounted.  It was eye opening to hear how even smart people in his circle did not think that their leaders and their citizens could devolve into chaos and war.

I have recommended it to my personal prepping friends and think that the $30 course fee is a fair trade for what you get.

Gear Review: Uvpaqlite

Uvpaqlite: The Rechargeable Glowstick Review


Gear Review: Uvpaqlite
Buy at Amazon

I don’t do reviews all that often, but not too long ago survivalblog had a passing mention about a new company that made reusable glowstick the size of a chemlite. I immediately ordered a couple of uvpaqlites for my personal evaluation.

Basically the devices are containing strontium crystals that are doped with other rare earth elements to form the latest generation of glow in the dark technology. These crystals charge very quickly from any type of visible light and glow for quite a long time. As with most glow in the dark devices, the stronger and longer the light source charging the crystals the brighter and longer they give off glow.

Glowing Crystals in a Sealed Package

The company that produces the crystals is called uvpaqlite.com and the crystals come in either glued inside a robust flat plastic sheet that reminds me of vacuum seal bags, or plastic tubes filled with clear epoxy.

Since I had never heard of the company before, I did not want to spend a lot of money on my first evaluation set was pretty inexpensive. I purchased the smallest product in both lines – the flat 4×6 mini uvpaqlite for $3.50 and the key chain sized tooblite mini for $4.95.

I received the package pretty quickly in the mail and wasted no time in charging them and trying them out. In my first video they had only charged for an hour or two since I only charged them from the time I got the mail until it got dark that evening.

While my camera did not take a very good video, I was able to use the mini paqlite in my pantry to read the labels on my can goods. It was bright enough that if I held it next to something I could make out what it was.

UVPaqlite Review II


I think this size of paqlite would be very good as a trail marker or a way to find something in the dark, We used the chain it came with to attach it to the pull switch on our bedroom ceiling fan, and the light it gets during the day (even with the shades drawn) is enough that I can always quickly find the light switch. it is not a replacement for a flashlight.

The tubelight went on my keychain, and even though it is normally in my pocket, I use it to help me find my keys and the door knob when I come home at night. It also helps when I misplace my keys, in the morning, as I get up while it is still dark out, and if I turn off the lights I can just look for the glow.

Great Product

The company that sells these lites says that the larger size will light up a small dome tent, and while I did not try it, I believe it would. Once again my camera did not do these devices justice, but I could set the large paqlite in my living room and make out the walls and location of the exits. It would not light the room up enough to read by, but I could use it to find my glasses, flashlight, or other personal protective devices.

I keep the 8×15 paqlite on the dash of my work vehicle, where it is constantly receiving a charge, that way when I get in the truck at night, I can see where all my tools are. It also helps me differentiate my vehicle from everyone else’s as they are all unmarked white SUVs. The large tooblite is attached to the outside of my daypack where I can use it if I have to make an unscheduled trip into the woods. I know that even if I forget to check my flashlight batteries I will at least have some form of light,.  Now, I don’t know about you, but whenever I am sitting around a campfire at night I always seem to lose something important and have to fumble around in the dark looking for it.

These products are very well made, and while the manufacturer suggested I do a destructive review to show how robust they are, I really don’t want to shoot them and have to go out and buy a replacement.

I thought about driving over them, as I believe they could handle that without damage…

Disclaimer

All in all, I think these are great products, and when used according to their limitations have a definite use in a prepared household. I had planned on buying the larger sizes to use while camping, but the company contacted me and asked me if I would review their larger lites. Of course I said I would. (FTC disclaimer – I received no payment for the review, but

I did receive two paqlites from the company at no cost to me, which I intend to keep).
I shortly received the larger Tooblite glow stick (about 8 inches long) which retails for $6.95 and the large 8×15 paqlite which costs $24.00. As a side note they came in a clear envelope which allowed them to come charged – I wonder what the post office thought of them glowing in their trucks.