

How to Convert a Generator to Propane

I have wanted to convert generator to propane for years. Doing so was mentioned in the lawnmower generator post back at the beginning of my blogging career.
I never got around to it because I thought it would be to hard. Additionally, I did not want to tear up an engine since, like most, I simply can’t afford to break an expensive engine.
This project came into being after I converted my generator to electric start.
However, I kept worrying about the fact that I was on the road a lot for work. I did not want my wife and son alone in a cold dark house if we had a bad storm. I also continued to have problems with storing gas and keeping the generator’s carb from gumming up.
This lead me to call Richard from propanecarbs.com and ask him exactly how hard it was to convert an engine to run on propane.
It did not take me long to realize that using a kit was pretty easy. Actually after talking with him I briefly toyed with the idea of offering conversion as a service.
I concluded that he was either a great salesman or the process was exceptionally easy.
The Process is Extremely Easy With the Right Kit
Turns out, the process is exceptionally easy. There was not a lot of products in the kit, and it had a LOT of documentation explaining the process. Each kit has some specific parts for your engine. However, your engine model may be installed in a generator, a snowblower, a tiller, or anything else the manufacture wanted. This means the instructions can be a little generic.
Take your time an look at the instructions before you start install. That makes it much easier if you understand how each part works.
The kit I got contained:
- Hoses and hose clamps
- High pressure regulator
- Vacuum operated regulator
- Elbows (one was also a valve)
- Venturi that bolts to the carburetor
- Gaskets
- Bolts
- Mounting hardware
- Studs.
There will be parts left over after your install so don’t panic if you have a bolt or two sitting around after the thing is installed.
The video shows the process pretty well, from start to finish it took me about 40 minutes, but a good portion olf that was figuring out what the parts were and how I wanted to mount the regulator. I could probably do it again in 25 or 30 minutes (so could a handy person that knew what they were doing)
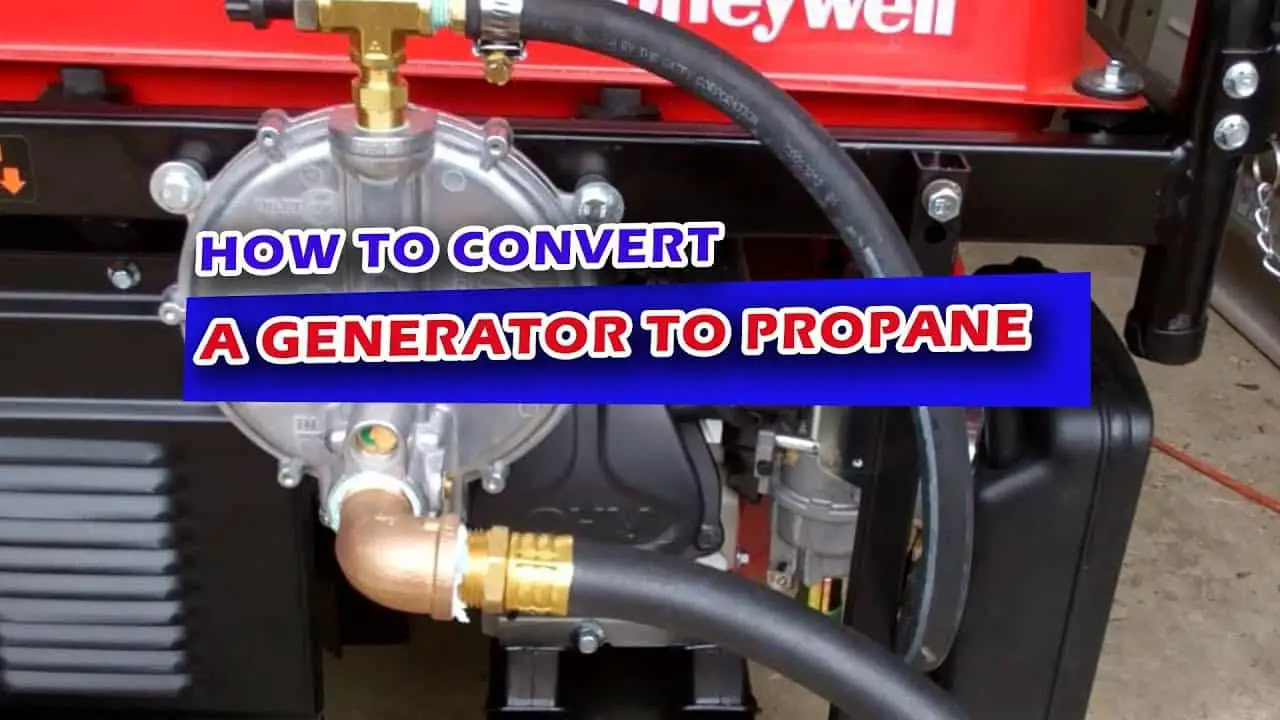
The basic steps are:
- With the large opening in the venturi pointed to the carb, install it between the carb and the air cleaner – there are gaskets and longer bolts to use if necessary.
- Install the elbow that has the lock-nut and adjustment screw on the top side of the venturi (unless it won’t fit then use the normal elbow) and point it toward the location you will mount the beam vacuum regulator.
- Decide where to mount the beam regulator on the machine you are converting, it needs to be close to the carb, be accessible so you can press the priming button when starting, and be orientated to the vertical – because if it lays on its side gravity will affect the diaphragm and make it hard to operate.
- Screw the elbow into the top of the regulator so it is orientated toward the carb.
- Install the shorter fuel line to connect the regulator to carburetor venturi – use the hose clamps.
- Connect the high pressure regulator that attaches to the propane tank to the beam vacuum regulator
- Use yellow gas-line tape on the connections and ensure they don’t leak.
- Prepare to start and adjust the system for your engine
OR – alternatively you can pay someone to install the kit for you….
Fuel Adjustments
As the instructions from propanecarbs.com suggested, the actual conversion kit install took very little time, what took up my time was adjusting the propane to air ratio after the propane conversion so that the engine ran smoothly and started easily.
This is important because the air/fuel ration is much more critical when burning propane, it burns leaner than gasoline, because it has less BTU’s by mass so it is easy to adjust the fuel so that their is not enough fuel to burn, it is also temperamental in that it ignites at a higher temperature so it easily becomes too rich to burn.
The kit is able to fit on a wide variety of engines so it does take adjustment, the instructors say to set the fuel adjustment needle valve in the middle range by screwing it in fully the, backing it out 6 to 7 turns. This should allow most engines to start.
Once the engine is started you can turn the screw 1/4 turns until you get the engine to run smooth.
If you can not get the engine to start look at the following for troubleshooting.
- On the beam regulator (flat pancake looking device that) there is a brass cover that looks like a screw that is directly above the propane inlet line coming from the LPG tank. The cover it should be 1 to 4 turns in. Occasionally the screw this plat covers is tightened too much at the factory and since it regulated how much vacuum it takes to allow fuel to flow through the regulator – if it is backed in too deep the generator will never run.
- Check your spark plugs, the propane ignites at a higher temperature so good ignition is more important than when running gasoline.
- Check your air filter – its just good mechanizing practice to check fuel, air and spark.
When I did all three – replacing the spark plug, air filter, and ensuring the diaphragm adjusting screw was in the right place the generator started right up just as the instructions said.
I let the engine warm up and then made slight adjustments until it idled smoothly – then tightened the lock nut and showed my wife how easy the generator was to start now.