Bundt Chicken makes a juicy chicken that’s crispy all the way around. Like the names says just use a bundt pan as a vertical roaster.
This is extremely simple to do, simply upend the bird on the center of the pan, season and add vegetables per your normal recipe, and then roast.
Bunt chicken is a nice way to roast chicken, as it is easy and looks pretty cool.
I like to start the oven hot at 450, let the chicken cook for 15 minutes, turn the heat down to 350 for about an hour, and then back to 450 for another 15 minutes. If you put in a lot of vegetables, the chicken is large, or the internal temp is not 160, you may need to increase the time at 350.
The great thing about this process is that it is scalable – the pan can hold anything from a game hen to a small turkey. – and if you use a pot instead of a cookie sheet to collect the juices, you can fill it with your favorite beverage for the bundt pan version of drunk chicken…
Tell me that the chicken in the video above did not look awesome. I will tell you that not only did it look great, it tasted out of this world.
When I was younger I could not tolerate hot food, but as I age, I find myself enjoying spicy food.
Couple that with my DIY gene, I really enjoy making my own hot sauce; it is not hard and makes a quality sauce for little expense.
This recipe works with any hot pepper, and I usually use a blend of jalapeno and habanero.
Making a pepper mash is different than making hot sauce – you make the sauce from the mash.
The pepper mash is fermented to mellow the flavor of the peppers and really ads to the quality. Tabasco sauce, for instance, is fermented for three years, but I find after 6 months you really don’t get that much more quality.
Since we are letting the peppers ferment, we are going to be adding salt to suppress bad bacteria and mold.
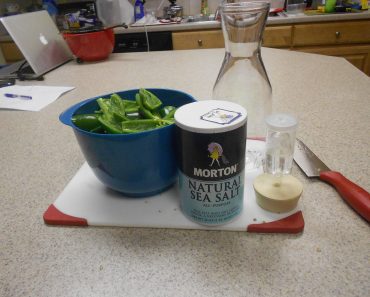
What You Need
The first thing you are going to need is a glass jar or pottery crock, size matters as you only can fill it about ¾ full so it won’t overflow as it ferments. You want a straight sided container so you can use a weighted plate to keep the peppers under the liquid (this prevents mold).
Since I am only making sauce for myself, I actually us a glass juice carafe and a large rubber bung and airlock instead.
As you size your jug, realize that 1 pound of peppers will produce a little less than a pint of pepper mash.
As you pick your peppers, get the largest, plumpest fully ripe peppers from the garden or market. Fully ripe peppers have a more sugar content, so that will help with fermentation.
I remove the seeds from my peppers, but that is a personal choice. Contrary to popular opinion, the seeds don’t add much heat. The real heat comes from the connecting veins that attach the seeds to the pepper walls.
If you are dislike getting burned by peppers, I have a great tip to help wash off the oleo-resin capsicum inside the hot pepper.
How to Make the Pepper Mash
Wash the peppers and dry them with a towel or paper towel before processing them.
Remove and discard the stems.
Add 1 Tablespoon of salt per pint of mash
Process the peppers in a blender.
Pour one Tablespoon sea salt per pound of peppers in a blender and process them on high speed till they become puree (mash), no more than a minute at the absolute most, typically only 15 to 30 seconds
You may add other vegetables, herbs, and spices into the blender and puree it along with the peppers mash, so long as you maintain the salt ratio to weight of vegetable matter. Anything you add will dramatically affect the taste of the finished product, (I add sweet peppers)
Pour the mash into the fermentation jar or crock. You need to keep air away from the mash, but if you seal it airtight it will explode. If you are using a straight sided crock, set an upside down plate inside the crock so that it can move up and down the crock, weigh it down with a ziplock bag full of water. Since I use a large juice carafe, I simply stick in a large rubber bung fitted with a airlock for making wine.
In one week, the pepper mash will start bubbling vigorously as a result of fermentation in which the bacteria will produce acetic acid and any sugars will produce alcohol and carbon dioxide gas. The gas bubbles will cause the pulp in the mash to rise, leaving the liquid and some solids on the bottom.
In another week or two, the fermentation should stop producing bubbles.
You may use the mash as soon as fermentation has finished. I let it age in a dark closet for about 6 months though.
You can use this mash directly on food. However it’s a simple process to turn it into a sauce. I will save that for another post….
Quick tip for Cutting up Potatoes for potato wedges: When you need to cut up a lot of potatoes, either for dehydrating, making home fries, mashed taters, stew, or whatever – simply peel, and run through an apple corer.
It makes evenly sized strips, is easy, safe, and it keeps you from buying a special potato slicer.
This tip for cutting up potatoes is pretty simple, and I am sure it took you longer to read it than to grasp it.
I probably could have said – cut potatoes with a apple slicer and you would have instinctively gotten the message. I use this tip when I make home fries as it makes large slices that are uniform. It also works when you are boiling up potatoes to make mashed taters, but now that I have an instapot, I don’t think that is as important.
I also use my pressure cooker to cook potatoes so cutting them up is not quite as important as it use to be. If you don’t want to cut up your potatoes, you can also use an electric drill for fast peeling of the potatoes instead of fast Cutting up Potatoes. Anyway, this tip works well, and my son loves doing it this way almost as much as he loves breaking eggs.
This Rolo Marshmallow tip is a simple campfire trick that is sure to make you a hero with the kids.
If you are roasting marshmallows on the fire, poke a hole in the center of it and insert a mini Rolo. (I am sure you could substitute plain chocolate or other mini candybar).
Rolo Marshmallow’s are a treat that will make you a hero in your kids eyes. Its even something that your wife may give you a little credit for…
The caramel and chocolate of Rolo will melt inside thee marshmallow and turn into a gooey tasty mess.
It’s like a s’more with caramel, especially if you eat it with graham cracker (well then it is a s’more with caramel).
I am not much of a sweets person, but I do like to eat these on the rare occasions we make them. My boy really likes them also.
Rolo Marshmallows are a simple way to fancy up campfire roasting. It is not hard, but it does take your dessert cooking to an entirely new level.
This is also a really fun way to spend time with your children. As a date night, a roaring fire, some wine, and a fancy yet fun activity – It would be hard to beat.
This post will show you how to take something you can store and turn it into an approximation of something that does not store well. We will use coconut milk in a can to make “whipped cream” I call it Coconut Whipped Cream.
It is not exactly like whipped cream from milk, but it is very easy, gluten free, and good for those that do not like or cannot tolerate dairy
How to Make Coconut Whipped Cream
Step 1: Cool a “full fat” can of Coconut Milk for several hours to over night
Step 2: Scoop out all the thickened coconut cream, leaving the coconut water in the can. (Don’t waste the water, use it for something else.)
Step 3: add a little cinnamon and/OR vanilla to the coconut, and whip it in a mixing bowl until it turns foamy.
It took me some time to find the right brand of coconut milk, any brand with stabilizers won’t work because the stabilizers are designed to keep them from clumping.
I also find that I don’t like the taste of coconut – the taste is pretty mild, and may not bother most of you, but I didn’t really like it – even though I did think it was pretty neat.