Kitchen DIY: How to Nixtimalize Corn

Kitchen DIY: How to Nixtimalize Corn
Buy at Amazon Cal

This project looks deceptively simple, but it is one that I had to try a couple times to get right. I only stuck with it because Nixtamalization is a vital process for people that use corn as a staple food.

This is because the nutrient niacin is unavailable in unprocessed corn, and by cooking dried corn with a strong alkali (nixtamaling it), Niacin becomes available.

Thereby preventing nutrient deficiency diseases like pellagra.

Besides preventing the typical symptoms of pellagra (diarrhea, dermatitis, dementia and death) this process is how Masa (corn tortillas), hominy, grits, and posole are made.

Hominy
Ingredients for Hominy

This makes the process an essential skill for any culture that is based on corn.

Nixtimalization is simply the process of cooking corn with alkaline, which dissolves the hull and improves the nutritional content of the corn.
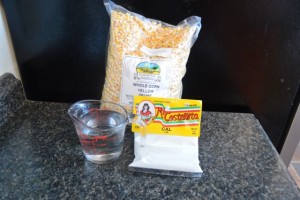
Ingredients:

  • 2 cups Dried Corn
  • 6 cups Water
  • 2 Tablespoons Calcium Hydroxide

Equipment:

  • Non-reactive pot (stainless steel, borosilicate glass (pyrex), or an unbroken enameled pot) – Do NOT use aluminum.
  • Non-Reactive spoon (I use a wood or plastic spoon)

Procedure:

  1. Obtain your Calcium Hydroxide – you could make lye from wood ashes, but I buy mine at the local Hispanic grocery store. It is sold as “Cal” and is normally on a rack with dried peppers and spices.
  1. Mix the corn, water, and cal and put the pot on medim-low.
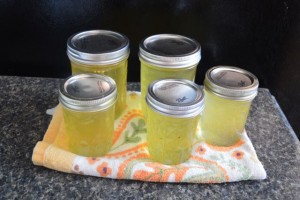
  1. Slowly bring the mix to a boil (this should take 30-45 minutes). When it boils, remove from heat and let the pot sit overnight.
  1. As the lime chemically alters the corn and the hulls undergo a visible change as well as loosen.
  1. The next day, pour off the cooking liquid and rinse the corn in multiple changes of water.
  2. In a bowl full of water, rub the corn in your hands to loosen the hull
  3. Fill the bowl of corn with water and pour off any pieces of hull that float to the top, then drain.
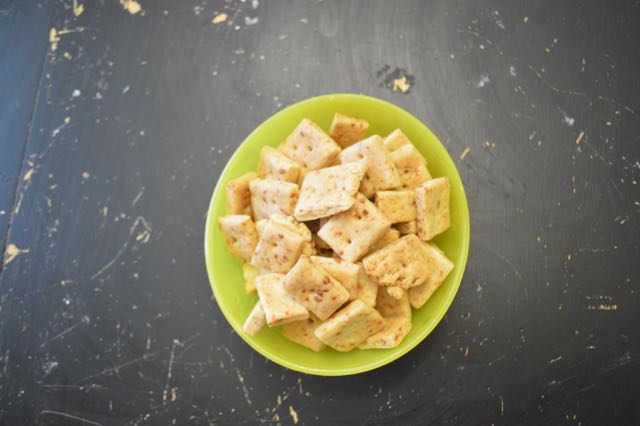
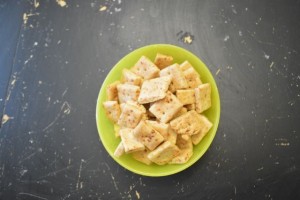
  1. The dehulled corn is now nixtamilized, it can be ground into Masa flour, or dried and broken up into grits.

Yield:

Approximately 3.5 cups of Corn

Notes:

Masa the corn is ground wet, using the retained water from the cooking as the liquid component. Add water as necessary until the dough begins to form.

Grits are made from dried nixtamilized corn, ground into small rice sized chunks

DIY Vegetable Rennet

How to Make Vegetable Rennet

Kitchen DIY: Vegetable Rennet
Buy at Amazon

Most cheese was historically made with animal rennet, nowadays, a lot of cheese is made with a mold based rennet.

It is possible to make a vegetarian rennet for those that are either vegetarian, vegan, or who do not have the resources to make animal based rennet.

Today we will make a DIY Vegetable Rennet out of Thistles.

The biggest problem with vegetable rennet is that it becomes bitter in aged cheeses.

This means it should not be used with raw milk, or cheeses like cheddar that need aging to build their sharp taste.

List of plants used to make a vegetable rennet:

  • Thistle
  • Fig
  • Yarrow
  • Ground ivy
  • Lady’s Bedstraw,
  • Nettle
  • Pineapple
  • Artichoke

Since Artichokes and Thistles are in the same family, we will show how to make rennet using them, but as a rule of thumb if you crush and extract the sap from the greenery any of the plants above you can use it to thicken milk.

Material:

  • Thistle flower head when it has turned brown, but harvest it before the plant produces the thistle down, in which case it is too late.

Or

  • The Purple head of the artichoke before it makes the head

Equipment:

  • Dehydrator
  • Pot

Procedure:

  1. Dry the flower heads and pick off the purple stamens.
  1. Boil water and drop thistles into the water and let steep into a thick dark tea.
  1. Strain off the liquid. This is now thistle flower rennet.
  1. The rennet can now be added to warmed milk to curdle it and begin the cheese making process.

Note:

Most cheese recipes using commercial rennet are in the teaspoon/tablespoon amounts, I started using a traditional recipe amount, but ended up using ½ cup of my homemade rennet to get a good result.

Homemade Cheese-its

Recipe: Cheese Crackers

Homemade Cheese-its
Homemade Cheese-its
Recipe: Cheese Crackers
Buy at Amazon

When I cam upon a recipe for homemade cheese crackers, as soon as I got past the excitement, I realized that this simple recipe was something that I should have been able to figure out on my own.

At my house we go through boxes upon boxes of cheese crackers, my three year old loves them, and while he will share if forced, he doles them out to his daddy one at a time.

This is a good recipe for young cooks, as it is easy, but due to the novelty, it will get them lots of complements from those that they share with.

Now that I bought a stand mixer I plan on making this pretty often.  They don’t cook as crispy as the store bought chips, but I think is you cooked them twice the would get harder.

Ingredients:

  • 1 cup all-purpose flour
  • 4 tablespoons unsalted butter, cut into small pieces
  • 8 ounces sharp cheddar cheese, grated
  • 3/4 teaspoon salt
  • 2 tablespoons cold water
  • 1/2 teaspoon ground mustard (optional)

Tools:

  • Food Processor
  • Measuring cups and spoons
  • Plastic wrap
  • Pizza cutter
  • Toothpick
  • Baking sheet
  • Parchment paper.

Procedure:

  • In a food processor, pulse all the ingredients (except the water) until it looks like course crumbs.
  • Once you get the crumbly texture, add in water 1 tablespoon at a time while continuing to pulse the food processor.
  • Remove the mixture from the food processor
  • Wrap the mix in plastic wrap and refrigerate for at least 20 minutes.
  • Preheat oven to 350 degrees.
  • Roll out dough until it is very thin, and then cut into squares using a pizza cuitter.
  • Use a toothpick to poke a hole in the middle of each cracker.
  • Place crackers on lined baking sheet, since the crackers don’t expand much you can put them close together.
  • Bake for 13-15 minutes or until crispy.
Corn Cob Jelly Recipe

Corn Cob Jelly Recipe


Recipe: Corn Cob Jelly
Buy at Amazon

This week’s project is one that I have seen on many internet sites and multiple canning and old school food preservation books. It took me a while to get around to trying it, but when I did I found that corn cob jelly tastes a lot like honey it made me wish I did this much sooner.

I typically only cook corn on the cob when grilling out with my family, and when I do so, I tend to cook a lot of corn. This recipe lets me turn the normally wasted water from boiling corn into a tasty food product in itself.

However, I feel like I should let you know that traditionally red field corn was used. Personally I have only used sweet corn.

Ingredients:

  • 12 large ears of corn
  • 2 quarts water
  • 2 tablespoons lemon juice
  • 1 package powdered pectin
  • Sugar (amount will vary, but 4-5 cups should be enough)

Equipment:

  • Knife
  • Measuring Cup
  • Non-Reactive (Steel) Pot
  • Spoon
  • Canning Funnel
  • Canning Jars, Lids, Rings
  • Water Bath Canner
  • Canning Jar Lifter
  • Towel

Procedure:

  • Cook corn, cut kernels from cobs and store for another use.

    Corn Cob Jelly
    Corn Cob Jelly
  • Measure 2 quarts water into a large pot; add corn cobs.
  • Bring water to a boil and keep uncovered at a rolling boil for 30 minutes to concentrate the liquid
  • I try to boil it down until I get 3.5 to 4 cups of liquid.
  • Stir in 2 tablespoons of lemon juice
  • Add pectin and bring to a boil.
  • Add sugar cup per cup to match the measure of your corn liquid. Stir to dissolve sugar.
  • Bring pot to a rolling boil. Boil for one minute while stirring constantly.
  • Remove from heat. 10. Ladle hot corn cob jelly into hot jars.
  • Adjust lids and bands.
  • Process in a boiling water bath for 10 minutes.
  • Add enough water in the canner to cover lids with one inch of water
  • Start time when water is boiling

Yield: 5 half-pints


Cooking Bread in a Grill

Kitchen DIY: Cooking Bread in a Grill

Cooking Bread in a Grill
Buy at Amazon

One of the main reasons I write books like this is to help promote the notion that anyone can solve their problems with a little out of the box thinking. This article on cooking bread in a grill is just one example.

Most people think you have to have an oven to bake bread – not true – all you need is a source of steady and controllable heat. Bread can be baked anywhere you can get controlled heat

Once you learn how to separate requirements from results you will be surprised at how many ways you can see to get the job done. The big thing to remember with baking on a grill is that it is hottest near the flames, so elevate the bread (even if you need to improvise.

Cooking Bread in a Grill

A grill thermometer is adequate for a good bread Another important thing to note is that to bake perfect bread you need to be able to control both time and temperature. Since most grill have a thermometer on them, you should have it under control, but you may need to add a thermometer, or experiment until you learn just the right sized fire for your recipe.

Depending on your grill you may need to bake on the top rack Rolls and buns will probably bake in 15 to 20 minutes and loaves will take 20 to 30 minutes depending on their size and the grill’s temperature. If you are making an entire meal – either to show off during a barbeque, or in some grid down emergency, timing is important.

Cook the bread before the meat. This allows the bread to cool, and grease from cooking meat makes the temperature unstable, and the smoke and soot from burning grease can stain your bread. Grills don’t circulate air as well as ovens do, which can lead to uneven heating. You may need to rotate your bread halfway through baking to have even cooking.

Grilled bread tastes wonderful There is also a tendency for flames to burn the bottom of the bread, so keep the flames low and the bread elevated on a rack.