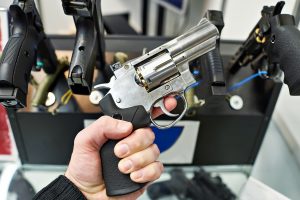
Revolver Dan Wesson in the hand of the buyer in the arms store
If you are considering purchasing your first handgun the options can be overwhelming. There are many choices out there and you want to get the best value and enjoyment out of your handgun.
An estimated 55 million Americans own guns, and handgun ownership is up 71% in the last 25 years. There are an estimated 111 million handguns owned in America.
And gun manufacturing has risen sharply over the last few years too. There are many options for handgun purchases.
Unfortunately, this means making a decision about your first handgun can be even more challenging.
There are numerous online guides and various advice columns, but you just end up with more guns to choose from.
Don’t worry. We can help.
We’ve put together 5 essential tips when purchasing your first handgun.
Let’s go:
9mm Is a Great Caliber to Start
Buy at Amazon
A great starting point is to think about caliber.
And a 9mm pistol is a great place to start for a first-time handgun buyer. The weapon is the primary sidearm of the United States military and is used often as a service pistol for law enforcement agents.
Considered very easy to learn to shoot, the 9mm also has the advantage of being easy to clean.
You will also want to factor in ammunition before you make a purchase.
Think About Ammunition
One mistakes beginners to handgun purchasing make is they don’t think about ammunition and the cost of ammunition.
For your initial pistol investment to last and have long value, you’ll want a handgun that fires ammunition that tends to be inexpensive and is readily available.
You can’t go wrong with 9mm for ease and affordability of ammunition.
Test Fire
Getting the proper first pistol for you means test firing the weapon before you decide. Choosing a nearby gun store with a firing range will allow you to gauge the weight and feel for the pistol.
At the same time, test firing a handgun will allow you to talk directly to gun shop representatives. They can give you valuable advice as well.
You’ll want to talk to them about a gun safe too.
Get Security For Your Handgun
First-time handgun buyers may not be aware of the security issues surrounding owning a handgun.
Unfortunately, guns are one of the most targeted items for theft in home burglaries. An estimated 600,000 guns are stolen every year in the United States.
Investing in a safe and an alarm system is a great idea. The last thing you want is for your new handgun to fall into the wrong hands.
Decide on Usage
If you are planning on using your first handgun primarily during daylight hours, or inside a shooting range, you won’t need to worry about lighting.
But if you are planning on firing your new handgun in the dark, you may want to factor in using lights. Sites like bestweaponlights.com offer a number of great options for lighting.
Make a Great Choice
If you follow those simple tips, you’ll find the right handgun for you. The next step is finding time for the range.
Practice makes perfect when it comes to marksmanship.
One of the best ways to improve hunting skills is to use a slingshot. But how to shoot a slingshot is something that not many of us know. But that’s okay because the learning process is pretty basic and easy. And most importantly, it’s essential that you learn how to use the tool properly if you want to avoid casualties or damages.
A slingshot is a weapon that needs to be handled with care and responsibility. So please continue reading if you want to understand the correct away how to shoot a sling shot safely.
We’ve listed a detailed guide on this particular topic so that you can enhance your hunting skills. The article also includes some valuable tips on how to use the tool properly. So let’s begin!
Here’s a clear idea of what awaits below:
What you need in order to learn how to shoot.
Ammunition loading.
The correct way of aiming your shot.
And finally, getting ready to fire.
Gather everything you need
When learning how to shoot a weapon like a slingshot, there are a few things you need to gather beforehand. This helps in saving ample of time and directing your complete focus on the process of learning instead of struggling with finding materials.
What you will need:
Ammunition
Slingshot
We would advise you to use dense and round objects. For ammo, feel free to select from fishing sinkers, small rocks, glass balls, and marbles. Ball bearings and marbles are considered to be the best since they come in striking colors. And this makes the process of tracing and evaluating your shots easier.
The method
Ammunition loading
Once you gather all the required materials, it’s time to begin loading the ammo. Hold the bottom of the slingshot with either the right or left hand, whichever feels more comfortable. Use the opposite hand to place your ammo in the center of slingshot’s pouch.
Please make sure that the ammo doesn’t swing away as this tends to mess with precision and accuracy.
Use the fingers, preferably the index finger and thumb, to hold the ammo in place. At this point, the strap and thumb need to be in a parallel position.
The correct way of aiming your shot
Hold the slingshot properly
To shoot in a more comfortable position, you need to use the principal arm. This also helps in producing a better and more accurate shot. The secondary arm is to pull back the ammo. Such a posture provides the principal arm with the much-needed strength to hold the slingshot in a steady position while releasing.
Now grip your slingshot in a perpendicular or flat manner. This you can do by holding up the weapon and raising the arm. Some shooters prefer to allow the forks of the slingshot to point upward while some like to angle the tool slightly along the side.
Since slingshots come in different lengths and widths, you might have to tweak the way you hold it based on the size and form.
Watch your stance
The way you stand determines how comfortable and confident you are with your aim. Place the right foot forward while drawing back the left one. At this stage, the left foot needs to point slightly outward. This applies to right-handed shooters. Left-handed hunters can do the exact opposite. Once the feet are positioned properly, bend your knees a little bit.
Such a stance enables you to create a solid foundation by keeping the feet pointed in the forward direction while also maintaining a shoulder-width stance. Failing to do so might keep you from striking that perfect balance in order to aim accurately.
Place the slingshot sideways
The shoulder of the principal arm needs to front the target. So you can do this by raising the slingshot perpendicularly while also making sure that it marginally slants away from your body. This gives you plenty of space to free the arm to yank back the band.
Breathing is important at this point
Before releasing the thing, it’s important to take a deep breath. This prevents the possibility of any bodily movements, which improves your aiming capacity.
Getting ready to fire
This part is crucial when it comes to learning how to shoot a slingshot. Take your time to aim to the target. There’s no need to rush, you can do it slowly too. Your head needs to be positioned in such a manner so as to marginally enable you to check the target. And this way you will also stay clear from those bullets.
It’s best to use the dominant eye only, so closing the second eye is not such a bad idea. But if you wish to train with both eyes open, then that’s okay as well. Because such a practice goes a long way in improving your skills and performance level.
Once you’re ready with the correct posture, it’s time to take the shot.
Fire the shot
Pull the slingshot band
Make sure that the band is completely stretched and that all triangles are clearly visible. They also need to be shaped by your slingshots’ splits.
Discharging the band
It’s time to flick the wrist forward to shoot your ammo and strike the target. Keep your thumb away from the projectile at this point. Failing to do so might lead to a painful injury.
Congrats, now you know how to shoot a slingshot!
If you’ve gone through each and every step discussed in the article above, then you’ve gained a little more confidence as a shooter. We’ve made it a point to make this guide of how to shoot a slingshot as simple as possible. So the instructions are easy to understand.
You need to keep in mind that practice is key. You have to keep going at it if you want to improve your skills. The goal is to make not only shooting but also aiming a more comfortable experience.
So please continue learning while also helping us improve by providing your feedback at the bottom. Feel free to leave all your comments in the section below. We hope you enjoyed reading the article!
About the author:
Tony Lohman (the founder of OutdoorHole) has been writing about outdoor sports and activities for many years now. As an outdoor enthusiast himself, he knows what kind of gear to use and how to use it. And that is what he shares with fellow adventurers on this platform. His valuable guides and tips are useful for beginners seeking to find the reliable answers.
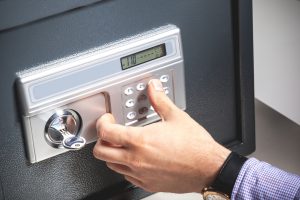
Looking for the best gun safe to add to your home? We’re sharing everything you need to know to pick the one that best suits your unique needs. Check it out!
hand opened a safe, close up
There are so many gun safes you may actually get lost if you walked into a warehouse that sold them.
Choosing a safe can be daunting, especially when you just expected to find a basic box to securely store your guns and other valuable belongings.
How could it be so complicated? You ask in utter confusion.
It really doesn’t have to be complicated. In a world of awesome customization options for pretty much anything you could ever want or need, manufacturers just get carried away.
There are two things you can do in this moment. Take a gun case quiz, and read on for some great info on how to choose a case for your needs.
Ask Yourself: Why Do I Own Guns?
No, this is not an existential question. It’s merely a way of parsing out what your basic gun safe needs are.
If you own guns for home defense, you need to access your guns quickly. Which is wise because 20% of homes will experience a home invasion. Period.
You may be storing your weapons to keep them away from children. You need something small that might even be attachable to something solid. It would have to have a quick release mechanism for easy access for you, and you only.
If you own guns for self-defense away from home, you need something portable. Something portable and concealable in a vehicle is useful for mobile defense.
Or you could just be a hunter and or collector of guns and valuable rifles. In this case, you may just want a large heavy case that is fireproof and more than burglar resistant.
Why Do You Need A Safe?
There are several reasons why people buy safes. Some of these include local laws. Theft or accident prevention. Damage prevention.
If you are buying a safe to comply with laws, make sure you understand the requirements. The state of California probably has the most strict gun safe laws in the country. If you are really concerned about staying within the law, California laws could be the gold standard. (This is a guest post – and they are not saying commifornia gun laws are the gold standard, but only that if you are within their limits you are probably within the law of every state)
But even so. Make sure you know your local regulations.
Of course, these legal specifications can never guarantee protection against theft.
Most cases are designed to withstand things like crowbars and prying tools.
They won’t withstand drills and other power tools.
And make sure the case is actually fire tested. It might claim fire safe. But if not actually tested, you never know. And whatever is inside might combust or melt anyway because of temperatures.
Also, remember, with gauge steel, the lower number is a thicker steel.
How Fast Can It Open?
Going back to the first question. Do you need to open the safe quickly?
Keyed locks are more reliable than most. You insert the key, turn, it opens. No jamming.
But, with keyed entry, you risk losing the key.
Combination locks are either mechanical or electronic.
Can you remember and quickly plug in numbers or turn a dial in a pinch? Then this safe could be for you. Otherwise, if you have a bad memory, go for the keyed entry.
Conclusion:
These are only a few small considerations when it comes to choosing a safe. But what we just went over are the base considerations you need.
So, now that you have the basics. Go shopping. You’ll find something you need in no time.
I got this idea from Dave Canterberry so I cannot take any credit. This has been done on youtube many times, but I don’t like seeing, I like doing…
This Sling Bow was a fun project, and if I spent the time to practice, this has the potential to be a useful tool. However, right now I am only shooting it for fun.
You do need to be careful with this, its not a kid’s toy, there is a potential for injury if its misused.
At the base form a sling bow is just a normal sling shot with some type of rest built between the arms to hold an arrow up. On my sling bow, I used a split ring held in place with two pieces of cord. More advanced sling bows use archery whisker biscuits.
The problem I had was that since I was just experimenting I used very cheap kids arrows, so they were not long enough to fully achieve the power this little device could make.
I think with experience and practice this would be a useful tool. I also think it needs a better set-up than my split ring. Canterberry’s bow uses a whisker biscuit to hold the arrow. I need to try that.
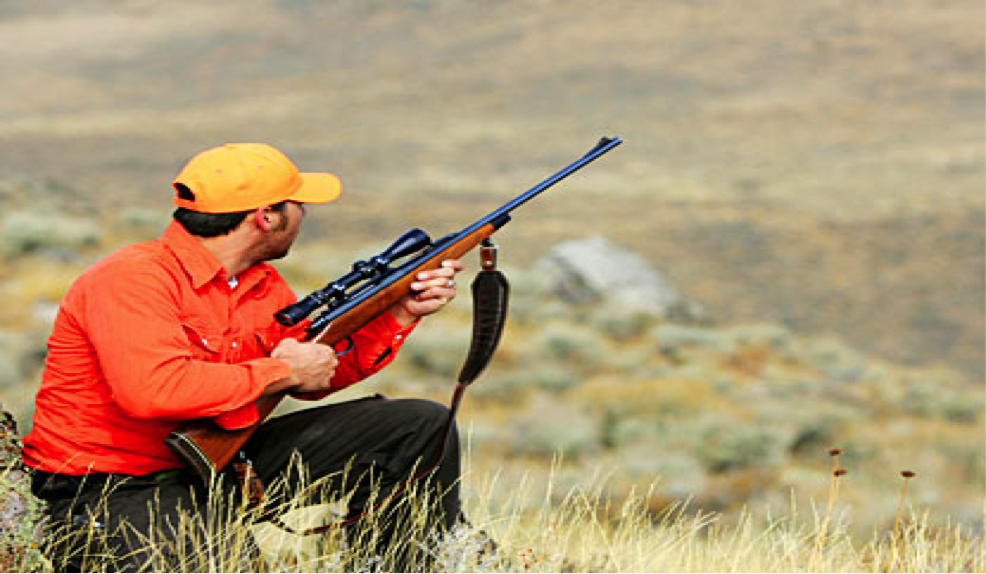
Tips for Choosing the Right Scope for Your Survival Rifle
It’s hard to describe the joyful feeling when you finally have the opportunity to enjoy yourself and pursue your shooting/hunting hobby. However, you need a proper scope that fits your needs and a scope that fits your gun; in other words, you need a top quality rifle scope that performs 100% without breaking your bank.
You will find so many rifle scopes out there being sold today, and you might wonder exactly how you are going to choose the perfect scope. That will all depend on what kind of gun you plan on shooting with, shooting you plan on doing, and what type of reticle you need/want.
Let’s browse through the fundamentals that you need to keep in mind when choosing your rifle scope and once you know the basic principles of how the rifle scope work, it will be easier for you to select the perfect scope that fits you the best. It is also important to get a scope designed for your rifle caliber. A rimfire scope won’t last on a large centerfire rifle. If you have a larger rifle you need a stronger scope. Here is an article on how to choose the best scope for a 308
How Does a Rifle Scope Function?
What the rifle scope does is to magnify the image of your target and the area surrounding your target. Depending on your scope’s type, the scope will magnify the image significantly to what the naked eye can see.
Buy at Amazon
But, exactly how is the process that allows your scope to magnify an image? Simply put, inside the scope there is a different type of lenses, and these lenses work to magnify the image that you see when you look through the scope.
Lower power scopes will have smaller lenses, and they are usually shorter while the higher powered scopes include bigger lenses and will come in bigger sizes as well.
All scopes will include reticle (cross-hairs or a dot) that are built in feature to easily mark the center of the Field-of-View that you see when you look through the scope. It will take you a lot of practice to properly shoot accurately using open sights, and there are things that you need to be aware of at the same time you are focused and waiting for your target.
You might be comfortably waiting in complete silence in your spot, having everything ready and set for your target to appear in your scope and then you suddenly start to “panic” and wonder if the front blade is perfectly aligned with the rear for elevation. Exactly at that moment, your prey suddenly appears but is way out of focus because it is farther away from your eye than the sites.
You rush quickly to set the focus, and then suddenly your crosshair appear completely out of focus! Evidently, to avoid this, you need to prepare, do your homework, learn how to use your scope perfectly and practice if you want to be able to shoot perfectly.
A quality rifle scope removes and completely eliminates all these problems. What you are supposed to do with a scope is to focus on the target and align the center where you want the bullet to hit and then squeeze the trigger. That’s all there is to it! Furthermore, a scope will magnify your target prey, and therefore you will see your target clearly. This will give you plenty of space to perform a precise shot. With a scope, it will be significantly easier to shoot and hit bulls-eye of a target than without one.
What Is The Main Parts of the Rifle Scope?
Eye-Piece:
This is the metal unit that holds and supports the ocular lens.
Ocular-Lens:
This is the lens that is closest to your eye when you are looking through the scope.
Power-Ring:
This is the ring that will allow you to change the magnification of the scope, in other words, this feature allows to you change the distance of the internal lenses.
Windage:
Windage adjustment is measured in Mintue-of-Angle (MOA). When you turn the knob on your scope, you will “feel/hear” a click and each click changes the aim point to a certain amount that is measured at every hundred yards. For instance, a ¼ Minute-of-Angel (MOA) will change the aim point ¼ of an inch to the left or right at hundred yards.
Eye-Relief:
This is the distance measured from your eye and to the ocular lens. What you should do is look for a scope that will offer you plenty of eye relief to avoid experiencing the recoil of your gun when it slams back and hits you very hard, then you will end up with a Scope-Eye! Look for plenty of eye relief to avoid the Scope-Eye!
Tube:
The rifle scope is a tube assembled into another tube. The inner tube is made of lenses that work out what to do with the light that enters the scope. On the other hand, the outer tube is intended more for protection purpose and provides a strong objective bell and eye piece bell.
When searching for the perfect rifle scope, it is extremely important for you to know the tube’s diameter because the rings that are attached to the mounts come in different tube diameters.
Nearly all scopes that are made in the United States include tubes with 1-inch diameter (measured just above 30millimeters). It is NEVER recommended to force or tighten down 1inch ring on a tube that is measured 30 millimeters because that will most definitely damage your scope.
Eye-Bell:
This is the house of the eye-piece and tube.
Objective-Bell:
This is the housing of the objective-lens.
Objective-Lens:
This is the lens that gathers the light that will enter your scope. Generally speaking, if the scope has higher magnification, then the objective-lens diameter will be larger. If you happen to own a 4-12x scope, then 40-millimeter objective lens will be fine.
However, if you are interested in buying 50-millimeter objective lens then have in mind that it will be significantly more expensive and most probably not very beneficial for you regarding light transmission. It is not only more expensive but also you have to deal with more weight and higher mount weight.
Elevation-Adjustment:
Elevation Adjustment will shift the aiming point up or down and is used to sight in your scope.
Adjustable –Objective-Lens (AO)
This is the lens that will correct parallax error (more on parallax error below).
Exit-Pupil:
Exit pupil is the diameter of the light that leaves the eye piece and most of the time it is measured in millimeters (mm). A large exit pupil is extremely beneficial under low-light conditions and during the night. The more the exit pupils increase, the brighter image will appear in your scope.
You will need a scope with at least same diameter as the dilation of your eye’s pupil. Your eye will dilate around 2 millimeters during bright sunshine and in darkness around 7 millimeters. It is extremely easy to calculate the exit pupil.
What you have to do is simply divide the diameter of the scope’s objective lens by the magnification that the scope is set at any giving time. For instance: 50-millimeter scope, 50mm/10. A 3-9x40mm scope has an exit pupil of 13 millimeters and 4.4 millimeters at 9x.
Obviously, a 50 mm objective scope will give you considerably more magnification in low light situations than 40mm will offer. Generally speaking, standard eight times (8x) magnification should be enough, but that’s just my opinion. You should investigate and find the magnification that you think will fit your needs the best.
What Else do you need to Know?
Magnification:
Basically, all the rifle scopes out there come with some magnification. Some with fixed with marked with a number and an X (For example, 4x). This means that the scope will magnify the image four times (4x) more than you can see with the naked eye.
Another example: Scope that is marked like this, 3-9x50mm, means that the scope will magnify the image between 3 and nine times (3-9x) more than you could see with the naked eye.
The 50mm (millimeters) means that the objective-lens come with a 50mm diameter. It is extremely beneficial to have variable power rifle scope rather than fixed one because it will allow you to adjust the magnification and adapt to any situation that you are in.
However, the downside is the hefty price tag. If you plan on buying a variable power scope, you have to make sure you are investing in a good quality variable scope. The bottom line is that once you get a great quality scope, you won’t have to worry about losing your –zero- and you won’t require frequent sighting in. If you can afford a good quality variable power scope, by all means, get one!
Field-of-View (FOV)
What you see through your scope when you look through it.
Parallax-Error:
If your scope is not perfectly centered when you look through the lens, a small error can appear that is called parallax error. This usually happens when you shoot at a distance that your scope is NOT factory set for. High power scopes of, for example, 12x and more, are quite affected by parallax error.
Parallax error is not something that you should worry too much about because it’s so minimal and if you are a long-range shooter (over 500 yards), you should buy a scope with adjustable objective lens. If so, you just set the range that you think the target is from you, and you are all set no more parallax error.
Light-Transmission:
Light transmission calculates precisely how much of the light enters through the objective lens and exits the ocular lens. Every top quality scope will let almost all the light enter through the lens which makes the scope easier to use when you are shooting in low light conditions.
Transmission numbers are quoted in % (like 95% resolution), but you should consider that those numbers are hyped by manufacturers of poor quality scopes, they tend to inflate this number significantly. You should be fine by trusting the numbers from the big reputable rifle scope manufacturers.
Resolution:
A top quality scope will, of course, come with good resolution and will have a crystal clear, sharp sight picture, while on the other hand, poor quality scopes will have blurry and reflect bad quality image through your scope. Those poor quality manufacturers can easily fake high-resolution number on their scopes, but it is impossible for them to fake a good resolution.
Reticles:
Generally, part of the scope that shows the center of the Field-of-View. This is where you select where you want the bullet to hit. Not too long ago, all you could get was just a simple cross-hair, but nowadays, the choices are endless. Basically, the reticle that people go for is the Duplex, and there are others top quality products available on the market that you should thoroughly research.
Top quality scopes today include a wide variety of reticle, so it is important for you to choose the one that you think will fit your hunting style the best and if you are a long range shooter, you might want to go for Ballistic Mil-Dot, they are exceptionally easy to use.
Lens-Coatings:
If the scope you plan on buying does not come with coated lenses, please, by all means, don’t buy it! Just about all scope lenses have materials to reduce glare, make a better resolution and protect the scopes from scratching. Also, always use lens covers when you store your scope.
Sealed, Water and Fog Proof:
You should make sure that your scope is properly sealed and also water and fog proof to avoid any small things (dust, moisture, humidity, etc.) entering your scope.
Do I Need a Powerful Scope? What Power Should I get?
That will entirely depend on what type of shooting you plan on doing and how you plan on using your scope. Here are some key points for reference:
100 yards or less = 7x
100-200 yards = 7x-9x
200 yards and more = 9x-12x
You Get What you Pay for!
Like with all products that you buy, you will most definitely get what you pay for. It is obvious that you cannot expect a $150 scope to perform just like a $1000 scope. Spend what you can in your scope, it will pay off eventually. Invest in a good quality scope. Your rifle will always shoot when you pull the trigger, but without a good quality scope, your rifle is useless!
Good quality scopes for the average hunter can range from $400-$1000. If you need a scope with high magnification and you want to shoot +400 yards, then the price tag will significantly increase.
Final Thoughts
Always, no matter what, go for quality! You won’t regret that you did. After you have done your research and found your quality scope that you want to buy, go for something just a little bit better. You will never regret buying something that is a little bit too good. Don’t knock your head on the wall afterward, wondering why the heck you didn’t buy a scope that was good enough!
Douglas Brooks is the founder of ProReviewly.com. He was enthusiastic about hunting from the first shot. He is also Rifle optic guru.