I like using binary exploding targets when exposing new shooters to the joys of shooting.
It rewards the shooter and gives immediate positive feedback. I haven’t used them as much as I could because of the expense, and the fact that typical exploding targets need a centerfire rife to detonate.
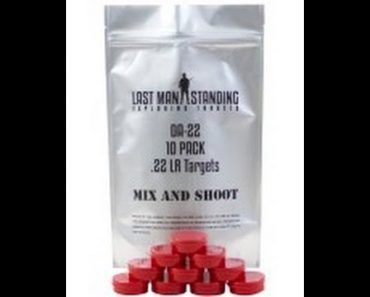
When I found the Last Man Standing targets, I knew they had something special. Their targets are affordable, and they have some that are reliably detonated by .22lr.
I did learn that when using .22 Sensitive Exploding Targets, you get much more reliable detonation when you attach them to a hard surface with the enclosed stickers. I was able to get some to detonate against the ground, but it was MUCH more satisfying when the detonated against a hard target.
I also learned in my last pumpkin shooting video, that while one 22 Sensitive Exploding Targets makes a nice satisfying crack, mixing all ten and shooting at one time makes a scary big “boom” – I won’t do that again for a while…
There are a lot of manufacturers of binary targets, but I find this one to be affordable and innovative. I particularly like their 22 targets.
I saw this brilliant idea on YouTube and had to share it. A very smart guy figured out how to make a Bottle Cap Fishing Lure out of a discarded beer bottle caps.
He even made a business of recycling buckets of beer caps harvested from local bars until he was sued by beer manufacturers for use of their copy-written logos.
I would link to the website, but it is no longer used as the bottle cap lure guy – it looks like someone else bought it, which is a shame, as the Bottle Cap Fishing Lure is a really cool idea.
All you need is:
Beer/Soda bottle top
Split rings
BB’s or small split shot
Treble hook.
Tools are simple also:
Hammer and small nail/Drill and small bit
Pliers
Instructions:
Using your fingers, press the sides of the cap until it buckles
Before pushing the two ends together, place a couple BB’s or shot into the cavity, so that they can rattle.
Carefully drill or punch a hole at either end of the folded cap. It may help to slightly flatten the ends with your pliers.
Thread a split ring into each hole
Thread a Treble hook into one of the split rings
Go fishing…
I would love to post pictures of any catch you have gotten using this piece of DIY fishing tackle.
The OODA loop is a training concept used to explain the decision making process and to help develop the ability to process information and make GOOD decisions under stress.
It was developed by a young air force fighter pilot in Korea named John Boyd, and is credited with playing a large part of the success in air combat during that conflict.
The OODA loop is an acronym describing the steps needed to make decisions it stands for:
Observe
Orientate
Decide
Act
First you need to observe an event – say you are walking up to an automatic teller machine in a “bad” part of town and you observe two male youths loitering near the terminal.
You would then orientate yourself based upon your observation – are they waiting for a friend, or do they seem to be waiting to mug a bank customer? How important that you get the money at THIS location.
Once you have gathered and processed the information you need to decide what to do – pick a new atm, talk to the guys, grab your gun; these are all decisions you could make and some are better in certain situations than others.
What is important is, that after you have made your decision you act with decisiveness and confidence. Half steps or hesitant action in interpersonal conflict gets people hurt. Avoidance is almost always the best answer, but sometimes the only real option is to fight.
When it is time to fight it is time to stop talking and to dominate the exchange.
Now, why the OODA loop is important is because once you understand it, and realize that all decisions run through these steps – you can use this to “get inside your opponent’s OODA” – meaning if accosted you can take action to make them react to you.
As an example, an older post of the former TN handgun permit scenario video shows when a bank robber runs out and points a gun at you – it is not the time to try to draw on a cocked and sighted pistol.
The robber has already decided to take action if confronted and all he has to do is send a command from his brain to his trigger finger, while the armed citizen must see the robber, process that they are a robber, and they are pointing their gun, decide the tactical and legal repercussions, decide to draw, draw, and fire.
Long story short – Action is always quicker than reaction
But what happens if you do something that makes the attacker have to reobserve, reorientate, make a new decision tree, and then react?
This is one reason I recommend concealed carry rather than open carry – going from – Hey I am going to rob this guy to heck this guy has a gun is a large leap for a criminal to make and would most likely ensure I would have a split second to take action.
Remember, there is a big difference between theory and practice, but the more you understand theory, and practice the greater chance you will survive when crisis calls.
I like gadgets and things that make life easier, BUT – I think it is vital that we don’t loose the ability to perform essential tasks without the aid of specialized equipment.
Today we will describe the “old school” method of rifle boresighting that allows you to sight in your rifle without the aid of a laser bore-sighter, collimator, or other equipment.
This is a very simple procedure to do. However, you need a bolt action rifle that has a removable bolt.
How to Boresight a Rifle
Simply mount your scope and center the cross-hairs.
Ensure that it is level and balanced on the rifle.
Securely mount your rifle on a bench. You can use a vice. However, in the video I simply used the rifle’s bipod and some sandbags. It is essential that the rifle not move as you perform the sighting in procedure.
Remove the barrel and look through it.
Center the bore of the gun on a target set at the range you want to sight the rifle to.
If the rifle is securely held, and the bore centered on your target, all you need to do is to move up to your sight. Center your scope reticle on the center of the target.
This should get your first shot on paper, and if care is taken, it should be pretty close.
Not everyone cleans their pistol magazines, but that doesn’t mean they don’t need attention. Personally, I used to neglect my pistol magazines. This was because I had a hard time getting the baseplates off of my Glock magazines.
This post shows an easy trick to help with Glock Magazine Disassembly
They have a detent button in the center of the baseplate. Once depressed, the plate is “supposed” to slide off – unfortunately I never have it that simple.
Luckily, I was shown a way that makes disassembling a Glock magazine very simple.
Use the Glock Armorer’s Tool!
Insert the tool all the way in until it stops at the handle.
Push the tool (with the baseplate sliding) forward. You want to leverage the plate forward using the handle of the Glock tool.
Unless you like searching for parts or getting smacked in the face by a flying spring, use your hand to cover the bottom of the magazine before you slide the baseplate completely off.
This does take some practice, but believe me, once you understand how to take the magazines apart using a punch you will find the process much easier. I have never been able to consistently get the mags apart without using this tip.