How to Make a Hot Wire Cutter


I have wanted to build a hot wire cutter for some time.  Once I found out that Styrofoam could be used to make patterns for aluminum casting.

This is because it would burn out in a manner similar to lost wax casting.  I knew it was just a matter of time before I had to have one.

Since I got back on a pyro video bug and bought some nichrome wire to make rocket ignition squibs.

I decided now would be a perfect time to also use it to build a DIY hot wire cutter.

This was a very simple project that only took a few minutes time, and was built out of scrap I had laying around.

Once my DIY Hot Wire Cutter was finished, the boy and I had a grand time slicing up leftover Christmas Present packaging.

DIY Hot Wire Cutter
DIY Hot Wire Cutter

My wife was not pleased at all the scraps and chunks of white Styrofoam.

Eventually, even the boy said it was “too stinky”, but it has promise and I am already planning out new projects and enhancements to my small cutter.

I used this diy hot wire cutter to help insulate my shipping container.  However, I made it so I can use Styrofoam to cast aluminum.

This goes to show having skills and making stuff can always come in handy.

diy fishing gear

How to Make Portable PVC Fishing Gear

How to Make Portable PVC Fishing Gear
Buy at Amazon

First of all, before I show you how to make portable PVC fishing gear I want to rant about prepper plans that are not as smart as many think.

Generally speaking, I think that for the VAST majority of preppers, having a “mountain man plan” of bugging out to the wilderness and living off the land is a dangerous fallacy.

In fact, there simply isn’t enough land to support everyone that has the skills to do so.  Additionally, many individuals even think they have the skill level but don’t.

Although this may be true, it does not mean I don’t think that a well-rounded prepper should not have wilderness survival skills and equipment.  Nor do I think that practicing outdoor skills is not fun and useful in its own right.

Consequently, I am looking forward to teaching Tell about outdoor living as he grows into manhood.

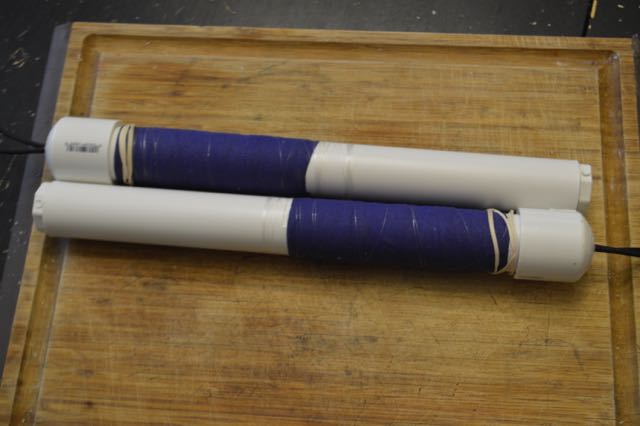
In the meantime, I want to share a outdoor living DIY tool.  It is a PVC fishing setup that takes up very little space in a pack, and is pretty versatile if you have the skill to use it.

Alternatively, if you really want a sturdy line, you can use braided fishing line.

How to Make PVC Fishing Gear

Parts

  • 3/4-inch MIP PVC plug
  • 1 inch diameter schedule 40 PVC pipe (12-inch piece)
  • 1 inch diameter PVC cap
  • 18 inches black parachute cord
  • 1 roll athletic tape
  • 80 feet 3- to 10-pound-test fishing line
  • 2 thick 1-inch-diameter rubber bands
  • 3 of your favorite fishing lures
  • 6 size-10 fishing hooks
  • 8 size-5 split-shot weights
  • Black spray paint (optional)
  • Hacksaw
  • Drill with 1/4-inch bit

Procedure

If you’d like to have a black fishing pole, paint all of the PVC parts now. Let them dry near a heat source for an hour, or overnight at room temperature.

  1. First, insert the ¾ inch MIP PVC plug into one end of the PVC pipe.
  2. Next, cut a ½-inch-long slit into one side of the cap. Make the slit twice as wide as the saw blade is thick.
  3. After that, drill a ¼-inch hole through the top of the cap.
  4. Tie the ends of the parachute cord in an overhand knot and thread the other end of the resulting loop through the hole in the cap.
  5. At the open end, cut a ½ inch long slit into the side of the pipe.
  6. Put the cap on the pipe. Starting ¼- inch from the base of the cap, wrap 4 inches of pipe with athletic tape.
  7. Cut a 1⁄16 inch deep groove across the pipe 4 inches from the plugged end. Do not cut through to the inside of the pipe.
  8. Tie a clinch knot into the end of the fishing line. Make sure the line rests in the slit, and pull the knot tight.
  9. Pull the fishing line toward the plugged end and wrap a 3-inch piece of tape around the pipe to cover the knot. This will not only hold the knot in place but also ensure that the line doesn’t snag on the knot when cast.
  10. Wrap about 80 feet of fishing line around this piece of tape. Don’t cut the line yet. Just cover the wraps with the rubber band to hold them in place.
  11. Using a clinch knot, tie your favorite lure to the end of the line.

Add Lures:

The inside of the tube is now your tackle box. Fill it with extra hooks, split shot, lures, and bobbers. You can even put a pocketknife in there.

Finally, put your newly tied lure into the pipe as well. Capture the fishing line in the gap formed by the slits in the cap and pipe. This gap will prevent the line from getting kinked and weakened.

Now you have a highly portable rod and tackle box.

To Use:

  1. First of all, take off the cap and pull out the tied lure. Replace the cap and remove the rubber band.
  2. Next, pull 3 feet of line off the spool and hold the rest of it on with your thumb. Swing the lure over your head in a counterclockwise motion. When you’ve got it swinging as fast as you can, whip the lure toward the water and take your thumb off the spool.
  3. Finally, slowly wrap the line around the pipe to reel it in. When you feel the fish bite, give the line a quick jerk to set the hook and reel it in.

I like having some portable fishing gear in my kit but its not as efficient as using normal fishing gear.  Plus I miss not having my electronic fish finder.

If you have pictures of you using such a piece of equipment send them to me, and I will post them here…

How to Make DIY Padding for Business Cards or Homemade Notebooks


DIY Card Pad
Buy at Amazon

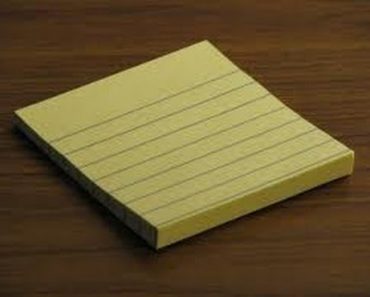
As I said in the video, today’s project is not a “prepper” project.  Rather it is something I did to make carrying my business cards easier.

I just wanted to share how to make a DIY card pad with you in the event that it may make your life a little easier as well.

You see, I don’t like carrying business cards.  This is because they get wrinkled and bent.

What this project does is connect them into a pad just like a notebook or memo pad.  Something that may be of interest is

I have heard of a particular technology guru that buys sheets of two dollar bills from the US Treasury, has them perforated between bills, and then padding compound applied to make tear off pads of money – He likes the wow factor.

To make pads of business cards (or anything else), simply clamp your paper together so that it is stacked neatly and then apply a small amount of padding compound to one of the edges.

The instructions on the bottle say to use a brush, but I find it simple enough to use a finger.

Let dry and add a few more coats.  I find three thin coats holds the cards stable, but does not make it extremely hard to remove them as needed.

I have a recipe for homemade padding compound if you want to use this in bulk.

This would be useful to bind printed off copies of information like in my Downloads section.  Especially if you wanted a backup to electronic storage.

If your interested in seeing a video like this let me know, otherwise I will keep it in my “neat to know, but not something other people find interesting” pile.

More PVC Projects for the Outdoorsman

Book Review: More PVC Projects for the Outdoorsman
Buy at Amazon

Forbes’ first book, PVC Projects for the Outdoorsman, became a runaway best-seller with do-it-yourselfers, outdoorsmen and survivalists alike.

in his new More PVC Projects for the Outdoorsman book he’s taken his no-frills approach to creating inexpensive shelters, primitive weapons, sturdy outdoor furniture and hunting and fishing gear and come up with more than 30 new projects, all made with durable, cheap PVC pipe.

Using photos and easy-to-follow instructions, this book guides you through such projects as a slingshot, brush bow, shooting bench, spotting scope stock (this pvc stock is a favorite of mine), bow-fishing reel, wall tent, animal pen, pickup truck shelter, firewood cradle and many more.

If you failed woodshop but still want to enjoy the dual satisfaction of building something yourself and saving loads of money in the process, this is the perfect do-it-yourself book for you.

The book is pretty cool, and the concepts inside are great.  I love the idea of using something so readily available inexpensively to make items that you may need.

PVC projects are in the reach of almost anyone, the simple projects give confidence to tackle larger and more difficult things.  It is a good step in the incremental process of becoming “handy”.

I have made several projects out of PVC pipe, and find it a great DIY material.

PVC Projects for the Outdoorsman

Buy at Amazon

In PVC Projects for the Outdoorsman you will learn how to make inexpensive and practical gear such as snowshoes, an equipment raft, shelters–including a teepee and a portable ground blind–a boot dryer and even a blowgun in your home workshop out of durable PVC pipe.

Photos and easy-to-follow instructions show you how to construct more than 30 projects.

I haven’t done all the projects in the book, but it has given me a lot to think about as well as fertilize my mind to keep it actively looking for other ways to use common materials.

This book was so popular that it spawned a sequel More PVC Projects, I have that one also.

The idea of using PVC to make things is pretty cool, at least in my own opinion.  It is workable with few tools, is cheap, and you can buy it in any town in the nation.

PVC Projects for the Outdoorsman is a good book to have around the house as it shows how to start MacGyvering solutions out of common materials.

I use it as a source of ideas, and through the ideas given I have used it to make garden hoop houses, tarp coverings for my rabbits, and a rabbit tractor, none of which are in the book proper, but the ideas stemmed from the book.