Homemade 48 Hour Crisco Candle

Homemade 48 Hour Crisco Candle
Buy at Amazon

This Crisco Candle is a very simple trick to get a long lasting emergency light for very low cost.

Simply take a tub of shortening, insert a natural fiber wick (I use cotton string) and light.

As the shortening melts it is wicked up and burned. I have heard a tub of shortening can last as a candle up to 48 hours. Personally I have not timed it, but it I do think it can last a while.

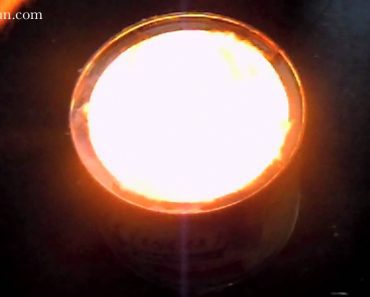
From doing this in my kitchen, I can attest that this crisco candle can put out a lot of light – and it is somewhat adjustable to the light it produces.

If you need more light (or heat) you can add additional wicks – but obviously this will decrease the longevity of the candle.
As with any candle you must use common sense and never leave it burning unattended or in a closed environment.

This Crisco candle is making the rounds on the preparedness sites, and  I wanted to try it out for myself.  I will day that it put out a lot of light, but frankly in most prepper situations, I think the edible fats are more valuable as food than as light – but I understand that others may feel differently.

How to Travel with Liquids Without Having Spills

How to Travel with Liquids Without Having Spills


52 Unique Techniques for Stocking Food for Prepper
Buy at Amazon

If you are backpacking, traveling with suitcases and airports, or packing a get home or get out of dodge bag there are some common similarities that make life easier. Pack only what you need, put the more common items near the top, and be careful when packing things like liquids or they will leak all over your gear.

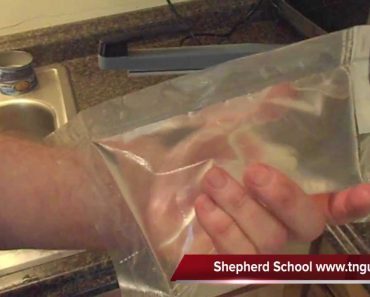
Today’s tip for Traveling with Liquids is an easy way to prevent spillage in your luggage. Simply unscrew the top of your shampoo, conditioner, or any other liquids with flip top openings, place a small square of plastic wrap over the bottle opening and then replace the lid.

This will mimic the safety seal that comes on certain liquids and will prevent any liquid from being released – even if the top is opened in your bag.

I hope this helps, and more importantly, I hope it helps people keep their eyes open for novel and efficient means of solving problems.

I used to travel a lot for work, and have had shampoo or toothpaste bottles explode in my luggage.  When traveling with liquids, having the top open up and the contents leak out is NOT a way to enjoy a hotel stay.

This tip is very easy to do, and it has stopped all leakage in my bags.


How to Make a DIY Olive Oil Lamp


DIY Olive Oil Lamp
Buy at Amazon

One of the constant issues preppers have to deal with is storing enough fats and oils and keeping up with their short shelf lives.

Today’s article on a DIY Olive oil lamp.  This gives you a new use for rancid olive oil that is no longer fit for kitchen use, but still too expensive just to throw away.

One of the historic uses of olive oil has been in lamps.  Lamp quality olive oil is still a major use of worldwide olive crop.

One of the Biblical parables that speaks directly to preppers.  That would be the parable of the ten virgins, Matthew Chapter 25.  It deals with wise ladies bring olive oil for their lamps, and foolish girls not thinking ahead.

Anyway…. Olive oil is great for lighting, it doesn’t smoke is relatively bright.  However, if you use used olive oil, or rancid oil from older storage, is very cost effective.

Olive Oil Can’t Be used in Kerosene Lamps

You can get as complicated as you want as you gain experience.  However, you do need to be aware that since oil is thicker than kerosene it won’t wick up as far.  This means it cannot be used in lamps designed for lamp oil or kerosene.

To make a simple olive oil lamp I use a bit of wire or paperclip, a glass jar, a length of cotton string, and some oil. (In the Selco course I reviewed earlier – he talks about always carrying the makings of such a lamp so that he could construct one as needed during nightly foraging as batteries quickly became extremely hard to find).

Simply bend one end of the wire so that it can hold the string. I like to wind a couple loops using a pair of pliers so that I end up with something resembling a very small key ring and wedge the strung between the loops, but it really does not matter as long as the string is securely held.

I then bend the wire so that the sting is held roughly center in the jar, and around ½ inch above the level of the oil.
With the far end of the wire, I bend it to rest securely on the end of the jar.

Fill the jug with oil. It is not necessary, nor advisable to fill the jar fully, as the wick will only pull the oil up a little ways, and the more full the jug, the greater the likelihood of an accident. I normally fill the jar a couple inches, and use the rest of the jar as a globe.
Dip the wick in the oil, raise it out, light it, and then replace.
As you can see in the video, it makes a very usable light.

How to Build a Tin Can Rocket Stove


52 Unique Techniques for Stocking Food for Prepper
Buy at Amazon

Being able to sustainably cook and heat is something that every prepper needs to plan for. t is not uncommon for modern homes to rely solely upon electricity for both. A rocket stove is able to burn efficiently by using high temperature and a good air draft coming from the bottom of the stove.

Once the basic premise is understood, these stoves can be quickly built from improvised materials at hand. With this in mind, today’s project uses a #10 can as the base, but I have seen commercially built stoves using 55 gallon drums, or even homebuilt stoves out of stovepipe and rock used to pressure can food at a hunting camp.

Tin Can Rocket Stove

Equipment:

  • Tin Snips
  • Hammer
  • Pliers
  • File
  • Gloves
  • Drill, Punch or Nail
  • Marker

Parts:

  • Empty #10 (sometimes you can get these for free from local restaurants, but I bought a bulk pack of chili beans to acquire this one)
  • 4 10.5oz soup/vegetable cans
  • Insulation (Perlite, Sand, Dirt, Ash – basically any flame resistant insulating material)

Procedure:

  • First, remove all labels from all the cans and clean cans well
  • Next, mark and cut hole in No. 10 can
  • Use one of your cans to trace a circle onto the #10 can.  It should be about ½ inch from the bottom of the #10 can.
  • Next drill, punch, or nail some access holes inside the drawn circle so that you can cut out the circle using your tin snips
  • Make sure a can (can B) is able to fit snugly in the hole.
  • Then, mark and cut hole in the side of a soup can (can A)
  • Make sure thathis hole needs to be at the same high as the hole in the #10 can.  It may be best to insert this can into the larger one and mark it through the hole in the #10 can.
  • Since this can needs to form an “elbow”, make sure the can “B” can fit securely in the hole
  • After that, cut bottom off of soup can (can B) and fit as elbow
  • Also, if you can use a can opener, do so, but newer styles cans make this harder, so you may need to use tin snips.
  • Cut and fit the chimney from soup can (can C)
  • Slit can C from top to bottom
  • Cut an arch at the bottom of the can, so it can sit on can B once the stove is assembled.  Once assembled, can C, must sit approximately ¼ inch below the edge of the #10 can.
  • Next, cut a hole in the lid of the No 10. can for the chimney
  • Take a can and center it on the #10 can lid, trace the circle, and cut it out with tin snips.

Assemble

  • First, set can A into the #10 can, ensuring that the open end of can A is facing up.
  • Push can B through the hole cut into the #10 can, and into the hole cut into can A
  • Can A should be centered into #10 can, with a portion of can B sticking out of the Side of the #10 can.
  • Next, push can C into the top of Can B forming a chimney
  • Cut 8 slits ½ inch long vertically from the top of the #10 can
  • Fill with insulation material
  • Go slow, and from time to time gently shake or rap the #10 can so that the insulation settles.  Take care not to disturb the assembly.
  • Then, insert #10 can lid over chimney formed by can C
  • Press the lid down slightly
  • Secure the lid by bending every other tab formed by the ½ slits in the top of the #10 can.  This should leave 4 tabs standing up to hold a cooking pot upright.
  • Another thing to ensure is that the top of the chimney is below the edge of the 4 upright tabs.
  • Make a fuel shelf from a soup can (can D)
  • With the remaining can (or a larger one) cut the can open lengthways and flatten it out.
  • Cut a “t” shape into the can, with the long leg approximately the size of the width of the center of Can B
  • Lastly, leave “wings” slightly larger to keep the shelf from being pushed into the stove.

Start a fire

This stove will get hot! You are warned.

  • First, wad some paper or tinder, light it and drop down the chimney.
  • Next, push small twigs or other kindling sized fuel into the stove through can “B”, it should sit on top of the shelf you just cut.
  • Air will flow into the stove through the channel under the shelf.
  • Finally, as the fuel burns, push it deeper into the stove so that it can fully combust.

How to Make a Zeer Pot

52 Unique Techniques for Stocking Food for Prepper
Buy at Amazon

Today’s project on how to make a zeer pot is something I wanted to do for some time, it is a cheap way of providing some level of refrigeration in very hot climates.

It is also an example of how preppers can learn from appropriate technology supporters as well as missionaries to third world countries.

Zeer Pot technology is used in some very poor countries to reduce food spoilage. It is also the technology behind Latin American ceramic water crocks called Olas which provide cool drinking water in hot arid conditions.

All a zeer pot is a simple fridge made of local materials. It is one earthenware pot set inside another, with a layer of wet sand in between. As the moisture evaporates it cools the inner pot, keeping up to 12kg of fruit and vegetables fresher for longer.

When I saw my local co-op had ceramic pots on sale, I grabbed a few and went to Lowes for some play sand.

My nephew and I stopped up the hole in the large pot with some tape, threw in a layer of sand, inserted the smaller pot, and had a good time filling the space between with sand.

We then put a thermometer in the small pot, poured some water in the sand, and covered the whole thing with a wet towel.

We did get a measurable decrease in temperature, but as it was very humid (and began to rain) we just could not get enough evaporation to make a huge difference. I have seen many people get temperature differences of up to 20 degrees using such a simple device.

During the Crusades, Saladin were able to use this technology (along with specially designed shade buildings) to get ice in the desert which greatly impressed King Richard.